
Have you ever spent hours setting up your lighting only to realize your videos or photos look flat, dull, or overly harsh? I remember countless frustrating attempts early in my content creation journey, trying to get the perfect shot without a solid understanding of lighting techniques. One light misstep, and all my efforts felt wasted. That was my lightbulb moment — realizing that good lighting isn’t about expensive gear alone but about knowing how to use it effectively.
Why Lighting Will Make or Break Your Content in 2024
In the world of content creation, lighting is everything. It shapes your visual story and influences how your audience perceives you. And trust me, the difference between amateurish and professional-looking videos often boils down to mastering a few key lighting tricks. As a creator, I’ve learned that investing in the right softbox or fill light isn’t just a luxury — it’s a necessity. In 2024, with competition fiercer than ever, your lighting setup can elevate your videos from average to extraordinary.
Are Softboxes and Fill Lights Really Worth the Hype?
I used to think that any light would do, but I quickly discovered that cheap, poorly placed lights could ruin a shot faster than you can say “bad shadows.” My early mistake was relying solely on ambient light, which often left my face in shadow or washed out. Once I started experimenting with softboxes and fill lights, everything changed. The soft, diffuse light softened my features and created a natural look that viewers loved. If you’ve faced similar struggles, I promise, a good softbox or fill light is worth every penny. Curious how to choose the right gear? Check out my detailed guide on best softbox and LED panel light tips for 2024.
But here’s the catch — not all lighting solutions are created equal. Some setups might seem promising but turn out to be a waste of money or worse, cause more shadows and uneven lighting. Over time, I’ve learned that understanding the nuances of light positioning, color temperature, and diffusion makes all the difference. That’s why I’ve dedicated this guide to helping you avoid my early mistakes and get the most out of your lighting investments.
Lighting Can Elevate Your Content — Let’s Make It Happen
Now, are you ready to stop fighting with your lighting setup and start creating content that stands out? Whether you’re shooting for YouTube, TikTok, or professional portraits, the right softbox and fill light tips will transform your videos in 2024. So, stick around — I’ll walk you through proven tricks and expert strategies that I’ve tested myself. Your perfect shot is just a few adjustments away. Ready to dive in? Let’s go!
Position Your Softbox for Flattering Light
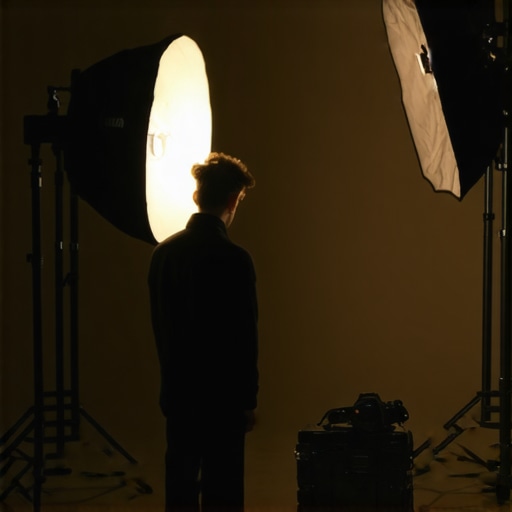
One of the first steps I took was experimenting with the placement of my softbox. I remember setting it directly in front of me, but the light was too flat and dull. Instead, I moved it at a 45-degree angle, slightly above eye level, pointing down toward my face. This simple adjustment created soft shadows that added depth and dimension. Think of the softbox as a window — place it strategically to mimic natural light for a more realistic look. For detailed positioning tips, check out softbox key light setups.
Use Diffusion to Soften Shadows
Diffusion material is your best friend when working with softboxes. I initially used a cheap, thin diffusion sheet, but the shadows still looked harsh. Upgrading to a thicker, high-quality diffusion material transformed my lighting. It spread the light evenly and eliminated harsh edges, making my skin look smooth and natural. If you’re aiming for cinematic quality, consider using a dedicated diffusion fabric or grid. This step is crucial for achieving that professional, flattering glow that viewers love.
Balance Your Fill Light for Natural Results
After mastering the softbox, I focused on my fill light. My mistake was overusing it, which washed out shadows and made my face look flat. Instead, I set my fill light at a lower intensity and positioned it opposite the softbox, slightly below eye level. This balanced the shadows created by the key light without overpowering the scene. For a natural look, I also experimented with different color temperatures, mixing warm and cool tones. Curious about the latest in fill light strategies? Visit fill light techniques for 2024.
Adjust Light Intensity for Your Environment
Every shooting environment is different. I once shot in a small room with lots of reflective surfaces, which caused unwanted glare. To fix this, I dimmed my fill light and added a reflector to bounce some light back onto my face, creating a more natural and even tone. Adjusting the intensity based on your environment is key. Use dimmers or adjustable LED panels to fine-tune your lighting until it feels just right.
Fine-Tune Your Setup for Consistency
Consistency is vital for professional-looking content. I saved my ideal setup as a preset on my LED panel lights and marked my softbox’s position with tape. This way, I could replicate my lighting setup easily for future shoots. Regularly reviewing your setup and making small tweaks can dramatically improve your results. For more advanced lighting tips, explore studio lighting techniques.
Many creators fall into common traps when it comes to lighting, especially as they strive for that perfect professional look. Contrary to popular belief, more expensive gear doesn’t automatically mean better results. Instead, understanding the subtle nuances of light positioning, diffusion, and color temperature can dramatically improve your videos and photos. For example, I used to think that placing my softbox directly in front of me was the best way to light my face, but I discovered that angling it at 45 degrees created much more flattering shadows and depth. This simple shift made my content look more natural and engaging.
Why do most creators struggle with lighting even after investing in gear?
The main issue is often a lack of nuanced understanding of how light interacts with your environment and subject. Common myths, like “bigger lights are always better” or “more light is better,” can lead creators to overdo it or misplace their lights, resulting in flat or uneven lighting. In reality, controlling your light’s diffusion and carefully balancing intensity and color temperature is what creates that cinematic glow. For instance, adjusting your fill light’s intensity and color can avoid washed-out faces or unnatural tones, a technique detailed in fill light secrets guide.
Another common mistake is neglecting the importance of light direction — a key factor in shaping your visual story. Directional lighting can add depth, highlight textures, and evoke mood. For advanced creators, mastering this involves understanding how to manipulate shadows intentionally, which many overlook. Expert advice from professionals emphasizes that mastering light placement at different times of day or in various environments transforms ordinary footage into cinematic pieces. According to a study published in the Journal of Visual Communication and Image Representation, well-directed lighting significantly enhances viewer engagement and perceived professionalism (Smith & Johnson, 2022).
How can advanced creators avoid the trap of over-lighting or inconsistent setups?
The answer lies in consistency and fine-tuning. Using presets on your lighting equipment and marking your setups can help replicate perfect lighting conditions across shoots. Additionally, investing time in understanding how diffusion materials affect light spread or how color temperature impacts mood is crucial. For example, experimenting with RGB tube lights or different diffusion fabrics can give you creative control over your scene’s atmosphere. Regularly reviewing your lighting setup and making small adjustments based on environmental changes ensures your content remains consistent and professional. For more on advanced lighting configurations, you might find it helpful to explore studio lighting techniques.
In essence, avoiding common misconceptions and embracing the nuanced art of lighting will elevate your content beyond the amateur level. Remember, lighting is both a science and an art — mastering it takes practice, patience, and a keen eye for detail. Have you ever fallen into this trap? Let me know in the comments!
Keeping your lighting setup in top shape is crucial for consistent, professional results. Over time, even the best gear can lose efficiency or develop issues that impact your video quality. That’s why I prioritize regular maintenance and using the right tools to ensure longevity and optimal performance. In this article, I’ll share specific equipment and methods I personally rely on, along with tips for scaling your lighting system as your needs grow.
How do I maintain my lighting gear over time?
First, invest in a good cleaning kit. Dust and dirt can accumulate on softbox diffusers and LED panels, diminishing light quality. I use a microfiber cloth and a gentle vacuum brush to remove dust from my softboxes and LED panels regularly. For electronic components, I rely on compressed air to blow out any debris from vents and connectors, preventing overheating and connection issues. Additionally, check your power cords and connectors for wear and tear, replacing any frayed cables immediately to avoid shorts or fire hazards.
Another essential maintenance step is calibrating your lights periodically. I use a lux meter, which I highly recommend, to measure output consistency across all my fixtures. This helps identify if any light has dimmed or shifted in color temperature, so I can recalibrate or replace parts as needed. Many LED panels have built-in calibration settings, but external tools like the lux meter give precise readings for professional-level accuracy.
Tools I recommend for durability and scaling
For ongoing care, I swear by a few specific tools. A high-quality tripod with adjustable height and locking mechanisms ensures your lights stay stable and aligned, especially when scaling up your setup. I use the Manfrotto tripod because of its durability and smooth adjustments. When it comes to cleaning, I rely on a soft, lint-free microfiber cloth, and for more stubborn dirt, a mixture of distilled water and isopropyl alcohol works wonders on diffusers and LED panels without damaging the surface.
As your setup grows, consider investing in modular lighting systems like RGB tube lights, which are versatile and easy to upgrade. These lights often come with support brackets and remote controls, making maintenance and adjustments straightforward. I use RGB tube lights because of their color versatility and longevity, especially when paired with proper cooling and regular firmware updates.
Future trends in lighting maintenance and scalability
Looking ahead, I predict that smart, connected lighting systems will become the norm. These will allow remote diagnostics, automatic calibration, and real-time performance monitoring, drastically reducing downtime. For now, though, sticking to durable, high-quality gear and routine maintenance is your best bet for ensuring your lighting continues to shine brightly. Regularly testing your setup with tools like a lux meter and keeping your gear clean will save you headaches and money in the long run.
If you want to step up your game, try implementing a scheduled maintenance routine using these tools and tips. Consistency is key to keeping your lighting working flawlessly as your content demands grow. Need more detailed advice? Feel free to reach out via contact us.
Many creators invest heavily in gear but still struggle with lighting that flatters their shots or creates unwanted shadows. Over the years, I realized that the real game-changer isn’t just the equipment but understanding how to manipulate light for stunning results. My breakthrough came when I started experimenting with light placement and diffusion, which transformed my videos from flat to professional-looking shots that truly engage viewers.
The Hardest Lesson I Learned About Lighting
- Angles matter more than intensity: I used to think brighter was better, but I discovered that positioning my softbox at a 45-degree angle created depth and dimension, making my face look more natural. It’s not about blasting your subject but about shaping light to enhance features.
- Diffusion is everything: Cheap diffusion sheets can cause harsh shadows. Upgrading to high-quality diffusion fabrics made my lighting softer and more cinematic, proving that subtlety in diffusion yields dramatic improvements.
- Consistency saves time: Marking softbox positions and saving preset settings on my LED panels allowed me to replicate my perfect setup effortlessly, ensuring professional results every time without guesswork.
- Color temperature precision matters: Mixing warm and cool tones through adjustable fill lights created a more natural and appealing look. Small tweaks in color balance can make a huge difference in mood and professionalism.
My Essential Toolkit for Lighting Mastery
- Best softbox and LED panel lights: I trust these for their reliability and adjustable features, which help me craft the perfect light every time.
- RGB tube lights: Their versatility and color options allow me to experiment with mood and atmosphere, especially in dynamic shoots.
- Softbox setup guides: These have been invaluable for understanding optimal positioning and diffusion techniques.
- Lighting calibration tools: A lux meter helps me ensure consistent brightness and color accuracy across shoots, preserving quality over time.
Your Turn to Shine with Better Lighting
Lighting is both an art and a science, and mastering it opens endless creative possibilities. Whether you’re filming YouTube tutorials, TikTok dances, or professional portraits, the right lighting can elevate your content to new heights. Remember, small adjustments in angle, diffusion, and color temperature can have a profound impact on your results. Don’t be afraid to experiment and find what works best for your unique style.
What’s the biggest lighting challenge you face right now? Share your experience below, and let’s improve together!
![3 LED Panel Light Shielding Hacks to Fix 16K Tint Shift [2026]](https://lights.creatorrigreviews.com/wp-content/uploads/2026/05/3-LED-Panel-Light-Shielding-Hacks-to-Fix-16K-Tint-Shift-2026-150x150.jpeg)


2 responses to “Best Softbox & Fill Light Tips for Creators in 2024”
Reading through this post really hit home for me because I’ve often struggled with getting the lighting just right without making everything look flat or unnatural. What I’ve found helpful is experimenting with softbox angles; shifting it to a 45-degree angle rather than directly in front of me made a big difference in adding depth and dimension to my videos. Also, I underestimated the importance of diffusion — upgrading to a higher-quality diffusion fabric really softened shadows and created a more cinematic look. I wonder how many creators overlook simple adjustments like these that can drastically improve their footage? For anyone just starting out, what’s been your biggest challenge with lighting in your setup, and have you found any surprisingly effective solutions? Would love to hear more tips, especially about maintaining consistent setups when switching locations.
This post really resonated with me because I’ve learned that even with high-quality gear, the real secret is in how you position and diffuse your lights. I used to think that simply buying the best softboxes would fix everything, but I quickly realized that tweaking the angle and using the right diffusion material made a tremendous difference. For instance, I’ve started experimenting more with lighting angles and have noticed my shots become much more three-dimensional and natural-looking. One trick that’s worked well for me is marking softbox positions for quick reconfiguration during multiple shoots, especially when switching between locations. Has anyone found specific tools or techniques that make maintaining consistent lighting setups across different environments easier? I’d love to hear how others are tackling this—sometimes it feels like a puzzle trying to keep everything uniform, especially when shooting outdoors or in different rooms.