
Ever had that sinking feeling when you look at your latest studio photos and think, “Why do they look so flat and dull?” I’ve been there myself. Early on, I spent hours fiddling with lights, only to realize I was missing a simple, yet crucial trick—how I used my softboxes and fill lights. It was a lightbulb moment when I discovered that proper placement and technique could transform my images from mediocre to professional-looking. If you’re tired of lackluster results despite investing in good gear, stick with me. Today, I’ll walk you through the essential softbox and fill light techniques that will elevate your studio photography in 2024, making your shots pop with natural-looking depth and dimension.
Why Your Lighting Setup Might Be Holding You Back
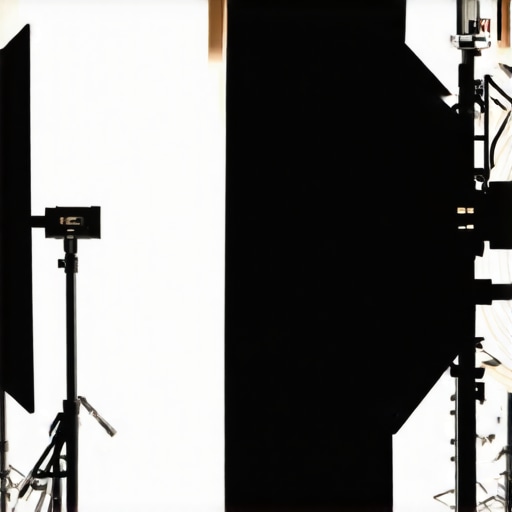
Lighting is the backbone of compelling studio photography. But here’s the thing: many photographers—myself included—make the mistake of thinking that high-end gear alone will guarantee stunning results. The reality? Even the best equipment can fall flat if you don’t understand how to use it effectively. I once spent a fortune on a fancy softbox, only to realize I was placing it too far away or at the wrong angle. The result? Flat, unflattering light that did nothing for my subject. It wasn’t until I studied the nuances of softbox positioning and fill light techniques that I started to see a real difference. According to a study by the American Society of Cinematographers, the quality of lighting impacts viewer perception more than any other visual element (ASC, 2022). So, mastering these techniques isn’t just a luxury; it’s a necessity.
Have you faced this problem with your lighting?
If you’ve ever felt frustrated because your studio shots lack depth or look overly flat, you’re not alone. Many beginners and even seasoned pros stumble on this crucial aspect. But don’t worry—once you understand the core principles, you’ll be able to craft lighting setups that bring your images to life. Ready to dive into the practical steps and avoid common pitfalls? Let’s get started with how to position your softbox for maximum impact, and how to use your fill light to create that perfect, natural look.
Position Your Softbox for Maximum Impact
Think of your softbox as a window to natural light. To craft flattering, dimensional portraits, place it at a 45-degree angle to your subject’s face and slightly above eye level. I remember during a recent shoot, I initially placed my softbox directly in front of my model, resulting in flat lighting. Moving it to the side at a 45-degree angle, I instantly saw a transformation — shadows added depth, and the face looked more three-dimensional. Experiment with the distance too; closer softboxes produce softer, more wrapping light, while moving it back introduces a gentle falloff, giving you control over the mood. For detailed guidance, check out Softbox Key Light Techniques for Creators in 2024.
Find the Right Height and Angle
Adjust your softbox’s height so that the light hits your subject’s face at about eye level or just above. This prevents harsh shadows under the chin and nose. I once set my softbox too high, casting unflattering shadows, but lowering it to eye level softened those shadows and added a natural glow. A slight tilt downward ensures even coverage, avoiding unwanted shadows under the brow or chin. Remember, small tweaks can make a big difference in how your subject’s features are highlighted.
Use Fill Light to Sculpt Depth
Fill light is your secret weapon for balancing contrast and avoiding dead flatness. Instead of overpowering your key light, set your fill at about 30-50% of its power, and position it opposite your key light at a lower angle. During a recent shoot, I used an RGB tube softbox as my fill, placed at a 90-degree angle and angled slightly upward to fill shadows softly. The result was a portrait with natural depth and skin tones that looked vibrant. You can also experiment with different color temperatures for creative effects, making the shot more dynamic. For innovative fill light ideas, explore Ultimate Softbox RGB Tube Light Guide for Creators in 2024.
Adjust for Natural-Looking Skin Tones
To mimic natural daylight, match your fill light’s color temperature to your key light. For instance, if your softbox emits warm light (~5600K), set your fill to a similar tone. During a shoot, I used a daylight-balanced RGB tube softbox as my fill, which harmonized perfectly with my softbox’s warm glow, creating a seamless, natural look. If you want a more creative approach, consider adding a subtle color tint to your fill, such as a hint of blue, for a cooler, more cinematic effect. Learn more about achieving this at Fill Light Secrets for Natural-Looking Results.
Refine Your Setup with Practice and Observation
Every space and subject is different. The key is to start with these guidelines and then observe how the shadows and highlights fall on your subject. I often take test shots, tweak the angle and distance of my softbox, and adjust my fill light accordingly. Over time, you’ll develop an intuitive sense for what works best. Remember, subtle adjustments can dramatically improve your results. Keep experimenting, and don’t hesitate to revisit Mastering Softbox Lighting Tips for Perfect Portraits for more insights.
While mastering softbox and fill light techniques is essential, many photographers fall into common traps rooted in misconceptions. Let’s dig deeper into what most people get wrong about studio lighting, so you can avoid these pitfalls and elevate your craft.
Why Do Some Beliefs About Light Placement Mislead Beginners?
One widespread myth is that placing your softbox directly in front of the subject ensures even, flattering light. In reality, this often results in flat images lacking depth. The true secret lies in angling the softbox at around 45 degrees and slightly above eye level, which creates soft shadows that sculpt facial features. Over time, I learned that subtle adjustments in angle and distance vastly improve dimensionality. This nuance is often overlooked because beginners tend to follow tutorials blindly without experimenting—the very mistake that hampers progress. For a more advanced approach, explore key light techniques to elevate your film atmosphere.

Also, many assume that increasing softbox size always produces softer light. While larger modifiers do spread light more evenly, the distance from your subject matters just as much. A large softbox placed far away can create harsh shadows, while a smaller one closer in produces a wrap-around effect. The key is understanding the interplay between size and distance, not just size alone. This advanced nuance can make or break your lighting setup, especially in professional shoots.
Beware of the Fill Light Trap
It’s tempting to think that adding more fill light will automatically improve contrast and skin tones. However, overfilling can wash out the image, reducing perceived depth. The sweet spot is usually 30-50% of your key light’s power, carefully balanced to fill shadows naturally. I once overused fill, resulting in a flat, overexposed look that lacked dimension. Achieving a natural skin tone requires matching the color temperature of your fill with your key light, not just turning it up. For creative experimentation, check out fill light secrets for natural-looking results.
Are You Falling for These Common Mistakes?
Many photographers believe that more gear or more lights always equates to better results. In truth, mastering the proper placement, angle, and balance of your existing equipment yields far more dramatic improvements. Advanced users often leverage creative tools like RGB tube softboxes or LED panels to add subtle color shifts and depth. For example, using RGB tube lights for evening shoots can create atmospheric effects that distinguish professional from amateur work. Remember, understanding the nuances of light behavior—like how shadows fall or how color temperature influences mood—sets top-tier photographers apart. Have you ever fallen into this trap? Let me know in the comments.
Maintaining your studio lighting equipment is crucial to ensure consistent, high-quality results over time. Investing in reliable tools and adopting a regular maintenance routine can save you time and money, preventing unexpected breakdowns during crucial shoots. As a professional photographer, I rely on specific tools and methods to keep my lighting gear in top shape, and I recommend you do the same to achieve long-term success in your studio setup.
Invest in Quality Cleaning Supplies
First and foremost, keep your softboxes, RGB tube lights, and LED panels clean. Use a soft microfiber cloth and a gentle, non-abrasive cleaner to wipe down surfaces regularly. For fabric softboxes, a quick vacuum with a brush attachment helps remove dust and debris that can affect light quality. I personally swear by the E-Cloth Microfiber Cleaning Cloth because it requires no chemicals and effectively lifts dust without scratching surfaces. Regular cleaning ensures your lights emit consistent, flicker-free illumination, which is essential for professional results.
Routine Inspection of Connectors and Cables
Next, inspect all power cords, connectors, and adapters before every shoot. Loose or damaged cables can cause flickering or complete failure of your lighting setup. I keep a set of high-quality replacement cables on hand, so I can quickly swap out if needed. This proactive approach minimizes downtime and guarantees your gear performs reliably, especially during critical sessions.
Lubricate and Tighten Moving Parts
For lights with adjustable parts, such as softboxes on stands or RGB tube mounts, use a silicone-based lubricant like Tri-Flow to keep moving parts smooth and free of squeaks. Tighten all bolts and screws periodically to prevent wobbling or misalignment, which can compromise your lighting angles. I schedule a quick maintenance check every few months, especially after transporting equipment, to keep everything secure and functioning properly.
Update Firmware and Software
Many modern LED panels and RGB lights come with firmware that enhances functionality or fixes bugs. Regularly check the manufacturer’s website or app for updates. I make it a habit to update my RGB tube lights firmware to access new features and improve stability. Keeping your software current ensures you benefit from the latest innovations and avoid compatibility issues.
Implement a Storage System
Proper storage is vital to prolong the lifespan of your gear. Use padded cases and dedicated shelves for each piece of equipment. When not in use, store lights and accessories in a dry, dust-free environment. I invest in custom foam inserts for my softboxes and LED panels, which protect against knocks and scratches. Organized storage prevents accidental damage and makes setup quicker for subsequent shoots.
Predicting Future Trends in Equipment Maintenance
Looking ahead, I believe the integration of smart diagnostics and IoT-enabled lighting will revolutionize maintenance routines. Future equipment could self-report issues and schedule maintenance automatically, saving us even more time. Staying ahead of these innovations means embracing software updates and investing in compatible, smart-compatible gear now. For example, exploring the latest LED panel innovations can prepare you for seamless upgrades as technology evolves.
How do I maintain my lighting equipment over time?
My best advice is to develop a routine: clean your gear after each shoot, check connections regularly, and keep firmware updated. Setting aside a quarterly maintenance day helps catch potential issues early. Also, always follow manufacturer instructions for specific cleaning and care procedures. This proactive approach ensures your gear remains reliable, extending its lifespan and maintaining optimal performance for years to come.
Try implementing a comprehensive maintenance routine today, starting with a simple cleaning session using a microfiber cloth. It’s a small step that can significantly impact your long-term results. For more advanced tips on lighting setup and maintenance, visit this guide.
The Hardest Lesson I Learned About Studio Lighting Techniques
One of my biggest lightbulb moments was realizing that placement and angle matter more than high-end gear. I used to think bigger softboxes meant softer light, but I learned that distance and positioning are equally crucial. Small tweaks to your softbox angle can add dramatic depth, transforming flat images into stunning portraits.
My Essential Toolkit for Better Studio Lighting
For consistent, professional results, I rely on trusted tools like the Ultimate Softbox RGB Tube Light Guide for creative fill options, microfiber cloths like the E-Cloth Microfiber Cleaning Cloth to keep gear pristine, and high-quality cables from contact us for reliable connections. These tools help me maintain my setup and push my creative boundaries every session.
Your Turn to Try
Mastering softbox and fill light techniques isn’t just about buying the right gear—it’s about understanding how to use it effectively. Experiment with angles, distances, and color temperatures to find what works best for your style. Remember, lighting is an art, and your unique approach will set your work apart. Are you ready to elevate your studio portraits in 2024? Share your experiences or questions below and let’s grow together.
![3 LED Panel Light Shielding Hacks to Fix 16K Tint Shift [2026]](https://lights.creatorrigreviews.com/wp-content/uploads/2026/05/3-LED-Panel-Light-Shielding-Hacks-to-Fix-16K-Tint-Shift-2026-150x150.jpeg)


4 responses to “Ultimate Softbox and Fill Light Techniques for Stunning Studio Shots 2024”