
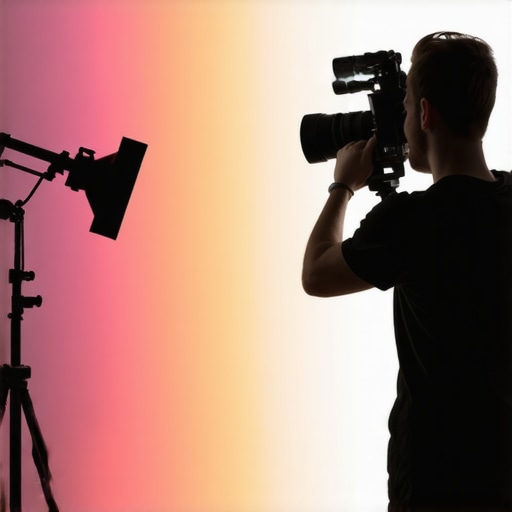
I remember my early days in video production, trying to get that perfect studio backdrop. One day, I was filming a portrait with my softbox and LED panel, but the background looked flat—boring and lifeless. No matter how much I adjusted my lights, those plain walls stayed dull, like a boring background in a Zoom call. It was frustrating because I knew the atmosphere could be vibrant, engaging, and cinematic, but my lighting wasn’t cooperating. Then, it hit me—my RGB tube lights, softboxes, and fill lights weren’t working together to create depth and interest. That realization was a lightbulb moment in my studio journey.
Turning Flat Backgrounds into Visual Masterpieces
In this post, I’ll share my go-to strategies to breathe life into your studio backgrounds using RGB tube light hacks. Whether you’re streaming, shooting videos, or creating content, a flat background can kill the mood and diminish your production quality. The good news? With a few adjustments, you can transform dull backdrops into dynamic environments that viewers will remember. We’ll explore practical tips that incorporate RGB tube lights, softboxes, and creative lighting setups—no expensive equipment or complex setups needed. Ready to elevate your studio space? Let’s dive in!
Is RGB Tube Lighting Really Worth the Hype?
Admittedly, I was skeptical at first. Early on, I made the mistake of thinking that only high-end studio setups could create compelling backgrounds. I bought a few RGB tube lights without understanding how to properly control their color and placement, which resulted in more flatness. Once I learned to tweak the color temperature and position these lights strategically, the difference was night and day. In fact, creative use of RGB tube effects can set your backdrop apart, making your videos more engaging. For more inspiration, check out this guide on RGB tube light effects. The key takeaway? It’s not just about having colorful lights but knowing how to make them work for your scene. Now, I’ll show you exactly how to do that.
Position Your Key Light Strategically
The foundation of any compelling background starts with your key light. Place your main light—be it a softbox or LED panel—at about 45 degrees to your subject, slightly above eye level, aiming downward to create natural shadows and depth. For example, I once struggled with flat backgrounds until I moved my key light closer and angled it slightly differently, which added a subtle shadowing effect. This simple adjustment immediately made my scene more dynamic. Check out this resource for more key light tips. Remember, positioning affects how your background appears, especially when combined with RGB lighting.
Use Fill Lights to Soften Shadows
Fill lights are your secret weapon for controlling contrast and filling in harsh shadows without flattening your scene. Set your fill light—like a smaller LED panel or a softbox—opposite your key light, but keep its intensity lower. Once, I used a cheap LED panel as a fill light, and adjusting its brightness helped me avoid overexposing my subject while adding some glow to the background. For natural-looking results, see this guide on fill light techniques. Subtlety is key: too much fill can wash out your scene, too little leaves harsh shadows.
Introduce RGB Tube Lights for Background Interest
The magic happens when RGB tube lights are integrated into your setup. Position them behind or to the side of your subject to add depth and color. For instance, I once placed two RGB tubes at different angles and played with their colors during my shoot. It created a vibrant, cinematic backdrop that transformed my dull room into an engaging space. To make the most of these lights, control their hue and brightness based on your scene’s mood—warm, cool, or colorful. For detailed techniques, explore RGB tube lighting tips here. Remember, placement and color choices are crucial for creating dimension.
Craft Dynamic Effects with Light Placement
Don’t just set and forget your RGB lights—experiment with movement and positioning to create depth. Angle a tube light downward for a mysterious glow or place one high to cast uplifting colors. During a recent shoot, I angled a red RGB tube to illuminate my background corner while keeping the rest of the scene neutral, resulting in a dramatic effect that captivated viewers. Use color gradients or animated effects to add motion and interest. For creative inspiration, visit this article. The goal is to avoid flatness and add layers of visual storytelling.
Balance Your Lights for Harmony
Achieving a professional look requires balancing your key, fill, and RGB lights. Adjust brightness levels so that no single element overwhelms the scene. For example, after multiple tests, I set my RGB background lights to about 60% brightness relative to my key, creating a harmonious glow that enhances my subject without distraction. Use dimmers or app controls for precise adjustments. Remember to check your scene through a camera to verify how lighting translates visually. For comprehensive balancing strategies, review softbox and RGB combo tips. Proper balance ensures your background complements rather than competes with the main subject.When it comes to video lighting, many creators fall into common traps that undermine their efforts, despite following best practices or copying popular setups. As an expert in studio lighting, I want to share some nuanced insights that often go unnoticed, helping you elevate your craft beyond surface-level techniques.
Firstly, a widespread myth is that brighter lights automatically improve image quality. In reality, overly intense key lights can cause harsh shadows and blow out details, especially if you’re not balancing them with fill lights. The true art lies in mastering light ratios and understanding the role of each light—be it an softbox or RGB tube. Many assume that the latest RGB tube effects will always produce cinematic backgrounds, but without proper placement and color harmony, they can lead to chaos rather than cohesion.
How can advanced users avoid lighting pitfalls that novices miss?
Let’s dig deeper. One critical oversight is neglecting the nuances of light falloff and diffusion. An aggressive key light without a diffuser can create stark, unnatural lighting that detracts from the scene’s authenticity. Conversely, overuse of diffusion materials can flatten the image, stripping away dimensionality. Achieving a balance requires understanding the inverse square law—small moves in light placement have significant effects on shadows and highlights. For instance, positioning your softbox too close or too far will alter the contrast dramatically. Skilled creators leverage this knowledge, combined with color management, to craft a scene that feels both natural and vibrant. Remember, effective lighting isn’t just about adding color or brightness but about controlling spatial relationships and tonal transitions. For a detailed dive into these techniques, check out this resource on key-light strategies.
Another advanced nuance is the misconception that RGB tube lights are only for colorful effects. While they are excellent for adding mood and depth, overuse can cause visual distraction. The key is subtlety—using color gradients and animated effects sparingly to guide the viewer’s eye and enhance storytelling. Movements or color shifts should be deliberate and complementary to the scene’s mood, not random eye candy. Professional setups often incorporate scripting or dynamic controls to synchronize RGB effects with camera movements, creating a seamless cinematic experience. Don’t forget to consider the background’s role—RGB tubes should integrate with your overall color palette to prevent jarring contrasts.
Finally, a mistake I frequently encounter is neglecting to check lighting in the actual camera view before finalizing the setup. What looks good on a monitor might not translate well in the final image. Always review your scene through your camera, adjusting for shadows, color spill, and contrast. Advanced creators often use pre-visualization tools or do quick test shots to ensure the ambient and direct lighting work together harmoniously. This step is crucial in preventing post-production surprises and achieving a professional look.
In summary, the key to professional lighting isn’t just about having high-end equipment but about understanding the intricate dance of light placement, diffusion, color harmony, and scene ambiance. Avoid the pitfalls of oversimplification and take the time to refine each element. Want to master these advanced nuances? Dive into more expert techniques at this guide on softbox and RGB tube integration. Have you ever fallen into this trap? Let me know in the comments and share your experiences with lighting challenges.Maintaining your studio lighting equipment is essential for ensuring consistent performance and professional results. First and foremost, investing in high-quality tools such as specialized cleaning kits for softboxes, LED panels, and RGB tubes can dramatically extend their lifespan. For example, using compressed air and microfiber cloths helps prevent dust buildup on sensitive components, which can affect light output and color accuracy. Additionally, having reliable cables, connectors, and power supplies on hand allows for quick replacements and minimizes downtime during shoots.
Regular calibration of your light sources is equally important. Utilizing a light meter to check and adjust brightness and color temperature ensures your setup remains consistent over time, especially after long sessions or frequent transport. Many creators overlook this step, leading to unexpected color shifts or uneven lighting—challenges that can be mitigated with simple, routine checks. For detailed calibration techniques, see this resource.
How do I maintain my lighting gear over time without breaking the bank?
Staying proactive with maintenance is key. Develop a regular schedule for inspecting your equipment for damage or wear, including checking for loose connections or frayed cables. Keep your lights in a climate-controlled environment to prevent moisture or heat from degrading components. Additionally, read your manufacturer’s manual—most provide specific tips for caring for your models to keep them running optimally. As RGB tube lights and LED panels evolve, staying current with firmware updates can improve functionality and longevity, so subscribe to updates from your manufacturers.
In the future, expect smart maintenance tools to assist creators. Devices equipped with diagnostic sensors could alert you when a component is nearing failure, allowing for preemptive repairs. Implementing these tools today can save you from costly replacements and long-term frustrations.
A practical tip to try right now is establishing a cleaning routine that includes using compressed air to clear dust from heat sinks and vents. This simple step prevents overheating and maintains consistent light output. Keeping your tools in good shape ensures your studio remains reliable, helping you produce top-tier content without interruptions. For a curated selection of essential tools, visit this guide.
The Hardest Lesson I Learned About Key Light and RGB Tube Lights
One of my biggest surprises was realizing that more intense lighting isn’t always better. Early in my journey, I believed that brighter was automatically more cinematic, but I soon discovered that proper light ratios and placement play a far bigger role. Over time, I learned to balance my key light with ambient RGB tube effects, creating depth rather than flatness. That insight transformed my approach, teaching me to focus on harmony rather than intensity.
How to Choose Tools That Truly Elevate Your Sessions
Through trial and error, I found that quality tools matter more than I initially thought. My go-to resources include this guide on RGB tube effect techniques for creative backdrops, and comprehensive softbox and RGB integration tips. These resources support my decisions, helping me select versatile equipment that adapts to different scenes and moods, rather than settling for generic solutions that don’t inspire.
Designing Lighting Sets That Reflect Your Personal Style
Finding my unique style in studio lighting required embracing experimentation. I realized that thoughtful placement of RGB tube lights, combined with softboxes, allows for storytelling through color and shadow. It’s about crafting scenes that resonate emotionally, not just illuminating a subject. I’ve learned to trust my instincts, which has unlocked a more authentic, compelling visual narrative. If you’re ready to experiment, I recommend exploring this curated list of top softbox and RGB tube options.
Don’t Wait to Elevate Your Vision—Start Lighting Smarter Today
Your studio space holds the potential to tell stories more vividly than ever. With strategic use of key lights, fill lights, and RGB tubes, you can craft a dynamic environment that captures attention and communicates your unique style. Remember, mastering lighting isn’t just about the gear—it’s about your creative intentions and willingness to experiment. Dive into these techniques and start transforming your backgrounds into visually captivating landscapes. Have you ever struggled to make your background pop? Share your experiences below—I’d love to hear how you’ve navigated your lighting journey.
![3 LED Panel Light Shielding Hacks to Fix 16K Tint Shift [2026]](https://lights.creatorrigreviews.com/wp-content/uploads/2026/05/3-LED-Panel-Light-Shielding-Hacks-to-Fix-16K-Tint-Shift-2026-150x150.jpeg)


