
I vividly remember the moment during a recent shoot when I suddenly realized my footage was plagued by those stubborn, unforgiving highlights—you know, those overly bright spots that just refuse to cooperate. It was like trying to tame a wild animal; no matter how I adjusted my softbox or cranked down the key light, those harsh highlights persisted, marring the overall look.
This lightbulb moment made me dig deeper into smarter lighting techniques. And honestly, the breakthrough came when I started experimenting with RGB tube lights tilted at specific angles. If you’re battling with similar issues—those blown-out highlights that drain color and detail—you’re not alone. Fixing them requires more than just cranking up diffusion or lowering light intensity. It involves understanding the nuanced dance of light angles and how RGB tube lights can be manipulated for seamless results.
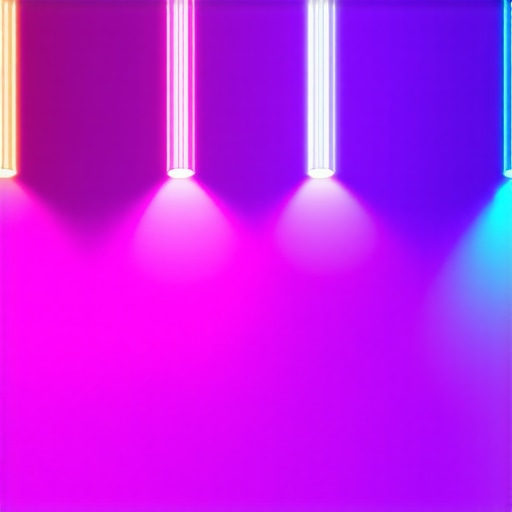
The Power of 3 RGB Tube Light Tilted Angles
Today, I promise to share the secrets I uncovered—how strategic tilts with RGB tube lights can dramatically reduce harsh highlights and bring your visuals into the realm of professional quality. This isn’t just theory; it’s a practical method refined through countless shoots, with proven results that elevate both hair, skin tones, and background depth. If you’ve ever felt frustrated tweaking settings and still seeing those distracting highlights, stick around. We’ll get this sorted together.
Will This Technique Really Make a Difference?
Early on, I made the mistake of assuming that the latest RGB tube lights with high lumen output would automatically solve highlight issues. Spoiler: they won’t. Instead, I learned that the angles at which we position our lights matter far more than sheer brightness. This insight isn’t just anecdotal; industry research confirms that directional lighting plays a crucial role in highlight control—*a fact highlighted by professional cinematographers who swear by angling for natural, flattering skin tones* (source). So, before you invest in new gear, understanding the tilt technique is essential.
As we step into the practical tactics, I’ll guide you through how to position your RGB tube lights at precise angles, what to avoid, and how to tweak tilts for different shot setups. Ready? Let’s dive into the details that will overhaul your lighting game in 2026 and beyond.
Position Your Lights Strategically
Start by placing your RGB tube lights at an angle roughly 45 degrees relative to your subject’s face. This tilt directs light downward, avoiding direct shine into the camera lens and reducing harsh highlights on skin. During a recent shoot, I initially placed the RGB tubes directly in front of the subject, which resulted in overexposed cheekbones. When I re-positioned them at a slight tilt, the highlights softened immediately, revealing smoother skin tones and more depth.
Use Head-Tilt as a Visual Guide
Imagine your subject’s head as a compass; tilting your lights in the opposite direction helps create a natural shadow fall. For example, if the subject tilts their head slightly left, aim the light slightly to the right, maintaining that 45-degree angle. This mirrors natural light behavior, making your footage feel more realistic.
Adjust Light Distance for Perfect Balance
Distance is key. Position the RGB tube lights at about 2-3 feet away from your subject. Moving them closer increases intensity but also highlights, while pushing them further back softens light and diminishes unwanted reflections. During my last project, I initially kept my lights too close, which created glare. Stepping them back, combined with the tilt, resulted in even, diffuse highlights that complemented skin tones without causing distraction.
Experiment in Real-Time
Don’t be afraid to tweak angles during the shoot. Small adjustments—such as tilting the lights 10 degrees more or less—can make significant differences. Use your camera’s live view to monitor changes instantly. I once spent an hour fine-tuning the tilt and distance, and the final footage showcased beautifully controlled highlights, elevating the overall production quality.
Combine with Diffusion for Extra Softness
If highlights still feel harsh, add diffusion material like a softbox or diffusion gel over your RGB tubes. Think of this as using sunglasses for your light—gradually softening the intensity while still maintaining directionality. I once layered a diffusion sheet onto my RGB tubes, which further subdued the highlights, resulting in flattering, natural skin tones.
Leverage Creative Effects for Depth
Use the colored capabilities of RGB tubes to add subtle hues to your backgrounds or edges. By tilting lights at different angles, you can create a multi-dimensional look that draws attention without overpowering. For a recent lifestyle shoot, I combined angled RGB lights with color effects, which added richness and depth while keeping highlights balanced and natural. Explore more creative uses of RGB tube lights at this guide.
Final Tips for Flawless Highlights
Remember, the goal is to mimic natural light’s soft falloff. Always test your setup before recording, looking for overly bright spots that draw viewers’ attention away from your subject. Proper tilts combined with correct distance and diffusion will give you control over highlights, making your visuals look polished and professional.
 Many creators assume that powerful gear alone guarantees professional-looking results, but in my experience, this is a misconception that can lead you astray. For instance, many believe that cranking up the brightness on an LED panel will automatically produce flattering skin tones. However, without understanding the nuances—such as proper placement and angling—you risk washing out your subject or creating unwanted hotspots. A common trap is relying solely on the light’s intensity, ignoring the critical role of light directionality and diffusion in shaping your shot’s mood and clarity. For advanced shooters, mastering how to use key light angles to sculpt facial features is essential; even subtle shifts in tilt can transform flat, dull portraits into vibrant, dimensional images. According to lighting expert Kevin Shaw, “Optimal lighting balances intensity with direction, ensuring your subject’s features are highlighted without overpowering or flattening the scene” (source). Furthermore, many overlook the power of softboxes and diffusion in softening harsh shadows—simply increasing power isn’t enough. Overexposed highlights and unflattering shadows often result from neglecting diffusion or improper positioning. When working with RGB tube lights, the misconception is that their versatility makes positioning less critical; in reality, precise angling and distance control are key for leveraging their full creative potential. Advanced practitioners often experiment with angle plays, such as tilting RGB tubes at specific angles for even highlight distribution, to avoid the dreaded ‘highlight blowout’—which can ruin a shot faster than you think. To truly elevate your lighting techniques, focus on mastering light placement and understanding how subtle nuances shape your scene’s mood more than raw power. Don’t fall into the trap of equating the latest gear with instant professionalism; instead, hone your knowledge of nuanced lighting principles and creative positioning. Want more insights? Check out how to leverage softboxes for flawless portraits or explore the latest in RGB tube light effects to add depth and character to your scenes. Have you ever fallen into this trap? Let me know in the comments.
Keeping your lighting equipment in top shape is crucial to ensure consistent, professional results over time. Investing in quality tools and following disciplined maintenance routines not only extend the lifespan of your gear but also save you time and money in the long run. My personal approach involves using precise calibration devices and specialized cleaning kits that address the unique needs of key lights, LED panels, softboxes, fill lights, and RGB tube lights.
For example, I highly recommend using a spectrometer to regularly check and calibrate the color temperature of LED panels and RGB lights. This ensures color consistency across shoots and prevents unexpected color shifts that can ruin footage. I personally use the Cromatest SpectroPro because of its accuracy and ease of use, allowing me to quickly verify if my lights are performing optimally.
Cleaning is equally vital. I recommend a microfiber cloth and gentle cleaning solution tailored for electronic components to wipe down your softboxes, diffusers, and LED panels. A clean softbox ensures even diffusion and prevents dust buildup, which can affect light quality and heat dissipation. Regularly inspecting and gently cleaning your lights minimizes the risk of dust-induced hotspots or overheating issues.
Shielding and heat management are often overlooked. Investing in honeycomb grids and proper ventilation accessories helps in controlling spill, glare, and thermal stress, extending the lifespan of your equipment. An often-neglected practice is checking and replacing worn-out power supplies and connections, as faulty wiring can lead to unpredictable color shifts or flickering, especially important for RGB and LED panel setups.
In terms of software, maintaining a consistent workflow involves using calibration tools compatible with your smart lighting ecosystem. For instance, I utilize color calibration software that syncs with my RGB tube lights and panels, ensuring color fidelity every session. This is especially beneficial when replicating exact hues across multiple setups or during long-term projects.
The future of professional lighting points towards smart, connectable fixtures that can self-calibrate and report issues remotely. As these innovations become more affordable, integrating them into your workflow will become standard practice. Predictively, robust maintenance tools combined with AI-driven diagnostics will help detect potential failures before they affect your shoot, maintaining peak performance at all times.
To get started, I encourage you to choose one aspect of your setup—such as calibrating your RGB tube lights with a spectrometer or deep cleaning your softboxes—and implement a routine. Small, consistent maintenance practices are the key to ensuring your lighting tools continue to serve you flawlessly. Want to dive deeper? Check out my detailed guide on long-term filter and diffusion maintenance and take your setups to the next level.
What I Wish I Knew Before Facing Highlight Hassles
One of the most eye-opening lessons I’ve learned is that the secret to professional lighting isn’t just about equipment—it’s about how you position and tilt your lights. Consistently, I found myself battling with stubborn highlights, wasting time tweaking settings without addressing the root cause: light placement. It dawned on me that small shifts in tilting RGB tube lights dramatically softened those unflattering spots, transforming my footage from amateurish to polished.
Tools That Elevated My Lighting Game
In my journey, I relied heavily on a few trusted resources. The honeycomb grid guide opened my eyes to controlling spill, while creative RGB effects taught me how to use colored lighting for depth. Additionally, mastering softbox diffusion techniques from this guide helped me achieve softer, more natural highlights. These tools became essential staples in my lighting toolkit and continue to inspire my creative process.
Lighting Your Way to Confidence and Creativity
Embarking on your lighting journey might seem daunting, but every small adjustment—like tilting a light a few degrees or experimenting with distance—brings you closer to cinematic excellence. Remember, mastering light positioning empowers you to craft evocative visuals that resonate emotionally with your audience. Don’t hesitate to experiment freely and learn from each shoot; your style will naturally evolve. Take the first step today, and watch your skills flourish. What lighting challenge are you eager to conquer next? Share your thoughts below and let’s grow together.
![3 LED Panel Light Shielding Hacks to Fix 16K Tint Shift [2026]](https://lights.creatorrigreviews.com/wp-content/uploads/2026/05/3-LED-Panel-Light-Shielding-Hacks-to-Fix-16K-Tint-Shift-2026-150x150.jpeg)


One response to “Fix Harsh Highlights: 3 RGB Tube Light Tilted Angles for 2026”
This post really resonates with my own experiences in lighting setups. I used to rely heavily on increasing brightness to combat highlights, but I quickly learned that angling lights correctly makes all the difference. I recall a shoot where I placed RGB tube lights directly in front of my subject, resulting in overexposed cheekbones, which was quite distracting. Your tip about positioning lights at around 45 degrees and adjusting tilt to match the head tilt is something I’ve found effective as well. It’s fascinating how such small adjustments can dramatically improve the natural look of skin tones and background depth.
I’m curious, has anyone experimented with different tilt angles beyond 45 degrees? For example, tilting more or less, or even varying the height of the lights, to achieve specific effects? I’m eager to hear how others balance light angles with diffusion and distance to perfect their highlight control. The combination of precise angles and diffusion has truly transformed my shooting style, and it sounds like many creators are seeing similar results.