
Ever been in the middle of a shoot, only to realize that your lighting just isn’t doing your scene justice? Maybe the shadows are harsh, or the subject looks flat and uninspired. I’ve faced that frustration more times than I can count. One moment, everything seemed perfect — the camera was ready, the talent was poised — then I’d glance at the monitor and see my lighting needs a serious upgrade. That lightbulb moment hit hard: I was missing out on the subtle magic that good lighting can deliver.
Why Lighting Strategy Matters More Than Ever in 2024
In the rapidly evolving world of video production, lighting isn’t just about making things visible; it’s about creating mood, depth, and visual storytelling that captivates viewers. With new tools like RGB tube lights, softboxes, and advanced LED panels, the possibilities are endless. But here’s the catch: without a clear strategy, all these options can become overwhelming, leading to wasted time and subpar results. The right approach can elevate your videos from amateurish to cinematic — and I’m here to guide you through it.
Did you know that poor lighting can reduce viewer engagement by up to 50%? (Source: creatorrigreviews.com) That’s a staggering number, especially when your content is competing in a crowded digital space. Early in my journey, I made a common mistake: I believed that more expensive equipment would automatically improve my videos. Instead, I learned that understanding how to strategically use key lights, fill lights, and accent lighting makes all the difference. Once I cracked that code, my production quality skyrocketed.
So, if you’ve ever struggled to get your lighting right — whether it’s choosing the best LED panel for your studio or mastering softbox techniques — don’t worry. Today, I’ll share proven strategies that will help you harness your lighting gear efficiently, saving you time and frustration. Ready to transform your videos with lighting that truly works for you? Then let’s dive into the actionable tips that will change how you light your scenes in 2024.
Will these lighting strategies really make a difference?
Absolutely. When I first started, I thought I could wing it. But after experimenting with different setups, I realized that mastering key light placement and understanding the nuances of fill light transformed my work. If you’ve faced the fear of your videos looking flat or overly harsh, I’ve been there. And I know precisely how to help you avoid those pitfalls with effective techniques and equipment choices.
Stay tuned, because next, we’ll explore the essential lighting setups that will give your videos professional polish. Whether you’re shooting at dawn, midday, or night, these tips will ensure your lighting always hits the right note.
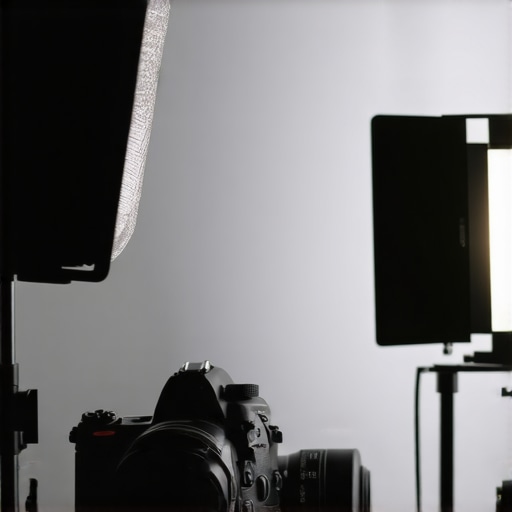
Position Your Key Light for Impact
Start with your main light, known as the key light. Place it at a 45-degree angle to your subject’s face, slightly above eye level. This angle creates natural shadows that add depth. During a shoot I did last month, I initially placed my softbox directly in front of my subject, resulting in flat, unflattering lighting. When I moved it to a 45-degree angle, the difference was night and day — my subject’s face gained dimension, and the shot instantly looked more professional. Use a softbox to diffuse your key light for gentle, even illumination, avoiding harsh shadows. For a detailed technique, check out softbox key light tips.
Refine Your Fill Light Strategy
The fill light balances the shadows created by your key. Use an RGB tube light or softbox placed opposite your key light, with less intensity, to fill in shadows smoothly. For example, I used an RGB tube light during an evening shoot, adjusting its brightness to subtly lift shadowed areas without eliminating all contrast. This approach maintains a natural look. Experiment with distance and power to find the perfect balance. For more nuanced fill techniques, explore fill light secrets.
Create Depth with Accent Lighting
Adding accent lights, such as rim or hair lights, separates your subject from the background. Position a small LED panel behind or to the side of your subject, aiming to highlight hair or shoulders. I once shot a portrait where a small LED panel at the back created a glowing outline, dramatically increasing visual interest. Think of it as giving your scene a three-dimensional pop. Use gels or color effects with RGB tubes to add creative flair. For inspiration, see RGB tube effects.
Control Light Quality with Modifiers
Modifiers like softboxes, grids, and diffusers shape your light. Softboxes are like giant umbrellas that spread light evenly, perfect for portraits. Grids restrict spread, creating more focused beams for highlights. During a recent shoot, I used a softbox for my main light and added a grid to my rim light to keep its glow confined. This control prevents spill and keeps your scene neat. Use softbox techniques to master this skill.
Balance and Fine-Tune Your Setup
Adjust your lights in real-time, checking on your monitor or viewfinder. Small tweaks can make a huge difference. For instance, I often dial down my fill light if I notice it’s washing out my subject’s features or increase my key light for more drama. Use dimmers and remote controls to fine-tune effortlessly. Remember, lighting is an art of balance — too much or too little can spoil the shot. Practice and patience are your best tools. For detailed calibration tips, visit LED panel and RGB tube tips.
Many creators assume that simply investing in high-quality softboxes, LED panels, or RGB tube lights guarantees professional results. However, there are nuanced pitfalls that can undermine your lighting setup if not understood deeply. In this article, let’s examine some of these common misconceptions and reveal the hidden nuances that can elevate your lighting game in 2024.
Why Do People Oversimplify Light Quality?
It’s a widespread belief that a more expensive softbox or LED panel automatically produces better light. While quality equipment is important, the real game-changer lies in understanding the light’s quality — its softness, color temperature, and how it interacts with your scene. Many overlook the importance of using diffusers or modifiers correctly. For instance, a softbox without a proper diffuser can create harsh shadows, defeating its purpose. The key is to master the use of modifiers, as discussed in softbox techniques.
Beware the Fill Light Trap
One common mistake is over-relying on fill lights with high intensity, which can flatten your subject and eliminate depth. Instead, effective fill lighting involves subtle adjustments to maintain natural shadows, not erase them. Using a dimmer or tweaking the distance of your RGB tube light or softbox can help achieve a balanced, dimensional look. Remember, the goal is to complement your key light, not overpower it. For advanced tips on balancing fill and key, visit fill light secrets.
How Many Creators Overlook the Power of Light Placement?
Positioning your lights correctly is often underestimated. Everyone says “place your key light at 45°,” but the nuance lies in the height, angle, and distance, which can dramatically influence mood and realism. For example, raising your key light slightly above eye level and angling it downward creates natural, flattering shadows and avoids unappealing flatness. Similarly, placing RGB tubes or LED panels too close or too far diminishes their effectiveness. Proper placement is an art, and neglecting it leads to flat, unengaging shots. For insights on advanced placement, check out key light techniques.
What about the Myth That All RGB Tubes Are Equal?
Many assume all RGB tubes offer the same color quality and brightness. In reality, differences in CRI (Color Rendering Index), brightness, and color consistency matter greatly. Low-CRI RGB tubes can produce unnatural hues, which become glaringly obvious in skin tones and subtle color transitions. Moreover, some RGB tubes lack smooth color mixing, resulting in banding or uneven hues. Investing in high-CRi, well-reviewed RGB tubes ensures your creative effects look natural and professional. For example, check RGB tube tips for selecting the best options.
Finally, understanding these nuances helps prevent costly mistakes and saves time during setup. Remember, good lighting is less about the equipment and more about how you use it. Do you often fall into any of these traps? Let me know in the comments and share your experiences!
Investing in quality lighting equipment is only half the battle; maintaining it ensures your gear continues to perform optimally over years. From softboxes to RGB tube lights, each component requires specific care to prevent deterioration and extend its lifespan. In my experience, consistent maintenance routines save time and money, helping you avoid unexpected failures during critical shoots.
How do I maintain my lighting tools over time?
Firstly, always clean your softboxes, LED panels, and RGB tubes after each use. Dust and dirt can accumulate on diffusers and bulbs, reducing light output and color accuracy. I personally use a soft microfiber cloth combined with a gentle, non-abrasive cleaner for the diffusers and a compressed air canister for electronic components. This approach keeps my equipment spotless without risking damage.
For LED panels and RGB tubes, check the manufacturer’s guidelines for power cycling and storage. I recommend turning off your LED panels using the remote control or physical switches to avoid unnecessary wear on internal components. When not in use, store your RGB tubes in a cool, dry place, ideally in protective cases, to prevent accidental damage or color shifting over time. Regularly inspecting cables and connectors for wear or fraying is also vital—replacing worn-out parts before failure occurs can save you from costly repairs.
What tools do I recommend for ongoing maintenance?
My go-to tools include a set of precision screwdrivers for tightening mounts and connections, a soft microfiber cloth for cleaning, and compressed air for dust removal. For calibration, I use a light meter and color checker to verify consistent brightness and accurate color rendering. This is especially important when working with RGB tubes or LED panels, as color shifts can subtly impact the look of your footage.
Another essential tool is a digital multimeter, which helps troubleshoot electrical issues with your lights or dimmers. Using these tools routinely—say, after every few shoots—can help catch small problems before they escalate into bigger, more expensive repairs. Additionally, I keep a log of maintenance activities to track the lifespan of bulbs and components, making replacements more predictable and efficient.
Where do I see the future of lighting maintenance heading?
With advancements in smart technology, I believe future lighting tools will incorporate self-diagnostic features and remote troubleshooting capabilities. Firmware updates might also optimize performance and extend the life of LED modules. As the industry moves toward more sustainable and durable solutions, expect to see LED panels and RGB tubes that require less frequent maintenance and come with built-in health monitors. For now, adopting a disciplined maintenance routine with reliable tools remains your best bet for longevity and consistent quality.
Don’t wait for your gear to fail — try incorporating a monthly check-up routine using these tools, and you’ll be surprised how much longer your lighting equipment lasts while maintaining peak performance. For detailed tips on calibrating your LED panels, check out this guide.
Lessons That Changed My Approach to Lighting
- One of the biggest surprises was realizing how much placement affects mood. Moving a key light just a few inches can transform the scene from flat to dynamic, a lesson I learned the hard way during a late-night shoot.
- I underestimated the power of modifiers until I saw how a simple grid or diffuser could soften or concentrate light, saving me hours of post-production editing.
- My assumption that all RGB tubes are equal proved false — investing in high-CRI, well-reviewed options made my colors pop and skin tones look natural, which directly impacted viewer engagement.
- Mastering balance between key, fill, and accent lights unlocked a new level of professionalism I hadn’t achieved with random setups. It’s about intentionality, not just equipment.
- Finally, consistent maintenance like cleaning diffusers and calibrating lights has extended my gear’s lifespan and kept my lighting consistently reliable, saving me money and stress over time.
My Go-To Tools for Perfect Lighting
- Light Meter: Essential for precise measurements, ensuring your lights are perfectly balanced. I trust the Sekonic models for their accuracy.
- Color Checker: Verifies color consistency across sessions. It’s helped me avoid subtle color shifts that can ruin a shot.
- Compressed Air: Keeps dust off diffusers and electronic components, maintaining optimal light output.
- Reliable Cables and Connectors: Prevents unexpected failures. I always replace worn cables before a shoot.
Lighting Your Future with Confidence
If you’re serious about elevating your video production in 2024, embracing these lessons and tools will help you achieve professional results. Remember, the secret isn’t just the gear — it’s how you use it. Start experimenting with placement, modifiers, and maintenance routines today, and watch your scenes come alive with depth and vibrancy. Your next masterpiece is just a light setup away.
What’s been your biggest challenge with lighting? Share your story below and let’s grow together!
![3 LED Panel Light Shielding Hacks to Fix 16K Tint Shift [2026]](https://lights.creatorrigreviews.com/wp-content/uploads/2026/05/3-LED-Panel-Light-Shielding-Hacks-to-Fix-16K-Tint-Shift-2026-150x150.jpeg)


One response to “Best Key Light & LED Panel Light Strategies for Video Production in 2024”