
I vividly recall the moment I realized my streaming background looked flat and uninspired. Despite investing in the latest key lights and softboxes, something felt off. The room was dim, and my face lacked depth, making my videos look amateurish. It was a frustrating realization—no matter how much I tweaked my main lighting, the background and under-desk illumination just wouldn’t cooperate. Then, it hit me: my lighting setup was missing that touch of creativity and dimension. The breakthrough came when I discovered the power of RGB Tube Light Under-Desk Mounts, specifically designed for streamers in 2026. These innovative accessories are changing the game, turning plain backgrounds into vibrant, cinematic scenes. Today, I’ll guide you through how to harness these lights to elevate your stream and photos, ensuring you never feel dull behind the camera again.
Why RGB Tube Light Mounts Are a Game-Changer for Streamers
Set Your Key Light Strategically
Begin with your main illumination, the key light, which sets the tone for your entire scene. Position it at a 45-degree angle from your face, slightly above eye level, to create natural shadows and depth. I once spent hours adjusting my key light, trying to avoid harsh shadows on my chin; moving it just a few inches higher and to the side made a dramatic difference. For detailed guidance on positioning, check out this article.
Diffuse Your Light for Softness
Hard light can make your skin appear shiny and unflattering, while diffusion softens shadows and creates a more pleasing look. Use a softbox or a diffusion panel attached to your LED panel light, much like wrapping a jacket around a hot light bulb. In my last setup, I replaced my bare LED panel with a softbox, dramatically reducing glare and improving skin tones. For optimal softening, consider softbox tips here.
Fill in Shadows with Precise Lighting
Fill lights are essential to prevent deep shadows that flatten your image. Position a fill light opposite your key light at a lower intensity to add dimension without overpowering. Think of it as filling in the missing pieces of a puzzle, balancing the scene. I experimented with a cheap LED panel, adjusting its distance until I achieved a natural, balanced look—sometimes, moving it just a few inches makes the difference. To refine your fill lighting, visit this guide.
Add Background and Under-Desk RGB Tube Lights
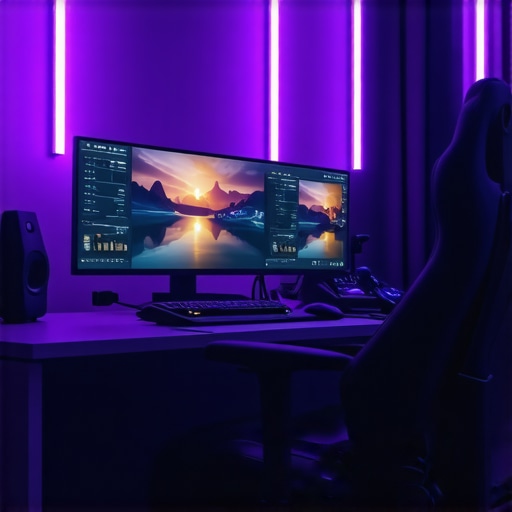
Transform your scene by incorporating RGB tube lights behind or under your desk. Mount them at strategic angles—like 45 degrees behind your setup—to create depth and vibrant effects. I once used these lights to simulate a sunset, casting warm hues across my background, which captivated viewers. Experiment with different color recipes to match your theme; detailed strategies are available at this resource. Remember, the goal is to highlight your environment, not overpower your face.
Control Light Intensity and Color T emperature
Fine-tune your lights’ brightness and Kelvin settings to match ambient light, maintaining a consistent aesthetic. Use your RGB tube lights to add subtle warmth or cool tones, depending on the mood. During a recent night shoot, I dimmed my key light and increased the RGB tube’s blue hue, creating a cinematic late-night vibe. For calibration tricks and balancing skin tones, see this article. Small adjustments here prevent your scene from looking flat or unnatural.
Implement Creative Light Placements for Depth and Mood
Use unconventional placements, such as side or overhead angles, to craft a dynamic scene. Position an RGB tube light slightly behind and to the side of yourself to create a subtle rim or hair light, which enhances separation from the background. I once set up a can of colored gels over my RGB tube to mimic dawn, producing a dramatic yet balanced look. This approach brings life and depth, making your scene cinematic rather than flat. For specific placement strategies, explore this post.
Adjust and Test for Consistency
Finally, continuously review and adjust your lighting setup. Use your camera’s viewfinder or a phone app to see real-time effects. Change angles, intensities, and colors, then take test shots to compare results. During a trial, I discovered a reflective surface across my room caused unwanted glare, which I fixed by repositioning a fill light. Regularly testing ensures your scene remains consistent and professional. Remember, lighting is iterative—small tweaks lead to big improvements. For comprehensive calibration techniques, check this guide.
When it comes to lighting for videos and photos, many creators operate under misconceptions that can sabotage their results. Let’s dig deeper into some nuanced pitfalls that even seasoned enthusiasts often overlook, starting with the overemphasis on the softbox. Sure, a softbox diffuses light beautifully, but relying solely on it can lead to flat, lifeless images, especially if you neglect adjustable angles and diffusion types. Incorporating multiple diffusion layers or para-cine reds can add subtle softness without losing contrast, a trick I mastered after reading about professional studio lighting techniques. Another sneaky trap is the misconception that more LED panels mean better lighting. In reality, cramming your scene with multiple high-powered LEDs without proper control can cause color inconsistency and unwanted hotspots, as studies show that uneven LED distribution results in color rendering issues. Focus instead on balanced key, fill, and background lights, using comprehensive tutorials like this article to calibrate your setup precisely. Now, consider the common myth that RGB tube lights are just for aesthetic effects; in truth, their strategic placement can dramatically improve scene depth. But be cautious—this advanced technique demands careful color matching and placement to avoid unnatural hues or flickering, which can be checked with color calibration tools referenced in this guide. What about your key light positioning? Many focus on height and angle but forget that subtle shifts—like moving it slightly closer or adjusting the tilt—can diminish unflattering shadows and enhance facial contours. Advanced creators also ask: How can I optimize lighting for dynamic scenes with moving subjects? The answer lies in continuous adjustments and real-time testing, ensuring seamless exposure and color consistency. Do you fall into these traps? Let me know in the comments! Remember, mastering lighting isn’t just about equipment but understanding these nuanced factors that make a scene captivating.Maintaining your lighting equipment is crucial for achieving professional and consistent images over time. Start by regularly cleaning your softboxes and LED panels with a microfiber cloth to remove dust and smudges that can soften the light or cause unwanted glare. Using compressed air can help dislodge dust from vents or internal components, ensuring your LED panels stay cool and function efficiently. Check the integrity of your RGB tube lights’ diffusion filters; replacing them when they become cloudy or damaged will preserve color accuracy and prevent flickering. For your key and fill lights, periodic calibration using a light meter ensures consistent brightness and color temperature, especially after bulb replacements or adjustments. Tighten all mounting hardware to avoid shifts in position that could alter your scene’s composition. Software tools can also lend a hand — for instance, using specialized lighting control apps allows you to create presets for your RGB tubes, enabling quick scene changes without manual fiddling.
Predicting the future, I believe the integration of IoT-enabled lighting controls and intelligent calibration systems will become standard, facilitating even more reliable setups with minimal effort. That means, investing now in tools and practices that support these emerging technologies will keep you ahead of the curve.
How do I maintain my lighting tools to ensure long-term performance?
Regular maintenance involves cleaning, calibration, hardware checks, and updates. Keep diffusion elements clean or replace them to maintain color fidelity. Use calibration tools to match your light output over time, especially if your environment changes or components are replaced. Tightening mounts and connectors prevents unintentional shifts, while employing lighting control software can automate scene consistency. For specific equipment tuning, consulting detailed guides such as this article helps refine your setup for optimal results. Remember, disciplined upkeep avoids costly replacements and ensures your lighting continues to serve your creative vision seamlessly.
Sneaky Lessons from My Lighting Journey
One of the most surprising lessons I learned was that even the best equipment can’t fix fundamental placement mistakes. I once relied heavily on my softbox to create perfect soft light, only to realize that its position was casting unflattering shadows that softened my features too much. It taught me that understanding the dynamics of light angles is more important than the gear itself.
Another insight was that overcomplicating your setup can backfire. I experimented with multiple RGB tubes and LED panels, which sometimes resulted in color inconsistencies and flickering. Simplifying my scene with carefully chosen placements and controlled intensity made a bigger difference than stacking more lights. Less truly can be more when you control the key variables.
The third lesson concerns ambient environment. I didn’t realize how reflective surfaces across my room would bounce unwanted light onto my scene, creating glare or color shifts. Regularly inspecting and adjusting my environment helped maintain a more professional look. Paying attention to these subtle factors elevated my lighting from ‘good enough’ to truly cinema-quality.
My Go-To Gear for Lighting Mastery
- Creator Rig RGB Tube Lights: These offer versatile color control and effects that I trust for dynamic backgrounds and mood setting. Their app integration allows seamless scene changes, making shoots more flexible.
- Softbox Lighting Kits: Nothing beats a well-diffused key light. I prefer high-quality softboxes with adjustable angles—check out detailed tips at this resource for refining your softbox setup.
- LED Panel Lights: I use these for fill and background lighting. Regular calibration using a light meter ensures consistency, especially after bulb replacements or when changing environments. Find calibration hacks in this article.
- Color Calibration Tools: Devices like the ExpoDisc or X-Rite colorimeters help keep my RGB tubes and LED panels color-accurate, preventing unnatural hues that break immersion.
Light Up Your Creative Path Today
Remember, mastering fill light, led panel lights, softboxes, RGB tube lights, and key lighting is a journey of continual learning and experimentation. With attention to detail and a willingness to revisit your setup, you can create scenes that truly captivate. Your scene is a canvas—use light creatively to tell your story more powerfully than ever before. Don’t wait to experiment; every tweak brings you closer to pro-level videos and photos.
What has been your biggest challenge with lighting, and how did you overcome it? Share your experiences below—I’d love to hear how you’re elevating your scene!
,
![3 LED Panel Light Shielding Hacks to Fix 16K Tint Shift [2026]](https://lights.creatorrigreviews.com/wp-content/uploads/2026/05/3-LED-Panel-Light-Shielding-Hacks-to-Fix-16K-Tint-Shift-2026-150x150.jpeg)


One response to “3 RGB Tube Light Under-Desk Mounts for 2026 Streamers”
This post really resonated with me, especially the part about using RGB tube lights to add depth and create cinematic effects. I started experimenting with under-desk mounts for my RGB lights, and it totally transformed the scene behind me. One challenge I faced was finding the right color balance without making the background overpowering. I found that controlling the saturation and intensity is key—sometimes a subtle hue contrast works better than bright, vivid colors. It got me thinking, how do others decide on the optimal color schemes for their background lighting to match different themes or moods? I’m curious if anyone has tried integrating smart controls to automate these color changes during a stream for a more dynamic presentation. Love hearing diverse strategies from fellow creators to push creative boundaries.