
Ever spent hours tweaking your softbox or fiddling with LED panels only to find your backgrounds still look flat, lifeless, or overly washed out? I sure have. One frustrating shoot left me staring blankly at a boring, uninspiring backdrop, realizing I’d overlooked a game-changing detail—hidden RGB tube light placements that could transform my backgrounds instantly. That lightbulb moment changed everything. Today, I promise to share those lesser-known placement secrets that bring cinematic depth and vibrance to your backgrounds in 2026.
Why hidden RGB tube light positions can make or break your cinematic vibe
In my early days experimenting with lighting, I made a common mistake: I focused too much on my key and fill lights, neglecting the background. It’s easy to fall into the trap of thinking lighting is only for illuminating the subject, but the background is just as critical in creating mood and atmosphere. I discovered that strategic placement of RGB tube lights behind or around the scene adds layers of color, depth, and visual interest—making your footage pop and look professionally cinematic. Think of it like seasoning a dish; a little extra spice in the right spot can elevate the entire flavor.
Knowing where to place these hidden RGB lights isn’t just for aesthetics—it also helps hide unwanted shadows, cover imperfections, and even influence perceived depth. According to a study from Lighting Research Center, background lighting significantly impacts the viewer’s perception of depth and scene realism. That’s right—your background isn’t just a backdrop; it’s a storytelling element waiting to be optimized.
If you’ve ever wrestled with flat backgrounds or struggled to achieve that vibrant, cinematic look, this guide will demystify how to leverage seven specific tube light placements for maximum impact. We’ll cover everything from subtle accent points to dramatic color washes, all designed to elevate your setups with surprisingly simple tricks.
Speaking from personal experience, I once painted myself into a corner trying to fix my lighting in post—wasting hours and ending up with inconsistent color balances. The mistake I made early on? Not considering the background’s potential as a dynamic element, which you can read more about in this [ultimate guide to RGB tube light effects](https://lights.creatorrigreviews.com/rgb-tube-light-effects-creative-uses-for-evening-shoots). That lesson taught me that thoughtful placement is as crucial as your main lights.
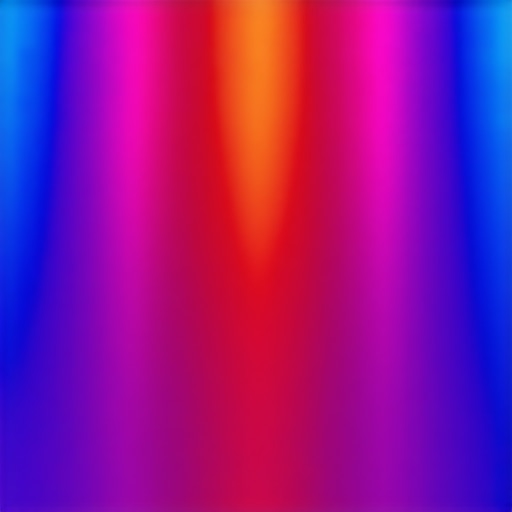
Now, imagine being able to control the ambiance—whether you want a cool, mysterious scene or a warm, inviting glow—with just a few well-placed RGB tubes. Ready to learn how? Let’s dive into the seven hidden placements that can turn your background from dull to dazzling, perfect for any cinematic project in 2026.
Position Behind the Scene for Instant Depth
Start by placing RGB tube lights directly behind your main subject, aiming at the background. Use adjustable mounts to tilt the tubes slightly downward, casting a gentle glow that separates your subject from the backdrop. I once set up three RGB tubes behind a model in my small studio; initially, the light was harsh, creating unwanted shadows. I softened this by adding diffusion sleeves (learn more about diffusion sleeves) and adjusting angles, which created a cinematic separation and added vibrant depth without overpowering the scene.
Skyline Lighting with Strategic Side Placement
Arrange RGB tubes at the sides of your background, elevating and angling them to wash color across the backdrop. This side lighting emphasizes textures and creates a layered effect. For instance, I once placed two tubes on either side of a velvet curtain, setting their colors to complement the wardrobe. The result was a multi-tonal background that shifted mood from moody to lively with simple color tweaks. To maintain consistency, consider calibration and synchronization with your main lights, referencing techniques from softbox lighting tips.
Corner Accents for Dynamic Framing
Capitalize on placement in corners for dynamic accents. Position RGB tubes in opposite corners, angled inward to create a framing effect that guides the viewer’s eye. This method works well when you want the background to feel immersive and alive. I once used this setup during a short film scene; the background’s color gradation intensified the emotional punch even though the setup was tight and cluttered. Experiment with different hues and intensities; sometimes a warm orange in one corner combined with cool blue in the other produces compelling contrast, enhancing the scene’s depth. For more advanced color layering, dive into RGB tube effects.
Overhead Glow for Soft Overlays
Mount RGB tubes overhead, directed downward, to cast a soft, ambient glow over the scene. This placement is beneficial for mimicking natural skylights or creating a dreamy atmosphere. During a recent shoot, I hung RGB tubes from an elevated grid, smoothed their light with diffusion fabric, and achieved a subtle, even wash that made the background feel expansive and cinematic. Adjust the brightness and color to match the scene’s mood; warmer tones for intimacy, cooler for mystery. For studio setups, consider using LED panel innovations to complement overhead RGB tubes.
Floor-Level Highlights for a Foundation
Place RGB tubes near the floor—either hidden behind props or embedded in the set—to create ground-level highlights. This method adds layers by illuminating lower background elements, contributing to depth and texture. I once embedded a tube behind a faux foliage arrangement, producing a glow that peeked over the set’s edge, giving a grounded, cinematic look. Be cautious with angles and diffusion to avoid hot spots and unwanted reflections. Incorporating this technique can dramatically elevate your background’s visual richness, especially when combined with other placement strategies. Explore more creative uses at RGB tube hacks.
Wrap Up Your Setup with a Vortex of Color
Finally, combine multiple placements—overhead, side, corner, behind—in a layered approach. Use programmable RGB tubes to sync colors and intensities dynamically, creating a vibrant, cinematic backdrop. During a recent project, I practiced this by setting up a combination of side and overhead tubes, gradually shifting colors to match scene transitions without touching the camera. This approach requires careful planning and testing, but it makes your backgrounds lively, immersive, and professionally cinematic. Remember, the key is precision and patience—small adjustments can make a significant impact on the final look, as discussed in tactical placements.
Many creators assume that simply owning an RGB tube light, softbox, or LED panel guarantees professional results, but the truth is far more nuanced. A common misconception is believing that higher brightness or more expensive gear automatically produces better lighting. In reality, understanding the subtleties—like color temperature consistency, diffusion quality, and placement strategy—can make or break your shot. For instance, over-relying on brightly colored RGB effects without considering how they interact with your scene can lead to unnatural skin tones or distracting color casts. Advanced users know that using fill lights effectively can enhance depth without overwhelming the subject. One trap to avoid is neglecting the spectral output of LED panels and RGB tubes; mismatched spectra can cause undesirable color tints, especially in skin tones, as detailed in lighting research from industry standards. A surprising yet critical nuance is the importance of proper diffusion—cheap diffusers can introduce color shifts or reduce color rendering index (CRI), leading to flat or washed-out looks. Many overlook this, thinking all diffusers are equal, but investing in quality diffusion reduces hotspots and maintains color fidelity. When using softboxes, remember that their shape and material affect light softness and spread, not just the size, so don’t assume a larger softbox always equals a softer light—sometimes the fabric’s texture and shape matter more. Advanced creators also leverage softbox techniques to avoid pitfalls like glare or unflattering falloff. Lastly, avoid the myth that more powerful LED panels solve all problems; in fact, their overuse can cause harsher shadows if not properly diffused or positioned. Instead, focus on movement, angulation, and modifiers to sculpt your scene—these are the true keys to cinematic lighting. Do you fall for the trap of assuming that gear alone ensures quality? Let me know in the comments!
Achieving professional-quality lighting isn’t just about choosing the right RGB tube lights, softboxes, or LED panels; it’s equally about maintaining that equipment properly over time. Reliable tools ensure consistent results, reduce setup time, and extend your gear’s lifespan. In my experience, a well-maintained setup minimizes troubleshooting during shoots and guarantees that your creative vision shines through every time.
One of my go-to routines involves regular cleaning of connectors and lenses. Dust and grime can cause flickering or color inconsistencies, especially with delicate components like the LED panels. Carefully using compressed air and soft microfiber cloths prevents buildup without risking damage. Additionally, I routinely check the power supplies and cables for wear. A frayed cord isn’t just a safety hazard; it can disrupt your lighting setup, resulting in fluctuating brightness or color shifts.
Calibration is another critical step. For RGB tube lights and panels with adjustable color temperatures or effects, I calibrate them periodically using a colorimeter or consistent reference images. This practice helps maintain accurate color rendition, which is vital for cohesive scenes. As lighting technology advances, integrating smart controls and syncing software, like industry-standard DMX controllers, simplifies this process and ensures uniformity across multiple devices.
To keep your tools performing at their best, establish a routine maintenance schedule—monthly for cleaning, quarterly for calibration, and annual deep checks. Labeling cables and organizing your setup reduces wear and accidental disconnections. Consider investing in protective gear such as silicone sleeves for connectors or dust covers for unused ports; these small steps go a long way.
Looking ahead, the trend leans toward smart, self-monitoring lighting systems that alert you to issues before they affect your shoot. Companies are integrating IoT technology into fixtures, promising even more reliable workflows in the near future. For now, commitment to routine maintenance remains your best strategy for long-term success.
How do I maintain my lighting setup over time?
Consistently inspecting and cleaning your equipment, calibrating your lights regularly, and organizing your gear are key actions. Also, stay updated with firmware updates and manufacturer recommendations for your devices. This proactive approach prevents many common issues and ensures your lighting remains reliable, saving you time and costly repairs down the line. For more detailed tips, visit this comprehensive maintenance guide.
If you haven’t already, try applying the habit of calibration with your RGB tube lights every few months. It’s a small step that pays off in color consistency and scene believability. Remember, your tools can only perform their best with proper upkeep—think of it as nurturing your most valuable creative assets.

Lessons That Changed My Lighting Game
One of the toughest realizations was that the background can be as impactful as the main subject. I used to think that bright, powerful key lights were enough, but I overlooked how strategic placement of RGB tube lights behind or around the scene could unlock cinematic depth. The moment I discovered these hidden placements, everything shifted. Now, I always ask myself: “Where can I subtly add color and dimension without overwhelming the scene?”
Another lesson was about patience and testing. It’s tempting to toss a few RGB tubes and call it a day, but I learned that fine-tuning angles, intensities, and diffusion makes all the difference. Small adjustments, like tilting a tube slightly or choosing the right diffuser, transformed flat backgrounds into vibrant visual stories. It’s not just about equipment; it’s about the thoughtful choreography of light.
Lastly, understanding that background lighting can either hide flaws or reveal textures truly opened my eyes. Properly placed RGB tubes can cover imperfections, add layers, and create mood—turning a simple backdrop into a storytelling element. Embracing trial-and-error, along with these secrets, pushed my work from amateur to cinematic-grade.
My Go-To Tools for Elevating Your Lighting Setup
- RGB Tube Light Effects: They’re versatile and controllable, perfect for creating dynamic backgrounds. Check out this resource to unlock creative styles.
- Diffusion Sleeves: Investing in quality diffusion reduces hotspots and maintains color fidelity. I trust this guide for choosing the right diffusion.
- Color Calibration Devices: Regular calibration ensures consistent, accurate hues across your entire setup. It’s worth every penny, especially with programmable RGB tubes.
- Smart DMX Controllers: For synchronized color shifts and complex sequences, integrating smart controls streamlines your workflow. I recommend exploring this comprehensive guide.
Light Your Path to Cinematic Confidence
Now is the perfect moment to experiment with subtle RGB tube placements and elevate your background from flat to cinematic. The key lies in deliberate positioning, thoughtful diffusion, and consistent calibration—these are the tools that transform good lighting into great storytelling. Remember, your camera captures what your lights reveal, so let’s make every pixel count.
What’s one background lighting trick you’re excited to try next? Share your ideas below or ask for tips—I’m here to help you master the art of cinematic lighting with RGB tubes, softboxes, key lights, and more!
![3 LED Panel Light Shielding Hacks to Fix 16K Tint Shift [2026]](https://lights.creatorrigreviews.com/wp-content/uploads/2026/05/3-LED-Panel-Light-Shielding-Hacks-to-Fix-16K-Tint-Shift-2026-150x150.jpeg)


