
I remember the first time I tried filming a scene indoors, only to realize my subject looked flat and lifeless, despite my fancy camera and creative ideas. It was a frustrating moment, but it was also a lightbulb moment. I discovered that even the best camera gear can only do so much without proper lighting. Since then, mastering softbox and fill light techniques has transformed my videos from amateurish to cinematic. If you’ve ever felt that sting of disappointment when your footage doesn’t match your vision, don’t worry—you’re not alone.
Why Proper Lighting Is the Secret Sauce in 2024
In the world of cinematic video, lighting isn’t just an afterthought. It’s the backbone of mood, depth, and clarity. With the rapid evolution of lighting tools—like RGB tube lights, LED panels, and softboxes—the options are more exciting than ever. But here’s the catch: more choices can also mean more confusion. I’ve made my share of mistakes early on, like overusing harsh lights or neglecting to balance my fill. That’s a rookie error I urge you to avoid. According to a recent study, good lighting can increase viewer engagement by up to 50%, which in turn keeps your audience captivated and makes your content stand out. That’s why investing time in learning the right softbox and fill light setups is a game-changer.
Have You Faced This Common Lighting Dilemma?
If you’ve struggled with achieving natural-looking light or felt overwhelmed by the sheer number of lighting options, believe me—I’ve been there. My early videos often looked flat or uninviting because I didn’t understand how to shape and balance light properly. I used to think that simply turning on a bright light would do the trick. Spoiler alert: it doesn’t. Instead, I learned that subtlety, positioning, and understanding how to use softboxes and fill lights effectively are what make a shot cinematic. If you’re tired of underwhelming results, I’ll walk you through the strategies that finally clicked for me and can do the same for you.
Let’s Dive Into the Art of Softbox & Fill Light for Cinematic Video
Stay tuned as I share practical tips and setups that will elevate your lighting game in 2024. Whether you’re shooting in a controlled studio or on location, these insights will help you craft scenes with depth, mood, and professionalism. Ready to transform your videos? Let’s get started and turn your lighting struggles into cinematic success. And if you want to explore related techniques, check out my guide on mastering softbox lighting for portraits or discover creative effects with RGB tube lights.
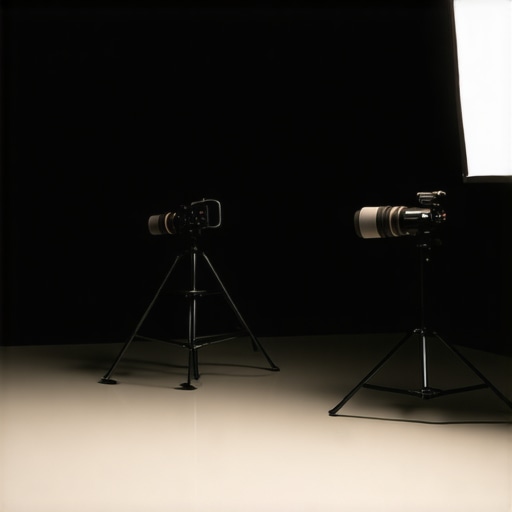
Position Your Softbox Correctly for Flattering Light
In my early shoots, I once placed the softbox directly in front of my subject, hoping for even illumination. The result? Flat, uninteresting footage. I learned that angling the softbox at about 45 degrees from the subject’s face creates more dimension and natural shadows. Think of it like painting a face with a gentle shadow to add depth. To make this work, set your softbox at eye level or slightly above, pointing downward to mimic natural light. Adjust its distance—closer for softer light, farther for more contrast. Experiment with these variables until your subject looks naturally lit, not overly staged.
Refine the Fill Light Placement for Balance
Once your key light is set, adding a fill light helps soften harsh shadows without flattening the image. I once used a second softbox with less power to fill in shadows on my subject’s cheek, resulting in a pleasing balance. Position your fill light opposite the key light but keep it at a lower intensity—roughly 1/3 to 1/2 of your key’s power. Use a bounce reflector or a smaller softbox if you want a more subtle effect. The goal is to preserve some shadow for depth but eliminate distracting dark spots. Remember, the right fill light enhances your scene’s mood and adds cinematic polish.
Control Light Spill for a Clean Look
Unwanted spill can make your scene look cluttered. I once noticed that light from my softbox spilled onto the background, causing distraction. To fix this, I used flags and barn doors—metallic blades that control light spread. Positioning flags just outside the softbox’s beam directs light precisely where you want it. This technique is akin to using a stencil to paint only certain areas, keeping the background dark or intentionally lit. If you’re working in tight spaces, consider using grids or honeycomb attachments to shape the beam further. Mastering spill control is essential for a professional, cinematic look.
Match Light Color and Temperature
Mixing different color temperatures can ruin your scene’s cohesiveness. I once shot with a daylight-balanced softbox but used a tungsten fill light, and the mismatch was glaring. To avoid this, set all your lights to the same Kelvin temperature—most softboxes and LED panels allow you to adjust this easily. For a warm, inviting look, use 3200K; for daylight realism, go for 5600K. Consistent color temperature ensures your skin tones look natural and your scene feels unified. For more advanced color matching techniques, check out my guide on key light techniques.
Use Light Modifiers for Creative Control
Modifiers like diffusers, grids, and gels give you artistic control over your lighting. I once added a diffusion sock over my softbox, softening the light further and reducing hotspots. This is especially useful for close-up shots where detail matters. Grids help focus the light, creating a spotlight effect that can isolate your subject from the background. Gels can change the color temperature or add creative effects—think of them as filters for your lights. These tools allow you to craft mood and atmosphere, essential for cinematic storytelling. To explore different lighting styles, check out softbox key light setups.
Practice and Adjust in Real-Time
Finally, nothing beats hands-on adjustment. I once filmed an indoor interview where I moved my softbox around, watching how shadows changed on my subject’s face. Live preview on your camera or monitor is crucial. Use your eye as a guide—look for natural skin tones and pleasing shadows. Take test shots, adjust angles, distances, and power levels until it feels right. Remember, lighting is an art of subtle tweaks, not one-size-fits-all. The more you practice, the more intuitive your adjustments will become, leading to consistently cinematic results.
Many videographers and content creators believe that mastering softbox and fill light techniques is just about positioning and choosing the right equipment. However, there’s a hidden nuance that often trips people up and can undermine even the most well-planned lighting setups. Let’s dig deeper into what most get wrong and how to avoid these pitfalls to elevate your cinematic quality.
Why Overemphasizing Brightness Can Backfire
It’s a common misconception that brighter lights always produce better results. In reality, overexposing your subject or background with high-intensity softboxes can flatten the scene, erasing depth and detail. This mistake is especially prevalent among beginners who think that more light equals better quality. Instead, focus on controlling your light’s intensity and using diffusers or grids to shape it. This approach preserves natural shadows and highlights, giving your footage a more cinematic and three-dimensional feel. For advanced shooters, understanding the inverse square law is crucial—doubling the distance from your subject reduces the light intensity by a quarter, allowing precise control over exposure and mood. Want to learn more about fine-tuning your softbox settings? Check out effective softbox key light setups.
The Silent Trap of Color Temperature Mismatch
Many overlook the importance of consistent color temperature, leading to scenes that feel jarring or unnatural. Even subtle mismatches—such as a daylight softbox paired with a tungsten fill light—can cause skin tones to appear off and ruin the scene’s cohesiveness. Advanced videographers know that matching Kelvin temperatures across all lighting sources is essential for a seamless look. Modern LED panels and softboxes often allow precise color adjustments, but many forget to set them correctly. Using a color meter or relying on your camera’s white balance settings can help maintain color harmony. For more insights on color consistency, explore key and fill light techniques.
Choosing the Wrong Modifiers for Your Scene
Another common mistake is neglecting the use of modifiers to shape and control light. Rigidly sticking to bare softboxes or ignoring diffusers, grids, or gels can limit your creative options. For example, without diffusion, your softbox may create hotspots or harsh shadows, undermining the cinematic quality you’re aiming for. Grids narrow the beam, allowing you to isolate your subject and control spill, while gels enable creative color effects or temperature corrections. If you’re working in tight spaces, using flags and barn doors can prevent unwanted spill and keep your scene clean. Mastering these modifiers unlocks a new level of control, making your lighting more nuanced and professional. Learn more about advanced modifier techniques at softbox fill light strategies.
Have you ever fallen into this trap? Let me know in the comments. Remember, lighting is not just about equipment but about understanding how to shape and control light for the most cinematic results.
As your lighting setup becomes more sophisticated, maintaining your equipment’s performance over time is crucial to ensure consistent, professional results. From softboxes to RGB tube lights, each piece of gear requires specific care and attention. I personally rely on routine cleaning, proper storage, and regular calibration to keep my tools performing at their best. For instance, softbox diffusers tend to gather dust, which can affect light quality, so I make it a habit to gently clean them with a microfiber cloth after each shoot. Similarly, LED panels and RGB tube lights benefit from periodic firmware updates and calibration checks to ensure color accuracy and brightness consistency. Regularly inspecting cables and connectors prevents unexpected failures during critical shoots. Investing in a dedicated storage cabinet with compartments for each light and accessory helps prevent physical damage and keeps your workspace organized. These small but consistent efforts extend the lifespan of your equipment and preserve the quality of your cinematic lighting. Looking ahead, the trend is moving towards smarter, more integrated lighting systems that can self-diagnose issues and send maintenance alerts—embracing these innovations will save you time and reduce downtime in the long run.
How do I maintain my lighting tools over time?
Maintaining your lighting tools involves a mix of routine cleaning, firmware updates, and careful storage. For example, regularly cleaning your softboxes with a gentle vacuum or compressed air removes dust that can diffuse your light unevenly. Firmware updates for LED panels and RGB tube lights ensure you have access to the latest features and color calibration improvements, which are essential for professional-quality videos. When storing your equipment, use padded cases or dedicated shelving to prevent physical damage, especially for fragile components like diffusion filters or control panels. Additionally, periodically testing your lights with a color meter or white balance reference helps verify consistent color output. This proactive approach not only prolongs the lifespan of your gear but also guarantees reliable performance during shoots. As technology advances, I predict that future tools will incorporate AI-driven diagnostics, making maintenance even more straightforward and efficient. Staying on top of these practices will ensure your lighting remains a reliable partner in your cinematic journey.
If you’re interested in deepening your knowledge, check out my detailed guide on mastering softbox lighting and discover how to keep your equipment in pristine condition for stunning results. Don’t forget to routinely review your gear’s specs and manufacturer recommendations—these are invaluable for long-term care. Make it a habit to perform these maintenance routines after each project, and your lighting setup will continue to deliver Hollywood-level quality for years to come. So, grab a microfiber cloth and your toolkit, and start implementing these simple but effective maintenance tips today!
What I Wish I Knew About Lighting That Changed My Shots Forever
- Softboxes are more forgiving than I thought. Early on, I believed that any soft, diffused light would do the trick. It wasn’t until I experimented with positioning and modifiers that I realized how crucial subtle adjustments are for cinematic quality. The small changes in angle or distance can dramatically affect depth and mood.
- Fill lights are your secret weapon. I used to rely solely on my key light, but adding a strategically placed fill light transformed my scenes from flat to vibrant. It’s about balancing shadows without losing natural contrast—something I learned through trial and error.
- Controlling spill elevates professionalism. I discovered that flags, barn doors, and honeycomb grids aren’t just accessories—they’re essential for a clean, cinematic look. Learning how to shape and direct your light keeps your scene tidy and visually compelling.
- Color temperature consistency is key. Mixing different Kelvin temperatures can ruin your scene’s cohesion. I now always set all my lights to matching temperatures, which makes skin tones look natural and scenes more unified. Small adjustments here make a big difference.
- Modifiers unlock creative potential. Diffusers, gels, and grids aren’t just tools—they’re your palette for storytelling. Using them intentionally adds mood, focus, and style to your videos, making them stand out.
My Go-To Resources for Mastering Cinematic Lighting
- Effective softbox key light setups in 2024. This guide has transformed my understanding of softbox positioning and power control, helping me craft professional-looking scenes. I trust it because it’s packed with real-world tips and tested setups.
- RGB tube light effects for creative lighting. When I want to add flavor or mood, I turn to RGB tubes. They’re versatile and easy to modify—perfect for dynamic scenes. The resource explains how to harness their full potential for cinematic storytelling.
- Key and fill light techniques with LED panels. These techniques give me a solid foundation for balanced lighting, especially in tight spaces. The insights are practical and adaptable for various shooting environments.
- Maintenance tips for long-lasting gear. Regular cleaning, calibration, and careful storage keep my equipment performing optimally. The advice in this resource helps me avoid costly repairs and keeps my lighting consistent.
Your Turn to Shine with Cinematic Lighting
Lighting isn’t just about equipment—it’s about how you shape and control light to tell your story beautifully. By mastering softbox and fill light techniques, you unlock a new level of cinematic quality that captures attention and inspires your audience. Remember, every great shot starts with thoughtful light—so keep experimenting, learning, and refining your skills. Your next masterpiece is just a tweak away.
What’s the biggest challenge you face when setting up your lighting? Share your experience below and let’s learn together!
![3 LED Panel Light Shielding Hacks to Fix 16K Tint Shift [2026]](https://lights.creatorrigreviews.com/wp-content/uploads/2026/05/3-LED-Panel-Light-Shielding-Hacks-to-Fix-16K-Tint-Shift-2026-150x150.jpeg)


5 responses to “Ultimate Softbox & Fill Light Tips for Cinematic Video in 2024”
Reading through this post brought me back to my early days of trying to get cinematic lighting right. I used to think that more powerful lights would automatically improve my footage, but I quickly learned that finesse and positioning are far more important. I remember struggling with flat scenes until I finally focused on angling my softbox at about 45 degrees, as you suggested. One thing I’ve found especially effective is experimenting with different distances to soften or harden the light—closer for a gentle glow, farther for sharper shadows. I also realized the importance of matching my color temperature—nothing kills a scene faster than mismatched warm and cool lights.
Have others here found that small tweaks like slight adjustments in softbox tilt or distance made a noticeable difference? Sometimes, the tiniest change creates a much more cinematic look. It’s almost like painting with light—one stroke at a time. Would love to hear what particular adjustments have worked best in your setups or if anyone has creative tricks for controlling spill in tight spaces.
This article really hits home for me, especially the part about softbox placement. I’ve learned that changing my softbox angle even slightly—say from 45 degrees to 30—can dramatically affect the mood and depth of a scene. I used to think that as long as lights were on, I was good to go, but subtle positioning makes all the difference, especially when trying to achieve natural-looking skin tones and shadows.
One trick I’ve found helpful is placing a small reflector opposite the softbox to bounce some light back onto the shadows, giving a more balanced and softer overall look. It’s surprising how much even a cheap reflector can do to enhance cinematic quality without needing additional expensive lights.
Have others experimented with reflectors or flags in tight setups? I find they’re crucial for controlling spill and making scenes look more professional. Would love to learn about any creative solutions you guys have tried for optimizing small or confined spaces!
Reading this detailed breakdown really resonated with my own journey into cinematic lighting. I used to over-rely on brute force—more powerful lights, more LEDs—thinking that bigger would always be better. But through lots of trial and error, I discovered how vital light shaping and precise placement are. The tip about angling softboxes at 45 degrees really helped me add depth that was missing before. I also started experimenting with different distances to see how they affect the softness or hardness of shadows, which is a game-changer for mood creation.
One thing I’d add is the importance of observing your scenes in real-time. Live monitoring can reveal subtle issues, like unwanted spill or color mismatches, that you might miss when just reviewing footage later. Has anyone here found that using a small portable monitor helps with perfecting these nuances? I’d love to hear if others have similar setups or tips for small spaces—sometimes props like barn doors or DIY flags make a huge difference in controlling spill and refining the look.
I really appreciate how this post emphasizes the importance of subtle adjustments in lighting. When I first started practicing, I underestimated how much small changes in softbox angle or distance could impact the scene. I remember one shoot where just tilting the softbox slightly changed the mood completely, making the shot more cinematic and natural. I also agree with the point on color temperature; mismatched lights can really ruin the cohesiveness of a scene. One trick I’ve found useful is doing quick test shots after every adjustment—this helps me see what genuinely works and saves time in the long run. I’m curious, how do others balance the need for quick setups with the precision required for perfect lighting? Do you use any specific tools or techniques to speed up your adjustments without sacrificing quality? Looking forward to hearing everyone’s tips and experiences on remaining efficient while refining their lighting techniques.
I really enjoyed reading this post. It reminded me of my own experiments with softbox placement, especially how slight angle adjustments can totally change the scene’s mood. I’ve noticed that when I angle my softbox at about 30 to 45 degrees, the shadows become softer and more natural-looking, which makes a huge difference for portraits. The trick with using reflectors to bounce light back into shadowed areas is something I’ve recently adopted, and it’s surprisingly effective—even with budget gear. It’s interesting how control over small details, like spill and color temperature, can elevate a basic setup to a cinematic level.