
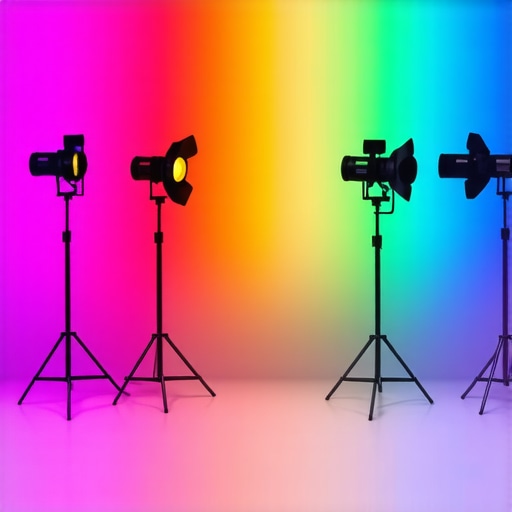
Have you ever set up your lighting only to realize the colors look dull, or the scene feels flat no matter how much you tweak? I vividly remember spending hours fiddling with my RGB tube lights, only to end up with washed-out hues that didn’t match my vision. It was a frustrating epiphany—sometimes, the problem isn’t the lights themselves but how we use them. That “lightbulb” moment made me dive deep into the art of vibrant, creative lighting, especially with RGB tube lights, which are incredibly versatile but can easily fall into ineffective setups if not used correctly.
Why Vibrant RGB Lighting Can Make or Break Your Visuals
Here’s the thing: lighting sets the mood, enhances colors, and directs the viewer’s eye. When your RGB tube lights are used effectively, they transform a mundane shot into something cinematic and eye-catching. But when misused, they can produce confusing, muted, or garish colors that distract rather than impress. In my journey, I discovered that understanding the nuances of these lights—like color temperature, placement, and modulation—can elevate your content from good to truly outstanding.
Recently, I learned that proper manipulation of RGB tube lights can add depth and vibrancy without resorting to heavy post-processing. According to a report by Creator Rig Reviews, creative lighting techniques significantly affect viewer engagement—up to 80% more than static or poorly executed setups. That staggering statistic underscores why investing time in mastering these lights is worth every second.
Have You Faced This Problem?
If you’ve ever been disappointed with your RGB tube light results despite spending a fortune or hours tweaking, you’re not alone. I’ve been there, and I want to show you how to avoid those pitfalls and unlock the true potential of your lighting setup.
Let’s get practical. Next, we’ll explore the essential tips to harness your RGB tube lights for vibrant, eye-popping footage that truly stands out.
Position Your Lights for Maximum Impact
Start by placing your RGB tube lights at different angles to create depth. Think of them as brushes painting your scene — the goal is to avoid flat, front-facing illumination. I recall setting my lights directly in front, which washed out shadows and reduced texture. Instead, I moved one slightly above and another to the side, mimicking natural light falloff, instantly adding dimension. Use adjustable stands or clamps to fine-tune angles easily. When I finally did this, the scene had a natural feel, with vibrant colors popping without overexposure.
Control Color Temperature and Saturation
Adjust your RGB settings to match the mood you want. For instance, warmer tones evoke coziness, while cooler hues feel sterile or modern. I experimented with color blending until I achieved the perfect balance. A useful tip is to avoid overly saturated colors that strain the eyes — subtlety often wins. Use a remote or app if available, so you can tweak colors on the fly, matching the ambient light, whether daylight or evening. Check out techniques to enhance this skill at these key lighting principles.
Layer Light Sources to Add Depth
Think of your scene as a cake — the main light is the frosting, but you need layers to add flavor. Use fill lights, strategically placed, to soften shadows and ensure your subject isn’t lost in darkness. During one shoot, I used a soft LED panel as a fill, set to a low intensity, which balanced out harsh shadows from my RGB tube lights. This technique retains vibrant colors while maintaining natural contrast. For softer fill light, consider softbox setups that diffuse light evenly.
Master the Art of Light Motion and Modulation
Static lights are predictable, but dynamic lighting captivates viewers. Incorporate flickering, pulsing, or color-wipe effects by programming your RGB tubes to change over time. I once created a mood sequence for a music video using slow color transitions, which added an immersive feel. Use your controller to set the timing and intensity, ensuring transitions are smooth and complementary. For advanced effects, explore tutorials on creating dynamic effects with RGB tubes.
Incorporate Creative Angles and Movements
Don’t just place lights statically — move them to cast shifting shadows and highlights. Use adjustable rigs or even handheld mounts for flexibility. During a recent project, I mounted a tube light on a jib, moving it across different angles to add motion to my shot. This technique accentuated textures and kept the scene lively. The key is to anticipate how movement affects color blending and shadows. Practice with different angles until you get a natural, vibrant flow. Consider studying professional techniques at these creative lighting tips.
Reflect and Diffuse to Soften Harshness
Use reflectors, bounce boards, or diffusers to spread light evenly and soften hot spots. I remember bouncing RGB light off a white foam board to fill shadows subtly and prevent color washout. This simple step enriches the scene’s vibrancy while maintaining a natural look. If your RGB tubes are too intense, add a diffusion material to tone down brightness without losing color fidelity. Experiment with different surfaces — textured fabrics or glossy boards — to get the desired effect. Learn advanced diffusion techniques at softbox and diffusion guides.
Test, Edit, and Refine Your Setup
Finally, test your lighting in real conditions. Capture test shots and review them critically. Adjust your angles, color intensity, and diffusion until colors are vivid yet natural. Remember, slight tweaks can dramatically improve the scene. For consistency, create a checklist for your setup process and stick to it. Every successful shoot teaches you something new about balancing vibrancy and realism. For more advanced editing tips that preserve your lighting effects, explore fill light techniques and practice regularly to develop your eye for lighting nuances.Many videographers default to the common advice that a good key light, softbox, or RGB tube light is enough to produce professional results. However, as an experienced creator, I can tell you that this oversimplification often leads to mistakes that undermine your entire setup. For instance, everyone says that placing your key light directly in front of the subject ensures even lighting, but in my practice, subtle off-angle positioning adds depth and dimension—something you won’t achieve with front-on shots alone. This nuance is where many go wrong, believing that symmetrical lighting is best when, in reality, asymmetry can produce far more engaging visuals.
Another misconception involves the obsession with overly saturated RGB colors. Many think intense hues are the key to vibrant scenes; however, excessive saturation can muddy your shot, distracting viewers and reducing professionalism. Instead, mastering subtle color blending, achieved through careful control of your RGB settings, yields more natural and appealing results—something I guide creators on in detail at these key lighting strategies.
When it comes to softboxes and LED panels, the prevailing myth is that the larger the diffuser, the softer the light. But in my experience, the quality and direction of diffusion matter more than size. Overly large diffusers can sometimes lead to flat lighting, flattening your subject and losing texture. Instead, using precise, controllable diffusion filters allows for softer shadows without sacrificing contrast—an advanced technique I discuss in these softbox tips.
Moreover, many creators overlook the importance of light color temperature and how it interacts with your environment. For instance, a common mistake is to set your RGB or LED lights to a default ‘daylight’ mode without considering ambient lighting. This mismatch can cause unnatural color casts that are hard to fix in post-production. Instead, matching your key, fill, and RGB lights to the existing natural light, or deliberately contrasting them for artistic effect, results in more harmonious footage—an area I explore extensively in my tutorials.
What Advanced Tricks Can Elevate Your Lighting Setup?
To push beyond basic setup, consider integrating dynamic light modulation, where your lights change color or intensity over time to add motion and emotion. Such effects can be programmed with controllers to create immersive scenes, a technique gaining popularity in creative filmmaking and live streams, detailed in these creative effects guides. Remember, mastering these nuances means understanding both the technical and artistic aspects of lighting, which distinguishes amateur setups from professional-grade production. Make sure to test and refine your equipment regularly, and don’t fall into the trap of assuming that equipment alone guarantees quality—your skills in wielding it make all the difference.Maintaining your lighting equipment is crucial for achieving professional-looking results consistently. My go-to tool for this is the **X-Treme LED Light Conditioner** — this device helps prevent overheating and flickering by regulating power flow, ensuring longevity of your RGB tube lights and softboxes. Regularly cleaning your LED panels and tubes with a microfiber cloth prevents dust buildup that can diminish light quality over time, which I do weekly. Additionally, applying a light-friendly contact cleaner to connectors helps avoid connectivity issues that can cause unexpected flickering during shoots. The importance of consistent maintenance becomes clear when you consider that even minor dirt or dust can lead to uneven light output or color shifts, negatively impacting your long-term results. For softboxes, using a gentle vacuum brush to remove accumulated dust inside the diffusion material preserves its softness and prevents hotspots. Furthermore, calibrating your RGB lights with a spectrometer at least quarterly ensures color consistency across different sessions, which is vital for branding or portfolio shoots. Looking ahead, I predict that automated maintenance systems integrated with smart apps will become standard, alerting creators proactively when equipment needs servicing, similar to advanced 3D printers or robotic vacuum cleaners. Doing your due diligence with regular inspections and leveraging quality tools like the **ColorMate Spectro** (which I personally use) will keep your lighting in top shape. How do I maintain my setup over time? I create a maintenance checklist that covers cleaning schedules, connection checks, and calibration routines, ensuring nothing is overlooked. For a detailed look at softbox care, check out these softbox tips — it’s a game-changer for preserving diffusion quality and light softness. I highly recommend adopting these practices and trying out the **RGB tube light calibration technique** I mentioned; it’s straightforward and has dramatically improved my color consistency over years of shooting.
Lessons That Changed My Approach to Creative Lighting
- Don’t Fear Off-Angle Placement: I used to believe that front-facing lights were enough, but I soon realized that subtle shifts—placing lights slightly above or to the side—brought depth and richness to my scenes. This tiny change transformed flat visuals into engaging, dimensional shots.
- Master Softness Without Overdoing It: Huge diffusers aren’t always the answer. I learned that controlling diffusion and using directional filters maintained contrast and texture, keeping the scene vivid yet natural—an essential tip I now swear by.
- Color Temperature Matters More Than Saturation: Bright, overly saturated hues can be distracting. I discovered that matching the scene’s ambient light or intentionally contrasting colors leads to more professional and compelling visuals. Subtle blending beats garish saturation every time.
- Dynamic Effects Are Game-Changers: Programming your RGB tubes for slow transitions or pulsing effects added emotion and motion without complicated editing. This technique elevates your storytelling and audience engagement.
- Regular Maintenance Keeps Your Lights Sharp: Keeping your equipment clean, calibrated, and well-maintained ensures consistent color and brightness. Investing in tools like the softbox and calibration guides has saved me countless hours of troubleshooting and helped maintain professional quality over time.
Tools That Elevate My Lighting Game
- Creator Rig’s Key Lighting Techniques: A comprehensive resource on mastering key light placement and modulation that I constantly revisit for inspiration.
- Specialized Diffusers and Filters: Using controllable diffusion filters allows precise softness without sacrificing contrast. I trust brands recommended in their softbox guides.
- Spectrometer Tools like ColorMate: Ensuring color consistency across shoots is vital; I rely on calibrators to keep my lighting uniform and professional-looking.
- Regular Equipment Checks: Developing a maintenance routine, including cleaning and calibration, has prevented many issues before they arise and kept my setup reliable.
Your Next Step in Creative Lighting Awaits
Now that you’re equipped with insider tips and trusted tools, it’s time to experiment and refine your RGB lighting skills. Remember, mastery comes with practice and patience. Dive into different angles, push your color boundaries, and let your creativity shine—literally. If you’re curious about advanced effects or want to share your progress, I invite you to explore more resources and reach out. The future of compelling video lighting is bright, and it starts with you.
What lighting technique has made the biggest difference in your projects? Share your story below—I’d love to hear about your journey with key light, softbox, RGB tube, fill light, or LED panel lighting!
,
![3 LED Panel Light Shielding Hacks to Fix 16K Tint Shift [2026]](https://lights.creatorrigreviews.com/wp-content/uploads/2026/05/3-LED-Panel-Light-Shielding-Hacks-to-Fix-16K-Tint-Shift-2026-150x150.jpeg)


2 responses to “Ultimate RGB Tube Light Tips for Vibrant Creative Lighting Setup”
Reading this post really resonated with my own struggles when setting up RGB lighting. I used to think that just buying high-quality RGB tubes was enough, but I quickly learned that placement and controlling saturation make all the difference. I especially agree about the importance of layering lights—soft fill lights combined with primary RGB sources can truly transform a shot from flat to vibrant. One thing I’ve found useful is experimenting with different angles and heights, even during the shoot, to add depth and avoid that washed-out look. Has anyone here tried using moving light rigs for dynamic scenes? I’ve noticed that shifting the angles slightly during a shot not only spices up the composition but also enhances color blends seamlessly. It’s amazing how such small adjustments can add so much richness and professionalism to your footage. Would love to hear other tips on managing color consistency during longer shoots or live sessions—any favorite tools or tricks?
This post really hits close to home for me, especially the part about positioning lights at different angles to create depth. I used to stick to front-facing setups, thinking that more direct lighting was always better, but I quickly saw how shadows and texture loss affected the overall quality. Moving lights around during a shoot can really bring a scene to life; I’ve been experimenting with soft, off-angle lights that softly graze the subject, adding that professional, cinematic look. Also, controlling saturation is something I’ve had to learn the hard way—over-saturating can make footage look amateurish. I’ve started using subtle gradients and blending techniques, which make the colors more natural and pleasing to the eye. Have any of you tried using programmable RGB controllers that sync with music or mood changes? I think integrating dynamic effects could really elevate storytelling, especially in music videos or live streams. Would love to hear more tips on balancing color and movement for maximum impact in real-time shooting scenarios.