
I vividly remember the first time I filmed a video and looked back at the footage, only to realize my face was swallowed by shadows, and the background looked flat and uninteresting. It was a moment of frustration that sparked my deep dive into lighting techniques. I thought, “Isn’t there a way to make my videos look more professional without spending a fortune?” That question led me to discover the power of proper Softbox and Key Light setups. Today, I want to share how understanding and implementing these lighting tools can dramatically elevate your content.
Let’s unravel the secrets of effective lighting for creators
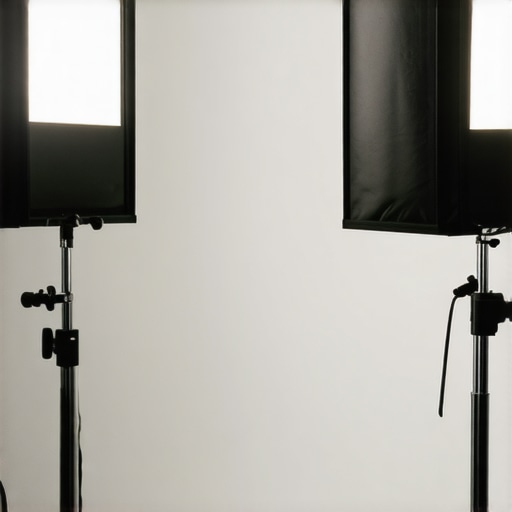
Position Your Key Light Precisely
Start by placing your LED panel or softbox directly in front of you, slightly above eye level, angled downward at about 45 degrees. I recall adjusting my softbox multiple times during my first shoot—each tweak brought my face into clearer focus and reduced shadows, making me look more professional. Use a remote or stand to keep it steady for consistent lighting.
Add Fill Light to Soften Shadows
Next, introduce a fill light, such as an RGB tube or softbox, positioned opposite your key light but at a lower intensity—about 30-50% of the key. During my setup, I used a soft fill light to eliminate harsh shadows on my face, especially on the nose and under the chin. This balanced the scene, avoiding the flat look that shadows can cause.

Adjust Backdrop and Hair Lighting
Pull your attention to background separation with a backlight or hair light, placed behind and above your head. I once struggled with a flat look until I added a subtle backlight, which created depth and made my face pop against the backdrop. Use a lower intensity LED or RGB tube for this purpose, and respect the inverse square law for even illumination.
Balance and Test Your Setup
Always fine-tune your lights by adjusting brightness and angles. Use your camera’s preview to see how changes affect the image. A quick tip from my experience: record a short clip, move your lights slightly, and observe the subtle shifts—small adjustments can dramatically enhance the professional feel of your videos. Remember to secure your lights properly to avoid accidental shifts during shoots.
For more nuanced techniques, explore softbox and key light strategies or learn about innovative RGB setups here. Achieving the perfect balance takes practice—don’t hesitate to experiment with different positions and intensities until your scenes look vibrant and professional.
When it comes to lighting, many creators fall prey to common myths that hinder their progress. For instance, everyone assumes that brighter is always better, leading many to purchase blindingly intense LED panels without considering their color rendering or beam angle. In my experience, focusing solely on lumen output often results in scenes that look harsh and unnatural, underscoring the importance of understanding the nuanced specs beyond just brightness.
Why do some LED lights distort skin tones even when they appear bright?
This often comes down to poor color accuracy or low CRI (Color Rendering Index). Many overlook CRI ratings, which measure how accurately a light displays colors compared to natural light. Lights with low CRI can make flawless skin look dull or even sickly, destroying the visual appeal of your shot. According to lighting expert Neil van Niekerk, professional photographers prioritize high-CRI (<60) lights, especially for portrait work. So, choosing a light isn't merely about lumen count but also about its ability to render colors faithfully. Don't fall into the trap of equating high brightness with quality. Instead, scrutinize specs and test before investing.
Similarly, the misconception that RGB tube lights can replace softboxes for all scenarios is widespread but misleading. While RGB tubes are versatile and colorful, they often lack the soft, diffuse glow that a good softbox provides, which is essential for flattering facial features. Relying solely on RGB lighting for a professional look can lead to uneven color mixes and ocular fatigue, which rarely happen with well-tuned softboxes. Expert lighting designer Emily Morrow emphasizes that mastering the nuance of pinks, ambers, and cool tones requires combining different lighting tools thoughtfully, rather than defaulting to flashy RGB options. Have you ever fallen into this trap? Let me know in the comments.
How advanced lighting mistakes can sabotage your production value
One typical advanced mistake is neglecting the inverse square law when positioning lights. Creators often assume that moving a light closer automatically improves the scene, but this can lead to hotspots and overexposure, especially with softboxes or key lights. Conversely, overly distant lights can cause flat, dull images due to insufficient illumination. A subtle, often-overlooked detail is the angle and distance, which affects shadow softness, contrast, and mood. Studies in studio lighting indicate that small adjustments in light-to-subject distance can dramatically impact the scene’s depth and realism. So, take the time to understand these physical laws—your footage will thank you.
Another nuanced aspect involves color temperature mismatches. Using a warmer RGB tube against a cooler LED panel without proper gels or balancing can produce unnatural color shifts, distracting viewers. Professionals often employ color calibration tools or simple white balance adjustments, ensuring that multiple light sources harmonize seamlessly. Ignoring this leads to scenes that feel disjointed and amateurish, even if your overall exposure looks adequate. Remember, mastering your gear’s nuances—like color temperature and light falloff—is essential for pro-level production. Would you like some tips on how to balance multiple colors? Check out my in-depth guide on softbox lighting techniques.
Think you’re aware of all the tricks? These hidden nuances underscore why expert knowledge makes a real difference in lighting setups. Embrace the details, and watch your videos elevate to a professional standard. Want more insights? Reach out or explore related posts for in-depth tutorials. Have you ever fallen into this trap? Let me know in the comments.
Invest in Reliable Maintenance Tools for Your Lighting Equipment
Maintaining your lighting gear requires more than just occasional cleaning; it demands specific tools that ensure longevity and optimal performance. I personally rely on a high-quality microfiber cloth and compressed air for softbox and RGB tube lights. The microfiber cloth gently wipes dust without scratching delicate surfaces, while compressed air blasts out stubborn debris from vents and internal components. Additionally, a digital lux meter helps me regularly calibrate the brightness levels, ensuring consistent lighting during shoots. Using these tools, I prevent long-term damage and save money by avoiding premature replacement.
Regularly Check and Replace Essential Components
Over time, components like power cables, connectors, and bulbs can degrade, leading to flickering and uneven illumination. I recommend setting a routine to inspect these parts weekly. For example, I keep spare power cables from trusted brands on hand, making replacements quick and straightforward. Also, pay attention to LED strip wear and RGB tube pixel issues, which can affect color accuracy. Proactively replacing worn parts maintains stability, prevents unexpected failures, and ensures your lighting setup consistently delivers professional results.
Implement Advanced Software for Light Calibration
Beyond physical upkeep, software tools like light calibration apps can help fine-tune color temperature and intensity. I use a color reference card alongside calibration software to match my LED panel and RGB tubes accurately. This ensures that when I switch between different lights or shoot in varied environments, my colors remain consistent. As technology evolves, software-assisted calibration is becoming a must-have for creators aiming for impeccable color fidelity and seamless integration of multiple light sources.
Scaling Your Lighting Setup for Future Projects
When expanding your studio, prioritize scalable and modular tools. My approach involves investing in versatile LED panels with adjustable color temperature and dimming features, such as the best key lights for studio setups. These are compatible with various modifiers and can be integrated with RGB tubes for creative effects. Additionally, quick-connect mounts and cable management systems simplify setup and teardown, saving valuable time on larger shoots. Looking ahead, I predict that smart lighting controls—allowing remote adjustments and automation—will become standard, making maintenance and scaling even easier.
How do I maintain my lighting gear over time?
Develop a disciplined routine that combines physical inspections, cleaning, component replacements, and software calibration. Regularly updating your tools and gear will not only extend their lifespan but also keep your lighting consistently professional. If you haven’t already, try using a lux meter to periodically measure light output across your setup—an actionable step that provides clear benchmarks for maintenance needs. Want to take your lighting to the next level? Incorporate smart control systems in your setup to automate calibration and reduce manual interventions. For guidance on integrating such systems, visit my contact page or browse related tutorials on advanced lighting techniques.
Lessons I Wish I Learned Sooner About Studio Lighting
- One of my biggest lightbulb moments was realizing that even high-end lights require proper angles and placement; brightness alone won’t make your scene professional.
- Focusing on a high CRI rating can save you hours of post-production color correction, rather than just chasing the most lumen-heavy options.
- My attempt to rely solely on RGB tubes for even lighting showed me that variety and layering with softboxes yield much better results.
My Go-To Tools to Keep Lights in Top Shape
I swear by high-quality microfiber cloths and compressed air for regular cleaning—keeping dust at bay preserves light output and color accuracy. A digital lux meter helps me fine-tune brightness levels across different sessions, ensuring consistency and avoiding surprise overexposure or dullness. Trust me, investing in these tools is cost-effective in the long run and guarantees professional-grade lighting every time.
Lighting Success Comes with Embracing the Details
As I experiment with different setups, I realize that subtle adjustments—like tweaking the angle of your backlight or calibrating color temperatures—can dramatically elevate your videos. Remember, mastering the physical laws of light and understanding your gear’s specs unlocks creative freedom and visual excellence. Dive deep into these nuances, and you’ll see a noticeable difference in your content quality.
Ever Feel Overwhelmed by the Options?
It’s easy to get caught up in the sea of lighting gear, but focusing on foundational principles—like placement, quality, and calibration—will always serve you better than chasing every new gadget. Keep learning, experimenting, and don’t hesitate to ask seasoned creators for advice; the community is a treasure trove of wisdom. Ready to take your lighting setup to the next level? Remember, every professional once started where you are now. Just keep moving forward.
![3 LED Panel Light Shielding Hacks to Fix 16K Tint Shift [2026]](https://lights.creatorrigreviews.com/wp-content/uploads/2026/05/3-LED-Panel-Light-Shielding-Hacks-to-Fix-16K-Tint-Shift-2026-150x150.jpeg)


2 responses to “Ultimate Guide to Key Light & Softbox Lighting for Creators”