
I vividly remember the moment I realized my lighting setup was holding back the quality of my videos. It was late afternoon, and I was trying to get that perfect bright, even studio look. Despite fiddling with my softboxes, ring lights, and RGB tubes, something still felt off. The shadows weren’t just subtle—they were distracting. My footage looked flat, dull, and lacked the professional polish I was aiming for.
That frustrating experience was my lightbulb moment. I had been relying on basic setups, thinking more light was the answer. But I was missing the nuanced techniques that can elevate a shoot from amateur to studio-grade. Since then, I’ve dedicated myself to demystifying the top methodologies, especially focusing on how to leverage high-quality LED panel lights effectively. Trust me, mastering these techniques transforms your videos into vibrant, professional-looking content that grabs attention and conveys your message with clarity and style.
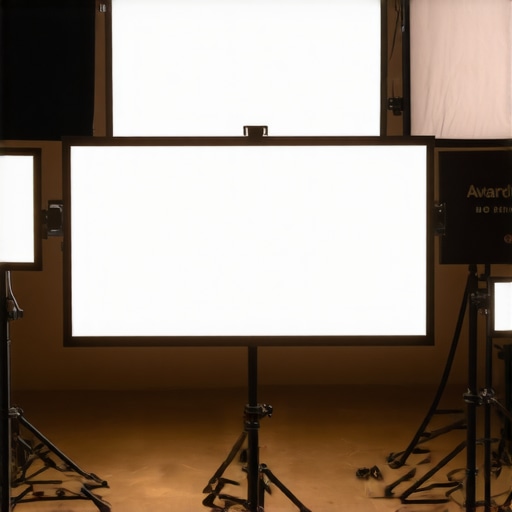
Why Proper LED Panel Lighting Can Make or Break Your Studio Videos
In the realm of studio videography, lighting isn’t just a technical detail; it’s the foundation of visual storytelling. The right LED panel lights, when used skillfully, can dramatically enhance your video’s mood, depth, and clarity. Especially in professional settings—whether you’re vlogging, creating tutorials, or producing cinematic content—lighting can be the game-changer.
Many creators underestimate the power of top-tier LED panels. Early on, I thought I could get away with generic setups, but I quickly learned that quality and technique matter just as much as the equipment itself. For example, positioning your key light correctly can highlight your best features and diminish unwanted shadows. Utilizing fill lights subtly balances exposure, ensuring your face looks natural and vibrant. Softbox accessories can diffuse harsh light, adding that soft glow that feels welcoming to viewers.
Moreover, choosing the right color temperature and intensity allows you to craft the perfect mood—whether you’re going for a warm, inviting glow or a crisp, clinical feel. The latest innovations in LED technology, as discussed in [a recent review](https://lights.creatorrigreviews.com/led-panel-lights-for-creators-a-complete-guide-to-brighten-your-videos), make it easier than ever to achieve consistent, flicker-free lighting, even in complex setups. This revolution in LED panel lights is nothing short of a boon for creators wanting professional quality without the hassle of traditional, bulky fixtures.
Now, I want to know—have you faced struggles with uneven lighting or subpar visuals despite your efforts? If so, don’t worry. The good news is, with a little guidance on top LED panel light techniques, you can dramatically improve your studio shoots and achieve stunning results. Let’s dive into the practical steps to make your lighting work for you, not against you, and elevate your video productions to the next level.
Position Your Key Light Precisely
Begin by setting your main light, or key light, at a 45-degree angle to your face, just above eye level. Think of it as casting a spotlight: it highlights your features and creates depth. I once placed my key light directly in front of me, flattening my features and eliminating any shadow play. Moving it slightly to the side instantly added dimension to my face, resembling professional interviews.
Use a Softbox for smooth illumination
Attach a softbox to your LED panel to diffuse harsh light, mimicking the effect of window light. This softens shadows and produces a flattering glow. During a recent shoot, I combined a softbox with a large LED panel, which gave my skin a natural radiance, improving my overall video quality.

Balance with Fill Light Effectively
Fill lights soften shadows cast by the key light, preventing high contrast that can be unflattering. Think of fill light as the gentle hand that brings balance—never overpowering, just enough to keep details visible. I experimented with a smaller RGB tube light placed opposite the key, dialing down its brightness until shadows looked natural, like in the subtle lighting techniques discussed here.
Leverage RGB Tube Lights for Creative Flair
RGB tube lights add vibrant color or subtle warm tones, giving your videos character. Position them behind your subject or along the edges to create depth and mood. I once installed a pair of RGB tubes on adjustable stands, using different colors to match the scene’s emotion. For more inspiration, check this guide.
Experiment with Light Height and Distance
The height and distance of your lights impact shadows and texture. Closer lights intensify brightness but can cause hotspots, while higher placement creates softer, overhead lighting. I initially placed my LED panels too close, resulting in unflattering shiny spots—moving them back and raising their angle softened the image and added natural shadows, similar to techniques in this article.
Mix Multiple Light Types for Depth
Combining softboxes, LED panels, and RGB tubes offers nuanced control. Use a softbox as your primary, fill with a smaller LED panel, and accent with RGB tubes. This layered approach creates a rich, professional look. I often start with a softbox, then add colored accents with RGB tubes to match scene mood, following the multi-light strategies outlined here.
Many creators operate under common misconceptions about studio lighting equipment, particularly regarding fill lights, key lights, LED panels, softboxes, and RGB tubes. A prevalent myth is that brighter, more intense lighting automatically results in better video quality; however, this overlooks crucial nuances in light placement, color temperature, and subtle shadow control. For example, relying solely on high-output LED panels without considering the complementary roles of fill and key lights can lead to overexposed highlights and flat visuals, undermining the depth and contrast essential for professional-looking footage.
What advanced pitfalls should experienced videographers watch out for in multi-light setups?
In my experience, one frequently underestimated error is neglecting the color rendering index (CRI) of LED lights. Lights with a low CRI may appear bright but distort colors, making skin tones look unnatural—this can be a silent killer for cinematic quality. Studies indicate that using high-CRI lighting not only enhances aesthetic appeal but also reduces post-production color correction time. Additionally, many overlook the importance of light angle and diffusion—placing lights at incorrect heights can cast unflattering shadows or create hotspots, especially with hard LED sources. For example, a softbox effectively diffuses light but only if positioned correctly; placing it too close or at the wrong angle can produce unnatural shadows. Mastering softbox placement is vital, as discussed in this comprehensive guide. Furthermore, a common mistake is to treat RGB tube lights as mere color accents rather than leveraging their full potential for depth and mood creation. Thoughtful use of their hues and placement can dramatically change a scene’s emotional tone, but overusing them without considering the environmental context can lead to visual chaos rather than cohesion. For advanced practitioners, understanding the spectral output and color blending capabilities of RGB lights is key to achieving nuanced effects. To avoid falling into these traps, it’s essential to understand the intricacies of each lighting component beyond their basic functions. Integrating knowledge about light quality, placement, diffusion, and color science allows you to craft environments that enhance storytelling, not distract from it. For example, exploring key light techniques or innovations in LED technology can elevate your lighting game. Have you ever fallen into this trap? Let me know in the comments.
Maintaining your lighting equipment is essential for ensuring consistent, professional-quality results over time. I personally rely on a few key tools and routines to keep my setup performing at its best and to extend the lifespan of my gear. Regular cleaning is the first step. Using compressed air and microfiber cloths, I gently clean my softboxes, LED panels, and RGB tubes to remove dust and dirt that can diminish light quality. For softbox diffusers and filters, I occasionally remove and wash them with mild soap, ensuring they stay clear and free of particles—this maintains the soft, even illumination essential for flattering shots.
Monitoring the performance of LED panels is crucial, as their brightness and color temperature can shift over time. I use a dedicated light meter, like the Sekonic C-700, to regularly check the intensity and color accuracy of my lights. This allows me to calibrate or replace units before any degradation affects my videos. Additionally, many modern LED panels support firmware updates. Connecting them to the manufacturer’s app ensures I get the latest improvements, which can optimize color rendering and flicker-free operation—a feature highlighted in this guide.
Tools like Gaffer’s tape are invaluable for cable management, preventing accidental pulls that could damage connectors or cause lights to shift. I also keep spare batteries, cables, and mounting brackets on hand, so I’m never caught off guard during critical shoots. To prevent long-term issues, I schedule periodical checks on all power supplies and dimmers, replacing worn-out components before failures occur. This proactive approach aligns with best practices detailed in professional cinematography manuals and ensures my gear remains reliable through heavy usage.
Looking ahead, as RGB and LED technology evolves, I anticipate longer-lasting, smarter fixtures with self-calibration features. The integration of AI-driven diagnostics might soon allow lights to alert you when performance drops, ensuring you always work with optimal quality. To stay ahead, I plan to incorporate regular software updates and tech reviews into my maintenance routine. Implementing these maintenance strategies—along with investing in high-quality equipment—helps me produce consistently stunning visuals, even under demanding conditions.
How do I maintain my lighting gear over time?
Developing a routine for cleaning, calibration, and checking connections is key. I dedicate a monthly session to inspect all components, clean surfaces, update firmware, and verify light output with my light meter. Keeping detailed logs helps track when each unit was last serviced, so I can plan ahead for replacements and upgrades. It’s also worth subscribing to updates from equipment manufacturers, as they often release firmware patches that enhance performance and longevity. Remember, your gear is an investment—treat it with care and you’ll ensure it continues to support your creative vision for years to come. For comprehensive strategies, see this collection.
Lessons Only Experience Can Teach
One of the most significant lessons I learned was that more light isn’t always better; it’s about how you use it. I once believed cranking up my LED panels would make my videos shine, but it often resulted in overexposure and flattened images. The real breakthrough came when I realized that *placement* and *diffusion* matter just as much as intensity.
Another insight was understanding that your choice of color temperature can dramatically influence mood without adding extra equipment. Small adjustments here can evoke warmth, coolness, or even dramatic tension, making your scenes more compelling.
And perhaps the most personal lesson—never underestimate the power of subtlety. Using softboxes correctly to diffuse light transformed my skin tones and shadow play, creating a polished, professional look that truly stands out.
Tools and Resources That Elevated My Lighting Game
My all-time favorite resource is this guide on LED innovations. It helped me select lights with high CRI and flicker-free operation, crucial for quality results. For softbox techniques, these practical tips have been invaluable for achieving soft, natural lighting.
When it comes to maintaining equipment, I trust this maintenance routine to keep my gear performing flawlessly, ensuring consistent results over time. Investing in good tools like light meters and high-quality stands has saved me countless hours of post-production adjustments.
For inspiration and deeper knowledge, I often turn to professional cinematography blogs and forums. They’re filled with insights on advanced lighting setups that push creative boundaries—an essential for anyone serious about elevating their craft.
Seize Your Lighting Moment and Transform Your Content
Great lighting isn’t just about equipment; it’s about your willingness to experiment and refine. Each scene you light is a canvas, waiting for your personal touch to bring it alive. Whether you’re aiming for cinematic richness or crisp tutorials, mastering your fill lights, key lights, and accenting RGB tubes opens endless creative possibilities.
Remember, the journey toward professional lighting is ongoing. The more you explore and experiment, the more intuitive your setups will become. So take those lessons, trust your instincts, and give your videos the glow they deserve. Your audience will notice the difference—and so will you.
What’s Your Next Lighting Challenge?
Have you struggled with balancing your fill light with your key light? Or perhaps you’ve hesitated to incorporate RGB tubes into your setup? Share your experiences below, and let’s grow together in mastering studio lighting that truly makes a difference.
![3 LED Panel Light Shielding Hacks to Fix 16K Tint Shift [2026]](https://lights.creatorrigreviews.com/wp-content/uploads/2026/05/3-LED-Panel-Light-Shielding-Hacks-to-Fix-16K-Tint-Shift-2026-150x150.jpeg)


2 responses to “Top LED Panel Light Techniques for Bright Studio Videos”