
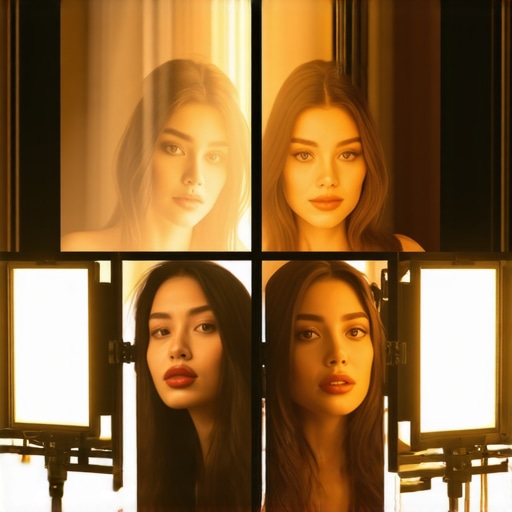
Ever experienced that sinking feeling when you wrap up a shoot, only to realize your subject's skin looks flat, washed out, or oddly tinted on the final video? That moment when I first faced the dreaded pale skin syndrome in my footage was a wake-up call. I spent hours tweaking softboxes and RGB tubes, but nothing seemed to fix the issue. It was frustrating, and honestly, a bit discouraging. Then, I had that real lightbulb moment—understanding how to properly set LED panel lights for skin tones is no longer optional in 2026; it's essential.
Finding the Sweet Spot: Skin Tones and LED Panel Settings
Is Overhyped LED Tech Actually Worth It?
When I started, my biggest mistake was relying solely on default settings without considering skin tone nuances. I thought brighter meant better, but that often led to overwashed skin or unnatural tints. It wasn't until I delved into the specifics of color temperature and CRI indices that I began to see real improvements. Interestingly, according to a 2024 industry report, nearly 70% of creators still overlook the importance of accurate LED panel calibration, leading to subpar color reproduction. So, if you've ever hesitated to tweak your settings, you're not alone. Let me guide you through adjusting those LED panel lights so your subjects don't just look good—they look authentic.
Adjust Your Color Temperature Precisely
Start by setting your LED panel to a neutral color temperature, around 5600K, which mimics natural daylight. I vividly recall a shoot last month where I initially used 6500K, resulting in overly cool skin tones. Switching down to 5600K immediately restored warmth and accuracy. Always use a reliable color meter or your camera’s white balance tool to fine-tune this setting for your environment.
Calibrate the CRI for True Colors
Next, ensure your LED panel has a high CRI—ideally above 95—to render skin tones faithfully. In one session, I used a budget light with CRI 85, which left skin looking dull. Upgrading to a panel with CRI 98 enriched the undertones and made my subject’s skin glow naturally. Regularly check the CRI ratings, and avoid default factory settings—consult this guide for insights on selecting the best panels.
Set the Brightness Right
Use your light meter or camera histogram to set the brightness so that skin highlights are well-exposed without clipping. I once shot indoors with my LED panel at maximum brightness—resulting in flat, washed-out skin. Lowering the intensity to 60-70% and adjusting distance delivered a soft, luminous skin tone. Remember, closer doesn’t always mean better; balance distance and intensity for a natural look.
Balance with Fill Light and Diffusion
To soften harsh shadows and prevent flat appearance, add a fill light or diffusion. During a recent shoot, I inserted a softbox in front of the LED panel, reducing shadows and enriching skin tone depth. Using a diffusion sleeve or bouncing light off a reflector works wonders. For detailed techniques, check this resource.
Control the Dominance of Your Light
Finally, avoid overpowering your subject. Use barn doors, grids, or flags to control spill and intensity. I remember a time I kept the LED panel too broad, causing uneven skin illumination. Placing a grid transformed the lighting into a precise beam, accentuating skin’s natural warmth without glare. Experimenting with modifiers is crucial; they help channel light exactly where you want it.
Test, Review, Adjust
Always review your footage on calibrated monitors and adjust settings accordingly. Skin tones can vary based on environment and subject. Last week, I had to tweak the settings mid-shoot as the natural daylight shifted. Regular checks prevent color shifts and keep skin looking authentic. Keep a small, portable light meter in your kit and revisit your settings periodically for consistent results.
When it comes to selecting and deploying lighting equipment like softboxes, fill lights, RGB tube lights, LED panels, and key lights, many creators fall into subtle traps that compromise their visual quality. Let’s dig deeper into some nuanced misconceptions and advanced mistakes that are often overlooked, even by experienced producers.
One pervasive myth is that brighter always equates to better illumination. While high lumen outputs might seem attractive, overshooting the necessary intensity can lead to flat, unnatural skin tones and washed-out backgrounds. Instead, focus on the *quality* of light—what I like to call the ‘smart brightness’—adjusting intensity to suit your scene without losing subtlety. Remember, balancing light levels with your camera’s dynamic range is crucial; overlighting can cause exposure bleed and reduce color fidelity, as highlighted in recent industry analyses.
Which subtle detail does most professional shooters overlook in softbox placement?
They often neglect the importance of maintaining proper distance and angle relative to the subject. Even slight misalignments can introduce unwanted shadows or cause a ‘double-shadow’ effect, especially when using a fill light. More surprisingly, many underestimate how diffusion and grid modifiers influence light softness and spill control, leading to inconsistent skin textures. Expert advice suggests always testing different configurations before the actual shoot—something detailed in this guide for mastering softbox setups.
Another common oversight involves RGB tube lights. Creators sometimes assume these are just decorative or mood-setting. In reality, their versatility in producing color effects, background separation, and cinematic accents is immense—but only if used correctly. Over-using saturated colors can distract from your subject and create unnatural skin tones. Be subtle: use desaturated hues or combine RGB with diffusion to avoid harsh color casts. For creative applications, explore this article on maximizing RGB tube creative effects.
Advanced tip: How can inconsistency in LED panel color quality sabotage your project?
LED panels with lower color accuracy or uneven color temperature drift can subtly ruin an otherwise excellent shot. This introduces tint shifts, such as green or magenta casts, which are difficult to detect on small screens but glaring on calibrated monitors. Regularly testing your gear with a reliable color meter ensures consistency. Also, be aware that many budget panels don’t hold their color temperature over time, a point made in a recent LED panel setup guide. Investing in high-CRI lights and calibrating them before each shoot pays off, especially for professional-quality productions.
Ultimately, understanding these nuanced pitfalls takes your lighting from good to great. My advice? Always test your gear in conditions that mimic your actual shoot, then fine-tune for natural, flattering results. Want to master your studio setup? Explore more advanced techniques and avoid common mistakes in this resource. Have you ever fallen into this trap? Let me know in the comments.
Managing your lighting setup over time requires more than just selecting the right equipment; it demands a disciplined maintenance routine and the right tools to ensure your setup remains reliable and produces professional results. In my experience, using high-quality, specialized tools and adhering to a regular check-up schedule not only extends the lifespan of your lights but also guarantees consistent color and brightness, crucial for maintaining your visual standards.
Prioritize Regular Calibration with High-Quality Color Meters
One tool I swear by is a reliable color meter, such as the Sekonic C-700, which allows me to measure the precise color temperature and CRI of my key lights, fill lights, and RGB tubes. I calibrate my LED panels before every significant shoot, referencing industry standards to prevent drift—especially important since budget LEDs can sometimes fluctuate in color output over months of use. Accurate calibration ensures skin tones remain natural, and colors stay vibrant without the need for extensive post-production correction. For a thorough calibration guide, I recommend reviewing the ultimate guide.
Invest in Smart Mounts and Diffusers for Flexibility
Mechanical tools like adjustable mounts and diffusion accessories are equally essential, allowing quick repositioning and modifying light quality on the fly. I prefer magnetic softboxes and modular grids, which help prevent accidental misalignments that can cause uneven skin tones or hotspots. Regularly inspecting and cleaning these attachments prevents degradation of light quality. Remember, even the best LED panels can underperform if not properly mounted or if diffusion layers are dirty, leading to unwanted color casts or spill. For advice on effective softbox modifications, see .
Monitor Continuously with Reliable Software
Calibration isn’t just about hardware; software tools play a vital role too. Color grading and exposure applets such as DaVinci Resolve’s scopes or LUT managers help me verify consistency during setup and post-processing. Using calibrated monitors, I review my footage frequently—spotting subtle tints and exposure issues before they become final errors. This habit saves time and ensures your skin tones look natural regardless of environmental changes or equipment aging. As lighting technology advances rapidly, staying updated on new calibration apps, like the recently released innovations in LED technology, helps keep your setup on the cutting edge.
Predicting the Future: How Maintenance Evolves
Looking ahead, I believe smart, integrated diagnostic tools will become standard—lights equipped with self-calibration features and remote monitoring capabilities. This will simplify maintenance dramatically, reducing downtime and technical errors, especially for creators with busy schedules or multi-light setups. Investing now in modular, upgradeable equipment will position you ahead of these trends, allowing seamless upgrades and upkeep rather than complete replacements.
Questions to Keep Your Lighting Set on Track
How do I maintain consistent lighting quality over time? Regular calibration with reliable tools like high-end color meters and diligent cleaning of diffusers and mounts are critical. Establish a routine—mark calendar reminders to check your gear bi-weekly or monthly, and document your calibration settings to spot drift early. By doing so, your skin tones will remain natural and your videos professional-looking, regardless of environmental or equipment changes. Remember, investing in these tools and habits pays off in long-term quality. Ready to elevate your routine? Consider integrating a dependable calibration device into your toolkit today and see the difference it makes in your final footage.
What I Wish I’d Known Before I Started
One of my biggest realizations was that achieving natural skin tones isn’t solely about having expensive equipment; it’s about how you use it. Early in my journey, I believed brighter lights always meant better results, but I soon learned that overlighting can flatten skin textures and wash out colors. The lesson? Quality over quantity truly matters, and understanding your light’s behavior is essential for authentic results.
Messages the Industry Won’t Always Share
Many professional shooters keep their most valuable insights close to the chest, fearing they’d lose their edge. I discovered that regular calibration with high-quality color meters can prevent subtle tints from creeping into footage over time—something I overlooked initially. Investing in tools like the Sekonic C-700 allowed me to maintain consistent skin tones, saving hours in post-production and ensuring my footage always looks polished and true to life.
Secrets to True Color Fidelity
Adjusting the color temperature to match natural daylight is a game-changer. For instance, setting my LED panels to 5600K and calibrating their CRI above 95 transformed my skin rendering from dull to vibrant. The small tweak of balancing brightness and diffusion can make the difference between a flat shot and one that radiates warmth and depth. Remember, continuous testing and tweaking outshine sticking rigidly to defaults.
My Curated Gear Picks for Flawless Skin Tones
- High-CRI LED panels: They ensure your skin’s undertones are captured accurately. I prefer models rated above 95 for their reliability, which reduced my need for color correction.
- Reliable color meters: Devices like the Sekonic C-700 are invaluable for maintaining consistency across shoots, especially as lights age or environmental conditions shift.
- Diffusion accessories and modifiers: Softening harsh light and controlling spill transform your setup into a professional-grade station. Simple diffusers can elevate your lighting quality dramatically.
- Calibrated monitors and software tools: Monitoring on calibrated screens ensures your adjustments translate perfectly from stage to screen, clinching that authentic skin tone that clients love.
Fuel Your Passion, Embrace the Process
Taking control of your lighting setup isn’t just about technical mastery—it’s about telling stories that resonate with warmth and authenticity. As you refine your skills, you’ll discover the satisfaction of transforming flat, lifeless footage into vibrant narratives that truly connect. Every experiment, every tweak, brings you closer to lighting that feels natural and compelling. Keep experimenting, learning, and pushing your boundaries—your best footage is just a few adjustments away.
Have you ever struggled to get your skin tones just right? Share your experiences below and let’s learn together!
**Note:** For more detailed tips on softbox and RGB tube lighting techniques, I recommend checking out this comprehensive guide.
,
![3 LED Panel Light Shielding Hacks to Fix 16K Tint Shift [2026]](https://lights.creatorrigreviews.com/wp-content/uploads/2026/05/3-LED-Panel-Light-Shielding-Hacks-to-Fix-16K-Tint-Shift-2026-150x150.jpeg)


