
I vividly remember the moment I set up my first RGB tube lights in my small studio. Eager to create vibrant, professional-looking videos, I plugged them in only to be greeted by uneven lighting, color inconsistencies, and a sense that my setup was more chaotic than inspiring. That frustrating experience sparked a realization: effective RGB tube light strategies are essential to transforming a cluttered space into a creative haven.
Why Your RGB Tube Lights Could Make or Break Your Studio Vibe
In the world of content creation, lighting isn’t just about illumination; it’s about crafting an atmosphere that captures your audience’s attention. RGB tube lights are versatile tools—able to produce a spectrum of colors and moods—but without the right strategy, they can turn your studio into a palette of mismatched hues. The key to unlocking their potential lies in understanding how to optimize placement, color temperature, and effects. I’ll share my journey from trial and error to expert technique, so you don’t have to waste time fumbling through the same pitfalls.
Are you struggling with inconsistent lighting or feeling overwhelmed by the sheer number of options? You’re not alone. Many creators make the mistake of buying RGB lights without a solid plan, leading to frustration and subpar results. Early on, I wasted hours adjusting colors and setting up lights randomly, convinced I needed more equipment. A study from the American Lighting Association highlights that proper placement and planning can significantly improve how colors render on camera, making your visuals pop without extra post-production work.
In this guide, we’ll dig into practical strategies—from choosing the right light positions to mastering color effects—that will elevate your studio setup. Whether you’re streaming, filming tutorials, or shooting cinematic scenes, these insights aim to make your lighting both effective and inspiring.
Now, let’s explore how to make your RGB tube lights work smarter, not harder, so you can focus more on your creative process and less on fighting with your gear.
Position Your Lights Strategically for Natural-Looking Results
To start, think of yourRGB tube lights as painters’ brushes; placement is everything. Begin by setting a fill light—place it slightly below eye level, angled towards your face—to soften shadows. Next, position your key light at a 45-degree angle from your subject, mimicking natural sunlight, to emphasize contours without harsh lines.
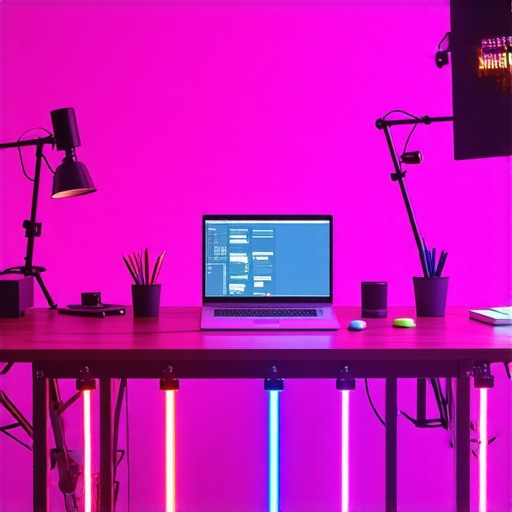
When I set up my first scene, I initially placed the RGB tubes directly behind the camera, which rendered flat images. After repositioning them to the sides, I noticed a significant boost in depth and dimension. Remember, the goal is to avoid flat lighting; instead, aim for layers that add volume and interest.
Control the Spread with Distance and Angles
Adjust the distance of your RGB lights from the subject to control their softness and intensity. Bringing the lights closer creates a softer, more diffused effect—think of it like widening the aperture for a blurry background. Use barndoors or softboxes if possible, but for RGB tube lights, adjusting the angle is often more effective.
During my session, I initially had the RGB tubes right next to me, causing harsh highlights. Moving them further away and angling them correctly softened the highlights, making my skin tone appear more natural and pleasing. Consider using redirection flags or barn doors to fine-tune the spread further.
Master Color Effects Without Overdoing It
Leverage the versatility of RGB lights by experimenting with color temperatures and effects. Start with subtle hues—like a light blue or warm amber—to set your mood. Use the effect modes to create fades or pulsing effects for more dynamic scenes.
In one shoot, I aimed for a moody, cinematic look. I set the RGB tubes to a deep purple and slowly transitioned to pink, creating an atmospheric vibe that captivated my audience. For detailed tips and creative ideas on effects, check out https://lights.creatorrigreviews.com/rgb-tube-light-effects-creative-uses-for-evening-shoots
Balance Light Sources for a Cohesive Look
Integrate your RGB tube lights with other lighting equipment to achieve harmony. Place a softbox or LED panel as a neutral fill—this prevents your scene from looking overly stylized unless that’s your intention. A soft, white light acts as a canvas, allowing your RGB accents to stand out.
I recall a shoot where I used a large softbox for my main light, with my RGB tubes providing accent colors. The resulting footage had natural skin tones with vibrant color pop. Without balancing these sources, the colors could have overwhelmed or clashed. Using the softbox as the primary anchor ensures your scene remains visually pleasing while allowing color effects to shine.
Utilize Creative Effects to Enhance Your Style
Once your setup is solid, explore creative effects to elevate your content. Use the dynamic effects on your RGB tubes for evening shoots or thematic videos. For example, flashing or strobing effects can mimic club lights or dramatic lightning.
I experimented with a slow fade between colors, adding a mysterious atmosphere to my latest project. For more inspiration on effects, visit https://lights.creatorrigreviews.com/rgb-tube-light-effects-creative-uses-for-evening-shoots
Remember, the key is subtlety and purpose. Excessive use of color can distract or confuse your audience, so always consider the mood you want to convey.
Fine-Tune Your Lighting with Test Shots
Before recording your main scene, spend time capturing test shots. Adjust your RGB lights’ positions, colors, and effects based on how they render on camera. Monitor the results on your screen closely—sometimes what looks good to your eye translates differently on video.
In my early days, I spent an hour adjusting, only to find the camera needed minor tweaks to the angles for perfect consistency. This iterative process is crucial for professional-looking content and can save hours in post-production.
By following these pragmatic steps—perfect placement, balanced integration, creative effects, and continuous testing—you can turn ordinary RGB tube lights into powerful storytelling tools. Every step builds upon the last, transforming your studio into a vibrant, versatile space tailored to your creative needs.Many content creators assume that all lights are created equal when it comes to studio illumination, but this misconception can compromise your video quality. One common mistake is treating fill light, RGB tube lights, key lights, softboxes, and LED panels as interchangeable instead of understanding their unique roles and nuances. For example, a fill light isn’t just a supplementary source; it’s carefully designed to soften shadows and balance exposure without overpowering your primary light, as explained in this guide. Misusing or overusing fill lights can flatten your scene and diminish depth.
Another trap many fall into involves RGB tube lights. Some creators believe that cranking the color saturation and effects always makes their scenes more dynamic. However, going overboard with color effects often distracts viewers and diminishes professionalism. Subtlety is key; employing these effects strategically enhances mood without overwhelming the viewer. For advanced users seeking refined techniques, I suggest checking this resource.
Is More Always Better When Using Key Lights or Softboxes?
A frequent misconception is that larger or more powerful lights automatically improve your shot quality. In reality, light quality and placement are far more critical than intensity alone. Softboxes provide diffused, even lighting perfect for flattering skin tones, but their size and distance from the subject must be calibrated carefully. An oversized softbox too close can create flattened features, while too far away may result in insufficient lighting. You can learn effective softbox techniques from this post.
Similarly, with LED panel lights, the misconception is that increasing brightness will compensate for poor positioning. However, studies, including those from industry experts, show that proper angle and diffusion significantly impact the naturalness of your scene. Overly bright lights can cause glare or hot spots, leading to unflattering results and additional editing time. Remember, quality lighting hinges on understanding the purpose of each element and deploying them thoughtfully.
The crux of mastering studio lighting lies in recognizing that tools like fill light, RGB tube lights, key lights, softboxes, and LED panels each possess distinct functions. Using them thoughtfully enhances your visual storytelling, saving you time and elevating your production quality. If you’re guilty of treating these tools as generic solutions, now is a perfect time to reassess your approach. Want me to deep dive into specific setups? Reach out through this contact page.
Have you ever fallen into this trap? Let me know in the comments.
Keeping Your Lighting Gear in Top Shape for Consistent Results
Ensuring your studio lighting tools perform reliably over time requires regular maintenance and thoughtful care. My firsthand experience has shown that adopting a routine enhances the longevity of equipment like RGB tube lights, softboxes, and LED panels, saving you money and preventing inconvenient downtime. Start by inspecting your gear after each session—check for dust buildup, loose connections, or minor damages. For delicate components, such as connectors on LED panels or control modules on RGB lights, using a soft brush or compressed air can prevent malfunction caused by dirt or debris. Additionally, maintaining your softboxes and diffusers involves gentle cleaning with a damp cloth—avoiding harsh chemicals to preserve fabric integrity. A well-maintained setup ensures consistent color rendering and reliable effects, which is crucial for professional-level content creation. I recommend creating a checklist for weekly and monthly inspections, covering all your primary and auxiliary lighting equipment. This proactive approach minimizes surprises during shoots and maintains your studio’s visual standards. When it comes to tools, I rely heavily on specific software for calibration and troubleshooting. For example, using light meter apps like Photone to measure and verify color temperatures across your lights helps maintain uniformity. Also, investing in a high-quality power strip with surge protection prevents damage from electrical fluctuations, especially important for sensitive electronic gear. Predicting future trends, I believe smart lighting systems integrated with IoT technology will become essential. These advancements will allow remote monitoring and automated calibration, making maintenance more seamless than ever.
How do I maintain my lighting setup over time?
My best practice involves establishing a regular maintenance schedule—cleaning and inspecting after each use, calibrating with tools like light meters and software, and replacing worn-out parts proactively. This ensures that your studio’s lights continue to deliver vibrant, consistent results, whether you’re shooting videos or photography sessions. Don’t overlook the importance of documenting your maintenance routines; keeping records helps identify patterns and preempt issues. For example, regularly checking a specific RGB tube’s color accuracy can alert you to early signs of LED degradation, as discussed in technical documentation from LED manufacturers. Keep your tools calibrated and clean, update firmware when applicable, and stay informed about new accessories that can enhance lifespan, such as protective covers or upgraded diffuser fabrics. Be diligent and proactive—your ongoing investment in equipment health guarantees long-term creative success. Want to optimize your RGB tube lights further? Try integrating advanced effects like the creative transitions discussed here: https://lights.creatorrigreviews.com/rgb-tube-light-effects-creative-uses-for-evening-shoots. Remember, small consistent actions today prevent major setbacks tomorrow, ensuring your studio remains vibrant and professional for years to come.
Throughout my journey with fill light, RGB tube light, key light, softbox, and LED panel light setup, I’ve uncovered some truths that often go unnoticed. One of the most vital lessons is that equipment alone won’t elevate your content—it’s how you wield these tools that makes all the difference. Trial and error taught me that precise positioning can turn flat lighting into depth-rich scenes, and subtle hue adjustments often create more mood than dramatic color shifts. I also realized that consulting industry experts and trusted resources, like this guide, accelerates growth and refines technique. Lastly, embracing ongoing maintenance and calibration ensures consistency, helping your studio stay top notch. These insights are not just technical; they unlock your creative potential and foster confidence in your craft.
![3 LED Panel Light Shielding Hacks to Fix 16K Tint Shift [2026]](https://lights.creatorrigreviews.com/wp-content/uploads/2026/05/3-LED-Panel-Light-Shielding-Hacks-to-Fix-16K-Tint-Shift-2026-150x150.jpeg)


