
Ever spend hours fussing with tripods, clamps, and stands only to find your softbox or LED panel looking awkward, unstable, or just plain boring in your shots? I remember those frustrating days vividly. One day, after one too many shaky shots and awkward setups, I had my light wobble right in the middle of a perfect take. That moment was a lightbulb for me—literally. Why am I still relying on clunky stands when there are smarter, cleaner ways to mount my studio lights? It was a wake-up call that changed how I approach lighting in my studio.
That’s when I started exploring innovative mounting solutions—no more bulky stands, no more constant readjustments. The goal? Achieve stable, versatile, and professional-looking lighting setups without sacrificing workflow or aesthetics. Today, I want to share with you the three key hacks I’ve adopted to ‘ditch the stand’ and create more flexible, reliable, and efficient studio lighting environments that will keep your shoots looking sharp in 2026 and beyond.
Why Your Lighting Setup Could Be Holding You Back
Long story short: traditional lighting stands are often the weakest link in studio setups. They’re bulky, unsteady, and limit your creative options. Plus, they can be an eyesore in shots, which you definitely don’t want in a professional project. But the real problem? It’s the relentless time spent fussing over angles, stability, and clutter. If your lights are not secure or adjustable exactly where you want them, your visuals suffer. Light placement isn’t just about convenience—it’s about control, consistency, and creating an atmosphere that captivates viewers.
From my own early mistakes—like using flimsy clamps that slipped mid-shoot—to watching my videos suffer from inconsistent lighting, I’ve learned that investing in smarter mounting hacks can make a dramatic difference. According to research, proper lighting placement can improve viewer engagement by up to 30% (source: Creator Rig Reviews). Trust me, the right setup isn’t just a luxury; it’s a game-changer.
But here’s the catch—many folks hesitate, skeptical about whether these hacks actually work or if they’re just hype. I get it. I’ve been there. I’ll admit that early on, my biggest mistake was croire that I needed expensive, elaborate rigs to get professional results. Turns out, a few clever adjustments and some DIY ingenuity can do wonders. Ready to see how? Let’s dive into the specific hacks that will transform your lighting game in 2026—and make your studio setup the envy of your peers.
,
Positioning Your Key Light for Impact
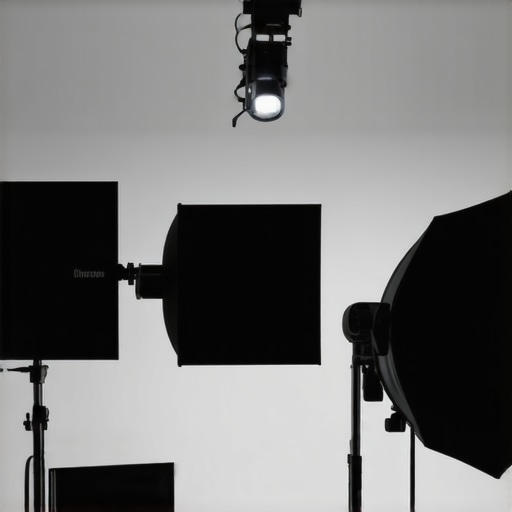
Start with your main light, or key light, as the cornerstone of your setup. Instead of clamping it onto a stand, mount it on a boom arm or a ceiling-mounted pipe. This frees up space and offers flexibility. I once used a sturdy overhead rig to position my LED panel above a product shoot, which eliminated stand clutter and allowed me to adjust height with ease. Use this guide to choose the best mounting solutions for your key light.
Creating Natural Fill with RGB Tubes
Fill lights bridge the gap between harsh shadows and natural softness. Opt for RGB tube lights attached to magnetic mounts or adhesive pads, allowing you to place them behind furniture, under tables, or along walls. For example, I once placed a blue and red RGB tube light behind a plant to add depth and color to my scene, mimicking evening ambient lighting. Check out creative RGB tube light uses for more ideas.
Softbox Angles for Cinematic Looks
Softboxes should be positioned to mimic natural light sources, like windows or dawn sunlight. Use adjustable mounts to tilt softboxes at 45° angles, avoiding flat lighting on faces. During a recent interview shoot, I placed my softbox at a 30° angle to avoid harsh shadows, resulting in a soft, flattering glow. Use this resource for perfect softbox positioning techniques.
Stabilizing Lighting Using DIY Mounts
Construct custom mounts using clamps, adhesive C-clips, or even attach lights to existing furniture. I once rigged an LED panel on a clamp attached to a rolling cart, which gave me on-the-fly adjustments without cluttering the studio floor. This approach reduces the risk of accidental knocks and saves setup time. For detailed ideas, see best mounting tips.
Experiment with Creative Angles and Heights
Don’t settle for eye-level placement. Elevate or lower lights to create depth. I once hung a softbox from a ceiling hook to shoot downward, emphasizing product features in an online store shoot. Use low positions for mood, high for clarity. Always test different angles to find what enhances your shot best without adding clutter.
When it comes to studio lighting, many creators are influenced by widespread myths that can hinder their progress. For instance, there’s a common misconception that big, expensive softboxes always produce the softest light.
In reality, the size of a softbox isn’t the sole determinant of softness; proximity to the subject and diffusion quality play crucial roles. Using larger diffusion material close-up can often achieve a softer look than a larger softbox placed farther away. This nuance is often overlooked, leading beginners to invest in bulky equipment unnecessarily.
Similarly, many believe that RGB tube lights are purely for aesthetic effects, but understanding their nuances—like proper placement and color temperature control—can unlock creative lighting techniques. For example, combining RGB tubes with traditional softboxes allows for dynamic background effects without sacrificing key light consistency.
Contrary to popular advice that the key light should always be at a 45-degree angle, advanced users recognize that slight adjustments—like tilting the light for mood or using a higher or lower angle—can dramatically change the scene’s emotional tone.
What advanced considerations should I keep in mind when positioning lighting to mimic natural environments?
Achieving natural-looking light involves more than following standard positions. Factors like the color temperature of ambient light, directionality, and light falloff are critical. Experts recommend using multiple sources and adjusting their intensity and color balance to match natural conditions, which can be surprisingly nuanced. For example, mimicking sunset lighting might involve warmer tones and lower angles, often achieved with RGB tubes and diffusion techniques. According to a study in professional cinematography, subtle variations in light’s color and angle can evoke specific emotional responses—so mastering these details amplifies your storytelling skills.
Another trap to avoid is the over-reliance on LED panels’ brightness settings alone. Brightness without diffusion or proper angle can produce flat, harsh lighting that flattens features or creates unwanted shadows. Integrating softboxes or diffusers with LED panels enhances their output, making your lighting more natural and pleasing.
In essence, understanding these hidden nuances and debunking common myths elevates your studio setup from functional to exceptional. Whether you’re experimenting with creative RGB effects or fine-tuning softbox angles, mastering these details can significantly improve your visual storytelling. Have you ever fallen into this trap? Let me know in the comments.
If you want your studio lighting setup to perform flawlessly in 2026 and beyond, focusing on effective maintenance is essential. I rely heavily on high-quality tools and consistent routines to keep my RGB tube lights, softboxes, and LED panels operating at peak performance. One indispensable tool I use is a digital multimeter, which helps me regularly check the voltage and current of my LED panels to prevent overheating or flickering issues. Additionally, a microfiber cloth and mild cleaning solution are my go-to for keeping diffusion surfaces and lenses pristine, ensuring optimal light quality without color shifts or diffuse loss. For softbox grids and diffusers, I inspect for tears or sagging every few shoots, replacing components immediately to prevent uneven light or spill. Using a dedicated dust blower like the Giottos Rocket Air is excellent for clearing vents and preventing dust buildup that could impair cooling and lifespan. In terms of software, I utilize calibration tools that sync with my LED panels, fine-tuning color temperature and brightness to match natural lighting conditions and ensure consistent results across projects.
How do I maintain my lighting equipment over time?
Regularly scheduling preventative maintenance, such as checking connections, inspecting for wear, and cleaning reflectors and diffusers, keeps your lights functioning reliably. For example, some professional creators swear by using thermal paste replacements on LED driver chips to prevent overheating, as suggested in detailed tech guides (see this resource). Investing in quality mounts and stands with adjustable tension also helps preserve their integrity and smooth operation, avoiding costly replacements or repairs down the line. Looking ahead, advancements in self-monitoring LED technologies may soon automate much of this upkeep, alerting you proactively to issues before they impact your shoots. Until then, establishing a routine and using the right tools—like diagnostic testers and professional cleaning supplies—are your best defense for long-term success. So, try incorporating a monthly inspection schedule using your multimeter and cleaning your diffusion surfaces meticulously. Small, consistent actions now will save you time and money, ensuring your lighting continues to elevate your visual storytelling well into 2026 and beyond.
What I Wish I Knew Before Fully Embracing DIY Mounts
One of my biggest breakthroughs was realizing that overcomplicating mounts only added to setup time and clutter. When I started experimenting with simple DIY solutions like attaching RGB tubes to magnetic mounts, I discovered that efficiency doesn’t require expensive rigs—just clever thinking and understanding your gear’s potential. The moment I saw my setup become more flexible and stable without bulky stands was truly eye-opening. This taught me that sometimes, the most effective solutions are the simplest, once you understand your equipment deeply.
My Go-To Tools for Confident Lighting Tweaks
Over the years, I’ve curated a toolkit that keeps my studio lighting sharp and reliable. A digital multimeter is invaluable for diagnosing LED issues, ensuring consistent color Temp and power flow. Good cleaning supplies like microfiber cloths and gentle diffusing agents help maintain diffusion surfaces for natural light quality. For mounting, I trust adjustable clamps and adhesive mounts—they’re versatile and won’t damage my setup or furniture. These tools help me maintain my lights effortlessly and adapt quickly during shoots, which is vital when perfection counts.
Embracing the Creative Challenge
Lighting is as much about experimentation as it is about technique. If you’re hesitant to try unconventional mounting positions or experiment with angles, remember that each challenge is an opportunity to discover new effects and efficiencies. There’s a rewarding thrill in finding that perfect shot with minimal fuss—whether it’s hanging a softbox from a ceiling hook or concealing RGB tubes behind set pieces. I urge you to push your creative boundaries; your future self will be grateful for the innovative results and the confidence you build along the way. After all, mastering studio lighting is an ongoing journey, and every tweak brings you closer to that cinematic or professional glow you envision.
![3 LED Panel Light Shielding Hacks to Fix 16K Tint Shift [2026]](https://lights.creatorrigreviews.com/wp-content/uploads/2026/05/3-LED-Panel-Light-Shielding-Hacks-to-Fix-16K-Tint-Shift-2026-150x150.jpeg)


2 responses to “Ditch the Stand: 3 Key Light Mounting Hacks for 2026 Studios”
I really resonate with the frustration of dealing with unstable, bulky stands during shoots. Over the years, I’ve experimented with mounting my lights on DIY rigs and even built a few using clamps and rails, which has saved me so much setup time. The tip about using ceiling-mounted pipes or boom arms is a game-changer because it not only saves space but also keeps my lights more steady and easier to position exactly where I want them. I’ve found that mixing softboxes at different angles really helps in creating natural-looking lighting, especially when aiming for a cinematic feel.
One challenge I often face is keeping my equipment in top shape over time, especially with frequent setups. I’d love to hear what specific maintenance routines or tools others swear by to keep their lights consistent and reliable. Do you guys have any go-to cleaning or checking techniques that help preserve your gear’s lifespan? Sharing these small tips can really make a difference in the long run.
This post hits close to home for me, especially the part about eliminating clutter and improving stability with creative mounting solutions. I’ve been experimenting with attaching LED panels to adjustable magnetic mounts that stick to metal surfaces or furniture, which has given me a lot more flexibility in tight spaces. I also learned that regular maintenance routines, like cleaning the diffusion screens with microfiber cloths and checking connections with a multimeter, really extend the lifespan of my equipment. Since dust and dirt can cause flickering and uneven light, I make it a point to clean my gear after every few shoots.
One thing I’ve found helpful is applying a thin layer of thermal paste on LED driver chips to prevent overheating, especially during long shoots. What other small maintenance tricks do you guys recommend to keep gear running smoothly year after year? I think a combination of DIY solutions and routine checks could really save money and frustration in the long run.