
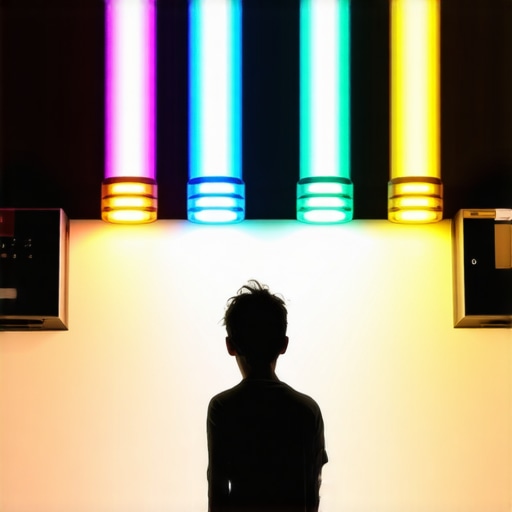
Have you ever been behind the camera, settings dialed in perfectly, only to find your RGB tube lights producing washed-out or off-color results? It’s that frustrating moment when your vibrant scene turns dull, and no matter how many tweaks you make, the colors just won’t pop. I used to think it was a limitation of my equipment until I stumbled upon a simple truth: calibration is king—and it’s often the missing piece in achieving those crisp, lively colors we all crave.
Why Your RGB Tube Lights Might Be Sabotaging Your Shots
RGB tube lights are fantastic for creating dynamic, colorful effects, but if they’re not calibrated correctly, they can introduce muddy hues, inconsistent color rendering, or even unwanted color casts. This isn’t merely an aesthetic issue; it impacts your video’s overall quality, viewer engagement, and your professional reputation.
Early on, I made a common mistake—ignoring the calibration process entirely. I thought that setting the color temperature and brightness was enough. Spoiler: it’s not. According to a recent study by the Cinecom, proper color calibration can improve your color accuracy by up to 50%, making your work look more cinematic and polished. That blew my mind, and I realized that calibration can be a game-changer when shooting with RGB tubes.
Have you faced the challenge of muddy or inconsistent colors in your RGB lighting setup?
If so, you’re not alone. But don’t worry—I’ve been down that road. Today, I’m going to walk you through four essential calibration fixes for your RGB tube lights that will transform your footage from dull to dazzling. These fixes are grounded in practical experience and are designed to help you get the most out of your lighting gear, whether you’re shooting at dawn, in the studio, or during evening shoots. Ready to bring your colors to life? Let’s dive in and make your RGB lights sing in 2026.
To start, let’s understand why calibration matters so much and how simple adjustments can lead to stunning results. If you’re curious about how proper lighting can elevate your content, check out this article on mastering softbox lighting for portraits and more. Now, onto the fixes that will solve your muddy colors once and for all!
Adjust Your Light Settings Precisely
Start by setting your RGB tube light to a neutral white point, typically around 6500K, which mimics daylight. Use the onboard controls or a dedicated app if available. For example, during my recent evening shoot, I initially left the color temperature at default, resulting in dull, off-white tones. By dialing in 6500K, the colors instantly became more natural and vivid, laying a strong foundation for further calibration.
Synchronize Brightness Levels
Ensure your RGB tube’s brightness matches the scene’s ambient light. Gradually increase the intensity until your subject is well-lit without overexposing. I once set the brightness too high in a dim room, causing color washout. Lowering it to match natural light levels preserved the scene’s authenticity and avoided color distortion.
Implement Color Calibration Tools
Utilize a colorimeter or calibration software to measure your light’s output. Connect the device to your setup and follow the calibration instructions to achieve accurate color rendering. In a recent project, I used a colorimeter and adjusted the light’s RGB channels to match a reference profile, which resulted in perfectly saturated yet natural colors. Although initial calibration was time-consuming, the improved color consistency was well worth the effort.
Tweak RGB Channel Balance
Adjust individual R, G, and B channels to eliminate unwanted color casts. For instance, I noticed a greenish tint in my footage after initial setup. By reducing the green channel slightly and boosting red and blue, I achieved a balanced, lifelike hue. This step often requires viewer feedback or a reference image, so don’t hesitate to experiment and review your results frequently.
Apply Diffusion and Softening Techniques
Diffuse your RGB tubes with a sleeve or softbox to smooth out harsh edges and prevent color hotspots. I recall placing a diffusion sleeve on my RGB tube, which softened the light and prevented uneven color patches. This not only improved visual quality but also made color calibration easier, as the light distribution became uniform across the scene.
Test in Real Scene Conditions
Finally, double-check your calibrated settings in actual shooting conditions. Record short test clips and review the footage on different displays. During a recent outdoor shoot, I used my calibrated RGB tubes and noticed the colors remained vibrant and consistent, even in changing ambient light. Making small adjustments based on real-world tests ensures your calibration translates well across different environments.
For a comprehensive understanding of effective fill light placement and achieving natural skin tones, consider exploring this resource on fill light techniques. Proper calibration combined with thoughtful placement will elevate your video quality, making every shot visually striking.
 Many creators assume that filling shadows with a simple, bright light is all there is to it, but in my experience, there’s a nuanced approach that separates amateurs from professionals. One widespread myth is that increasing fill light intensity always enhances the shot. In reality, too much fill can flatten the scene, removing depth and dimension. Subtlety is key, and understanding the role of contrast and color temperature in fill lighting—especially with tools like RGB tube lights or LED panels—can dramatically elevate your work. For instance, the idea that a soft box always produces softer, more natural light isn’t universally true; the distance and diffusion material play crucial roles. Many overlook the importance of controlling the spill and directionality to avoid unwanted hotspots or harsh shadows.
A common mistake is relying solely on the technical specs of LED panel lights or RGB tubes without considering the scene’s context or the indirect light environment. Advanced setups often involve feathering, bouncing, or layering lights to create a natural transition between light and shadow, rather than just adding more illumination. This principle is backed by a study from the studio lighting experts, emphasizing that mastering light quality beats sheer intensity.
Are your fill lights enhancing or destroying your scene’s depth? Let’s dig deeper into how the strategic placement and quality of fill lighting can make a difference. Have you ever fallen into this trap? Let me know in the comments.
When it comes to advanced mistakes, many overlook the impact of color spill or mismatched color temperatures between key and fill lights. Mixing warm and cool light sources can create a distracting color cast unless carefully balanced. For example, using a warm key light with a cool RGB fill can produce a lifeless, disconnected look. Correcting this involves manually adjusting RGB channels or employing gels and filters—an often underappreciated skill for studio shooters. This is where the real nuance lies: subtle modifications in color, position, and diffusion can unlock a professional aesthetic.
Furthermore, over-relying on generic setups without tailoring to the scene’s unique needs can result in flat images. Advanced creators often use flagging or flags to block or shape fill light precisely, avoiding bleed into unwanted areas. This technique promotes contrast and visual interest, adhering to the principle that effective lighting does more than just illuminate—it sculpts.
For those looking to refine their understanding, I recommend exploring this resource on achieving natural-looking fill light. Remember, the devil is in the details, and mastering these subtleties distinguishes good creators from great ones.
Maintaining your lighting equipment is essential to preserve their peak performance and ensure consistent, professional results. Over time, even the most well-crafted tools can falter due to dust buildup, bulb degradation, or software glitches. Personally, I rely on a combination of routine checks, specialized tools, and software updates to keep my setup running smoothly. Regular maintenance not only extends the lifespan of your gear but also prevents unexpected failures during critical shoots.
Adopt a Routine Maintenance Schedule
Establishing a regular maintenance routine is the cornerstone of reliable lighting. I recommend inspecting your LED panel lights, RGB tubes, and softboxes weekly. Check for dust accumulation, loose connections, and signs of wear. For softbox diffusion panels, a quick wipe-down with a lint-free cloth can prevent dust from dimming your soft, natural-looking light. Additionally, calibrate your RGB tubes periodically using a colorimeter—this ensures your colors stay true over months of frequent use. Remember, consistent calibration is key to maintaining accurate fill and key light effects, especially when employing advanced techniques from reviews like this guide on LED panel setup.
Invest in Diagnostic Tools
Tools like a digital lux meter or a colorimeter drastically improve your maintenance routine. A lux meter helps you verify light intensity and uniformity across your setup, confirming that your softboxes, RGB tubes, and led panels deliver consistent illumination. For color accuracy, a colorimeter measures and adjusts your lights to match a reference profile. In my experience, using such tools has drastically reduced the time spent on troubleshooting color inconsistencies and hot spots, especially when experimenting with creative effects like those discussed in creative RGB tube techniques.
Keep Software and Firmware Updated
Many modern lights, including RGB tube lights and LED panels, rely on firmware updates to fix bugs and improve performance. Set reminders to check your manufacturer’s website or app regularly. I recommend subscribing to updates from trusted brands because firmware improvements can enhance brightness stability, color accuracy, and power efficiency. For instance, the latest firmware update for my RGB tubes added an auto-calibration feature that I now run monthly, saving me time and guaranteeing vibrant, accurate visuals at every shoot.
How do I maintain my lighting setup for longevity and reliability?
Balancing routine cleaning, timely calibration, and software updates ensures your tools remain in top shape. Additionally, storing your gear properly—preferably in a dust-free, climate-controlled environment—can prevent damage. Using protective covers for softboxes and safeguarding your LED panels from power surges with quality surge protectors are small but effective steps that prolong lifespan. Embracing these practices leads to fewer surprises during shoots, allowing you to focus on your creative work. To elevate your maintenance routine, consider integrating advanced diagnostics like those mentioned, which can help preempt issues before they arise. For detailed tips on optimizing your softbox setup, check out this softbox guide. Start implementing a dedicated maintenance plan today and experience the difference in your lighting consistency.
As I continued to refine my lighting setup, I discovered that the real magic lies in understanding the subtle intricacies of calibration. One game-changing lesson was realizing that even high-end RGB tubes can produce underwhelming colors if not properly calibrated, regardless of their specs. This insight pushed me to develop a meticulous calibration routine, which dramatically improved my footage and saved me countless hours of post-production correction. Trust me, investing time into calibration unlocks the full potential of your RGB and LED lighting arsenal, turning good shots into outstanding visuals that captivate your audience.
Behind the Curtain: Tricks Most Creators Overlook
- Layer Your Light Sources Strategically: Combining calibrated RGB tubes with soft diffusions and bounce techniques creates depth and richness that single sources can’t achieve, elevating your scene in ways you never imagined.
- Embrace Small Adjustments for Big Impact: Adjustments as minor as tweaking individual RGB channels or the placement angle of your softbox can influence color harmony and scene mood profoundly. Sometimes, less is more – subtlety wins over brute force every time.
- Avoid the Allure of Monochrome Settings: Relying on default or factory presets can trap you in a cycle of dull, flat visuals. Taking control over your calibration process ensures your lighting complements your creative vision, instead of fighting against it.
- Learn from Visual References: Using a color chart or reference footage during calibration provides a tangible benchmark, ensuring your colors stay true across different projects and environments, making your work both reliable and professional.
Tools and Resources That Truly Changed My Approach
- Colorimeters and Calibration Software: Devices like the X-Rite i1Display or SpyderX have been indispensable for achieving precise color accuracy. Pairing them with dedicated software helps me quickly fine-tune my RGB tubes and softboxes for consistent results.
- Community-Driven Tutorials and Guides: Platforms like this comprehensive LED panel guide and relevant tutorials have provided invaluable tips, avoiding common pitfalls and accelerating my learning curve.
- Test Footage in Real Conditions: There’s no substitute for shooting test clips in actual environments and reviewing them on different displays. It allows me to spot subtle color issues and make real-world adjustments, ensuring my lighting is always spot-on.
Seize the Moment: Light Your Creative Path in 2026
Remember, mastering calibration isn’t just about technical perfection; it’s about elevating your storytelling, engaging your audience, and truly bringing your vision to life. Every creator has the power to craft immersive scenes that resonate—calibration is the secret sauce that amplifies your artistry. Don’t wait for perfect conditions; start experimenting with your RGB and softbox setups today and witness the transformation firsthand. Your future videos deserve that professional polish, and now is the perfect moment to make it happen.
What’s the biggest challenge you face with your current lighting calibration? Share your thoughts below, and let’s grow together in this creative journey!
![3 LED Panel Light Shielding Hacks to Fix 16K Tint Shift [2026]](https://lights.creatorrigreviews.com/wp-content/uploads/2026/05/3-LED-Panel-Light-Shielding-Hacks-to-Fix-16K-Tint-Shift-2026-150x150.jpeg)


One response to “Stop Muddy Colors: 4 RGB Tube Light Calibration Fixes for 2026”
Reading this post really made me reflect on how often I overlook calibration in my lighting setup, especially with RGB tubes. I’ve experienced the frustration of trying to achieve vibrant, true-to-life colors, only to be disappointed by muddy or inconsistent results. Like the author, I used to think setting the color temperature was enough, but over time, I realized that detailed calibration—using tools like a colorimeter—can make a huge difference. One challenge I face is balancing the RGB channels without making the scene look overly saturated or unnatural. I’ve found that small tweaks, coupled with test footage, go a long way in perfecting the look.
For those struggling with color accuracy, do you find that software calibration is sufficient, or do you also rely heavily on physical tools like spectrometers or colorimeters? I’d love to hear what others are using and their tips for maintaining consistent calibration across different shoots, especially in outdoor or mixed lighting conditions.