
Imagine setting up for a shoot, excited to capture that perfect shot. But as soon as you hit record, harsh shadows and overly bright spots reveal the flaws in your lighting. You try adjusting the softbox, tweaking angles, but nothing really softens those stubborn highlights. That was me not long ago. I remember thinking, “There has to be a way to get a smooth, natural look without expensive gear or complicated setups.” Turns out, a few surprisingly simple mods to my softboxes transformed my lighting — making my videos look more professional and inviting.
Why Softbox Mods Are the Missing Piece for Better Lighting
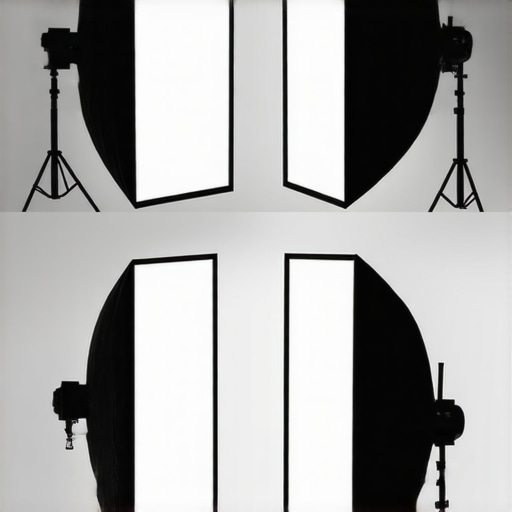
In the world of video and photo production, lighting can make or break your visuals. Softer, well-diffused light creates that beautiful, flattering look viewers love. Yet, many creators fall into the trap of using softboxes straight out of the box, only to realize their light is still harsh or uneven. The problem often boils down to the quality of diffusion and control.
Research shows that *diffused light reduces shadows and skin imperfections* — a critical factor for portrait and product shots. According to a study by professional photographers, even small adjustments to diffusion materials can significantly improve the quality of soft light (source: Ultimate Softbox RGB Tube Lighting Tips for Creators in 2024). Early in my journey, I made the mistake of assuming my softbox’s stock diffusion sock was enough — only to find my images looked flat and uninviting.
So, what’s the fix? In this post, I’ll walk you through four straightforward mods to your softboxes that will bring your lighting from mediocre to stunning. These tweaks are affordable, easy to implement, and best of all, incredibly effective. Whether you’re shooting portraits, product videos, or YouTube vlogs, these tips will help you craft softer, more natural-looking light that enhances your subject and elevates your content.
Ready to ditch the harsh shadows and achieve that luminous glow? Let’s dive into the first mod you can try today, and see how even small changes can make a big difference.
Adjust the Diffusion Material for Softer Light
Begin by replacing or supplementing the stock diffusion sock with higher-quality diffusion fabrics like opal or silk. During my first attempt, I used a thin shower curtain as a DIY diffuser. The result was a noticeable reduction in harsh shadows, creating a more natural glow. Cut the fabric into a size slightly larger than the softbox opening, and secure it tightly with clips or velcro, ensuring no wrinkles or slack that could distort the light.
Create a DIY Baffle for Better Light Control
Attach a foam board or cardboard baffle inside the softbox, positioned a few inches behind the diffusion layer. This prevents light from scattering directly and helps control spill, resulting in more focused illumination. I once stacked foam boards behind my softbox, which significantly improved the light’s softness and prevented unwanted spill onto the background. Secure the baffle firmly, and test the output, adjusting as necessary to get the desired diffusion without dulling brightness.
Upgrade to Higher-Quality Diffusers for Superior Softness
Replace the stock diffuser with professional-grade ones made from spun polyester or similar materials designed for studio lighting. These diffusers distribute light evenly and reduce hotspots. I ordered a universal softbox diffuser online, and the change was remarkable—my portraits gained a silky, even tone that was impossible with the original diffuse sock.
Enhance Your Softbox with Internal Bounce Surfaces
Line the interior walls with reflective materials like white foam core or votive foil-lined paper to bounce more light evenly across the diffusion layer. This technique minimizes hotspots and creates uniform diffusion. I experimented with a white poster board inside my softbox, which doubled the perceived softness and spread of light, making my subjects look naturally illuminated from every angle.
Blocking Unwanted Light Spillage
Use black wrap or flags to control spill and prevent light from hitting objects you don’t want illuminated. During a shoot, I placed small black flags around my softbox to shield parts of the background, which increased contrast and made my subject stand out more effectively. This simple step helps in achieving a professional look without expensive modifiers.
Implementing These Mods for Consistent Results
Apply these modifications systematically, testing each change by shooting test images. Adjust the diffusion thickness, baffle placement, or bounce surfaces until you achieve the desired softness. Remember, the key is balance; too much diffusion can reduce the light’s intensity, so compensate with your light source’s power if necessary. Over time, these small upgrades will make a noticeable difference in the quality of your footage, leading to more polished and inviting visuals.
Many content creators default to thinking that simply adding more light or using popular equipment ensures professional results, but that’s a misconception. A common trap is assuming that all lights—be it a fill light, key light, or RGB tube—are interchangeable or that the brightest setup guarantees the best look. In reality, mastering nuances such as color temperature consistency, light placement, and diffusion quality makes a significant difference in your visuals. For example, many overlook how improperly balanced fill light can flatten subjects or introduce unwanted color casts, reducing realism. Expert photographers warn that neglecting how different lights interact and how their spectral profiles affect skin tones can lead to unnatural results. An advanced mistake is neglecting the importance of light quality, such as using low-CRI LEDs which can make skin look dull or washed out, regardless of brightness. According to lighting professionals, understanding the core principles—like the inverse square law’s impact on light falloff—helps in avoiding over- or under-lighting specific parts of your scene, which can be a common pitfall for amateurs. For instance, positioning a softbox too close can cause hotspots and flatten the image, while uneven RGB tube placement may lead to color inconsistencies that spoil the shot’s harmony. To elevate your lighting game, explore how technical factors such as spectral output and diffusion materials influence final image quality. Take a look at detailed guides on perfect softbox setup or creative RGB tube usage to deepen your knowledge, like the ones available in our comprehensive resources. Remember, proper light layering—not just adding more light—is key to creating cinematic depth and visual interest. As you progress, be cautious of the myth that increasing light intensity compensates for poor placement or diffusion; often, subtle tweaks deliver far better results. Ensure your equipment choices support color accuracy and compatibility, especially when combining multiple light sources. Overlooking these details can lead to inconsistent color rendering or unflattering shadows, which are tricky to fix in post-production. Reflecting on these nuances, ask yourself — are you leveraging your lights to their full potential? If not, a small investment in understanding these advanced principles can massively improve your setups and final image quality. Want to learn more about perfecting your lighting? Check out our guides on softbox lighting techniques and creative uses for RGB lights. Have you ever fallen into this trap? Let me know in the comments.
Keeping Your Lighting Gear in Top Shape
Investing in quality tools like softboxes, RGB tube lights, and LED panels is just the first step; proper maintenance ensures they deliver consistent, professional results over time. Regularly inspecting your equipment for signs of wear, such as frayed Diffusion fabrics or loose connections, prevents small issues from turning into costly repairs. I personally dedicate fifteen minutes at the end of each shoot session to check all light mounts, switches, and power cables, which has saved me from unexpected downtimes. Using manufacturer-recommended cleaning routines, like gentle dusting of LED panels and soft cloths for diffusers, helps maintain optimal light output and color accuracy. Remember, neglected equipment can develop uneven outputs or flickering—problems that become more pronounced with extended use and can compromise your footage quality.
Tools I Recommend for Effective Maintenance
One indispensable tool I rely on is a variable heat gun. It allows me to carefully remove dust and restore flexibility to diffusions and gels without damaging delicate materials. For cleaning, I use microfiber cloths and compressed air to clear dust from vents and internal components, ensuring proper cooling and longevity. When it comes to testing, a luxmeter has become my secret weapon; it helps me verify that my softboxes and LED panels maintain consistent brightness levels over time, following best practices outlined in our guide on mastering softbox lighting. Additionally, investing in spare replacement parts—like mounting clamps, diffusers, and cables—reduces project delays and keeps production running smoothly. Remember, routine checks aren’t just about preserving equipment; they’re about safeguarding your creative work’s consistency and quality.
Embrace Future Trends in Lighting Maintenance
As technology advances, expect smarter, more self-diagnosing lighting systems to emerge, reducing manual upkeep and enabling real-time performance monitoring. Companies are now exploring AI-driven diagnostics integrated into lighting fixtures, which can alert you before issues become obvious—a game changer for busy creators. To stay ahead, I recommend regularly updating firmware on your LED panels and RGB lights, following manufacturer updates to benefit from optimizations and new features. For long-term results, establishing a maintenance routine—perhaps quarterly inspections—can keep your setup reliable and save money by extending equipment lifespan. And don’t forget to document your maintenance schedule, so you always know when components need replacing or servicing.
How do I maintain my lighting equipment over time?
Focus on proactive care: regularly clean, inspect, and test your gear, and stay informed about evolving best practices through resources like our comprehensive maintenance guide. Incorporate small habits, such as keeping a checklist for each session, and investing in quality cleaning tools and spare parts. This approach not only prolongs your equipment’s lifespan but also ensures your creative work consistently meets professional standards. For example, routinely calibrating your LED panels with a luxmeter can help maintain stable color temperatures, preventing subtle shifts that could affect your footage’s look. If you’re eager to further optimize your setup, consider exploring advanced troubleshooting techniques and software updates that can keep your system humming smoothly—details of which are covered in our latest tutorials. Don’t neglect this essential aspect of your workflow; a little effort today prevents costly repairs tomorrow.
The Hardest Lesson I Learned About Softbox and RGB Tube Lighting
One of my biggest surprises was realizing that even minor modifications to my softboxes and RGB tube lights could dramatically elevate my video quality. Early on, I thought more expensive equipment alone would do the trick, but I quickly learned that understanding and customizing your light setup is key. Letting go of the myth that factory settings are sufficient opened up a new world of creative control and polished results.
Boost Your Creativity with These Curated Tools and Resources
My favorite resource is our guide on softbox and RGB tube lighting techniques, which provides deep insights into maximizing the potential of your gear. I also rely on a quality luxmeter to ensure consistent brightness and a DIY diffusion fabric set for quick upgrades. For ongoing learning, this resource on softbox lighting solutions offers practical, step-by-step advice that keeps me inspired and informed.
Your Next Step in Perfecting Your Lighting Style
Embrace the journey of customizing your softboxes, RGB tube lights, and LED panels — small tweaks can lead to massive improvements in your videos. Don’t wait until your setup feels perfect; start experimenting today with simple mods, and watch your content transform into a professional-looking masterpiece. Remember, the power to elevate your lighting is within your reach, waiting for you to unlock it.
![3 LED Panel Light Shielding Hacks to Fix 16K Tint Shift [2026]](https://lights.creatorrigreviews.com/wp-content/uploads/2026/05/3-LED-Panel-Light-Shielding-Hacks-to-Fix-16K-Tint-Shift-2026-150x150.jpeg)


