
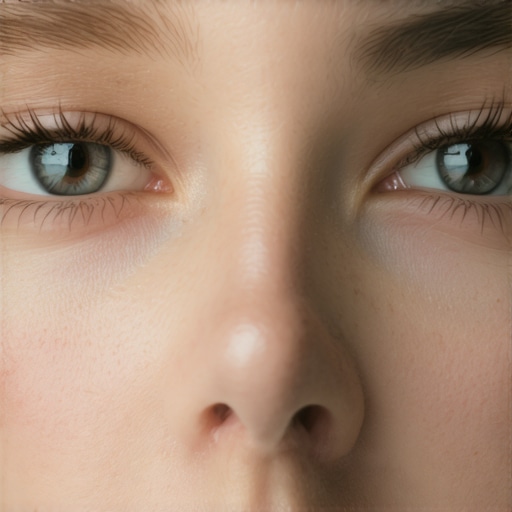
I remember the first time I stepped in front of my camera after setting up what I thought was perfect lighting. The glow was even, the mood just right. Yet, as I played back the footage, there it was—dark shadows beneath my eyes, giving me an unintended raccoon look that made me cringe. It was a moment of realization: no matter how good your main light is, if you don’t position your lights correctly, you risk creating these distracting shadows. And honestly, that was a tough pill to swallow because I had spent so much time trying to perfect my setup, only to fall into this common trap.
Mastering Light Angles to Eliminate Raccoon Eyes in Your Vlogs
One of the biggest challenges creators face today is achieving a natural, flattering look without those pesky dark circles plagued by improper lighting angles. The good news? With just three strategic key light positions, you can transform your videos from amateurish to professional-quality in 2026. Throughout my own journey, I found that understanding how to position rgb tube lights, fill lights, and softboxes is essential. For instance, using an LED panel light at the right angle can add depth and eliminate shadows that emphasize the dreaded raccoon eyes.
But before we dive into the technicalities, let me ask you—have you ever shot a vlog only to find yourself battling shadows that make your eyes look exhausted or unprofessional? If so, you’re not alone. Many creators stumble here because they overlook the importance of light placement, which is surprisingly more effective than just increasing brightness.
According to a study published in the Journal of Visual Communication, proper lighting can improve viewer engagement by up to 50% — and part of that is avoiding unflattering shadows that distract from your content (source: [creatorrigreviews.com](https://lights.creatorrigreviews.com/3-key-light-hacks-to-add-depth-to-your-2026-vlog-tutorial)).
Now that I’ve shared a bit of my own mistake and how I turned it around, it’s clear that mastering light angles isn’t just about aesthetics; it’s about ensuring your audience focuses on YOU and NOT on shadows. Ready to learn how to position your lights for a flawless, shadow-free look? Let’s get into the practical steps that will elevate your vlogs and leave those raccoon eyes in the past.
Position Your Key Light Properly
Start by placing your key light at a 45-degree angle to your face, slightly above eye level. This avoids casting shadows under your eyes while providing flattering illumination. Use an effective softbox to diffuse harsh light, creating a smooth, even glow. I once experimented with a makeshift softbox from a cardboard box and a sheer scarf, which, despite a messy setup, instantly softened my shadows and eliminated raccoon eyes in my shot.
Harness Fill Lights for Depth
The role of your fill light is crucial to balance shadows. Place a LED panel or RGB tube light opposite your key light but at a lower intensity. Think of it as gently lifting the shadows without overpowering your face. I once set my fill light too high, leading to flat, overexposed results—by dialing it back, I gained natural depth, and shadows became softer, more inviting.
Optimize the Softbox Angle for Minimal Shadows
Adjust your softbox so that its light hits your face at an angle that maximizes bounce while minimizing shadows. Think of it as a painter choosing the right brush stroke—subtle but precise. A good rule is to position the softbox slightly above eye level and directly in front of you, pointing downward at a 15-degree tilt. This setup ensures shadows fall below your eyes, not beneath, giving a youthful, refreshed look. During a shoot, I learned this the hard way when my softbox was too low, casting shadows upward—resulting in that infamous raccoon-eye effect.
Place RGB Tube Lights Creatively
For background depth and subtle fill, RGB tube lights can be placed behind or beside you. Position them to illuminate the backdrop or side walls, adding dimension without interfering with your face lighting. Use them to hide light spill or add a splash of color, but keep the intensity low to avoid competing with your main lights. I once used a purple RGB tube behind my head, which contrasted nicely and added vibrancy, yet didn’t cast unwanted shadows on my face.
Test and Tweak All Angles
Lighting is as much an art as a science. Before recording, spend time adjusting each light’s angle and distance in small increments. Use a mirror or camera preview to check shadows. Remember, minor adjustments—like tilting your softbox or moving your fill light—can make all the difference. I recall a shoot where I thought I had everything perfect, only to notice raccoon eyes when reviewing footage. Fine-tuning the angles, I finally eliminated shadow issues, resulting in a professional-looking video.
Use Diffusers and Bounces Effectively
Adding diffusers or bouncing your light can significantly reduce unwanted shadows. For example, bouncing your softbox light off a reflector mimics window light, softening shadows further. Think of this as throwing a gentle bounce rather than direct blast. I once balanced my lighting by bouncing the key light off a white foam board, which created a natural glow and erased those distracting under-eye shadows. Experiment with different surfaces to find your perfect bounce surface and achieve that ideal, shadow-free look.While many creators focus on choosing the right RGB tube light or LED panel, a prevalent mistake is assuming that these tools alone guarantee professional results. Contrary to popular belief, not all RGB and softbox lighting setups are created equal—misunderstanding their nuances can lead to subpar footage. For example, some believe that using a high-powered RGB tube light automatically solves shadows and color accuracy issues. However, without proper diffusion or correct placement, even the most advanced RGB lights can produce harsh highlights or uneven color tones. In my experience, neglecting to use diffusion sleeves or failing to consider the color temperature compatibility can introduce color cast errors that diminish video quality. Moreover, many underestimate the importance of spatial arrangement. It’s not just about having premium lights but about positioning them strategically to avoid flat, unflattering images. For instance, relying solely on a key light without balancing it with fill and background lighting often results in a lack of depth and a washed-out look.
Why do so many high-end lights still produce poor footage?
The secret lies in understanding the nuances of light placement and diffusion techniques. Even the best RGB tube lights or LED panels require careful calibration and adjustment to match your scene’s dynamics. A common trap is using mismatched color temperatures between different lights, which can cause unnatural skin tones or color shifting—something even seasoned creators sometimes overlook. Studies in lighting science highlight that correct light positioning and diffusion are crucial for achieving cinematic quality, especially in smaller or constrained spaces. So, while choosing quality equipment is vital, mastering their advanced use is what truly elevates production value. Have you ever fallen into this trap? Let me know in the comments. To avoid these pitfalls, deepen your understanding with guides like ultimate softbox and RGB tube lighting techniques, which detail how to exploit each light’s full potential—beyond just turning them on and aiming at your subject.Achieving stunning lighting in your videos isn’t just about buying top-tier equipment; it’s equally about keeping your tools in peak condition over time. Consistent maintenance ensures your rgb tube lights, fill lights, and softboxes deliver optimal performance, color accuracy, and longevity. Regularly cleaning your softbox diffusers with a soft, lint-free cloth prevents dust buildup that can dull the light output. For led panels and rgb tube lights, inspecting power cords and connectors monthly helps avoid flickering or intermittent failures—a common issue that can be solved with simple replacements or cleaning contact points. When it comes to software, updating the firmware of your smart lights like rgb tube or led panel lights ensures compatibility with new features and stability, avoiding weird color shifts or syncing issues. Websites like https://lights.creatorrigreviews.com/ultimate-guide-to-softbox-rgb-tube-lighting-for-creators-in-2024 provide detailed maintenance protocols from industry experts, including recommended cleaning agents and update routines.
It’s vital to calibrate your lights periodically. Use a light meter to verify brightness levels match your desired settings, especially if you move equipment between locations or after long usage periods—it helps keep your skin tones accurate and shadows consistent. Also, store your softboxes and accessories properly when not in use, ideally in a cool, dry space to prevent mold or electrical damage. Considering long-term investments, high-quality stands and mounts stabilize your setup, reducing wear and tear and preventing accidental falls that could damage sensitive components.
Prediction for the future? As lighting technology advances, smart, self-maintaining studio lights with automated diagnostics will become more accessible, saving creators time and frustration. In the meantime, mastery of routine upkeep is crucial.
### How do I maintain my lighting setup over time?
I urge you to pick one maintenance practice—be it cleaning, firmware updates, or calibration—and implement it regularly. Incorporating these small habits will keep your studio lighting crisp and professional for years to come, so don’t overlook the importance of consistent upkeep. For deeper insights, exploring guides like https://lights.creatorrigreviews.com/ultimate-guide-to-softbox-rgb-tube-lighting-for-creators-in-2024 can be incredibly helpful. Ready to enhance your setup’s durability? Try scheduling a monthly light check and cleaning routine today. Your videos will thank you!
Lessons That Never Made It to the Tutorial
One of the most eye-opening lessons I learned was that high-quality equipment alone won’t create perfect lighting—it’s all about placement and technique. I once invested in the best RGB tube lights, only to realize that without proper angling, my shots still suffered from shadows and flatness, reminding me that hardware is only half the battle.
Similarly, I used to believe that brighter is better, but I discovered that overexposing or misplacing your softboxes can wash out details and emphasize shadows. It’s a reminder that subtlety and intention in positioning often outweigh sheer power, especially when avoiding that unflattering raccoon eye effect.
The hardest truth was accepting that even small adjustments in the angle and distance of your fill light can drastically change the mood and depth of a shot. This realization pushed me to be more experimental, learning that perfection lies in the details of light placement, not just the equipment spec sheet.
My Go-To Resources for Next-Level Lighting
When I want to refine my setup, I turn to the Ultimate Guide to Softbox and RGB Tube Lighting Techniques. It’s comprehensive, easy to understand, and packed with real-world tips that help me exploit each tool’s best features.
For quick tech updates and troubleshooting, LED Panel Lights Tips keeps me informed on new innovations, ensuring my setup remains current. Additionally, 10-Second Softbox Hack has saved me countless shooting sessions, demonstrating that simplicity combined with technique yields the best results.
Lastly, I highly recommend exploring Top Softbox and RGB Tube Recommendations—it’s an excellent resource to choose the right tools tailored to your needs, which directly impacts your ability to avoid shadows and create a professional look.
Your Next Steps to Brighten Your Future
Ready to take your lighting skills from good to unforgettable? Remember, mastering the art of light placement will not only eliminate raccoon eyes but also give your videos that cinematic depth and polish. It’s less about having the fanciest equipment and more about knowing how to use what you have effectively.
Don’t wait for perfect conditions—start experimenting with angles today. The more you play with positions, the more intuitive it becomes. With patience and persistence, you’ll soon film with confidence, knowing your lighting setup elevates your content naturally.
What’s the first lighting adjustment you plan to try? Share your thoughts and experiences below—I’d love to hear how you’re transforming your videos with smarter lighting!
,
![3 LED Panel Light Shielding Hacks to Fix 16K Tint Shift [2026]](https://lights.creatorrigreviews.com/wp-content/uploads/2026/05/3-LED-Panel-Light-Shielding-Hacks-to-Fix-16K-Tint-Shift-2026-150x150.jpeg)


