
Ever set up your softbox lights only to end up with flat, dull images that don’t quite capture the magic you envisioned? I’ve been there. I remember spending hours tinkering with my studio lights, convinced that more expensive equipment would automatically mean better photos. But despite investing in several high-end softboxes and LED panels, my shots still looked lackluster, unflattering, and flat. That was a real lightbulb moment for me. I realized that mastering softbox lighting isn’t just about hardware — it’s about technique, placement, and understanding how light interacts with your subject.
Why Proper Softbox Lighting Matters More Than Ever
In the world of professional photography and videography, quality lighting can make or break your shot. Softboxes are widely favored because they produce soft, even light that reduces harsh shadows and highlights, giving your images a polished, professional look. But the problem is, many creators overlook the importance of technique, relying solely on their equipment. This often results in images that lack depth, dimension, and that ‘wow’ factor. With the right approach, however, you can elevate your studio work to new heights, ensuring every shot is compelling and beautifully lit.
According to a study by The Photography Institute, lighting accounts for approximately 80% of a photo’s impact. That’s no small number. It emphasizes why understanding how to manipulate softbox lighting effectively is essential for anyone serious about their craft. If you’ve ever faced the frustration of trying to achieve professional-looking portraits or product shots with subpar lighting, I promise you’re not alone. And the good news? It’s easier than you think to change that.
Have you ever used a softbox only to find your subject looking flat or overly shadowed? If so, you’re in the right place. Today, I’ll share the top techniques I’ve discovered over years of experimenting, which transformed my studio from a poorly lit disaster zone into a space where every shot turns out stunning. We’ll cover everything from the perfect key light setup to filling in shadows naturally, and even how to incorporate RGB tube lights for creative effects. Ready to get started? Let’s dive into the details that will revolutionize your softbox lighting approach.
What’s the Real Secret Behind Great Studio Shots?
Position Your Key Light for Maximum Impact
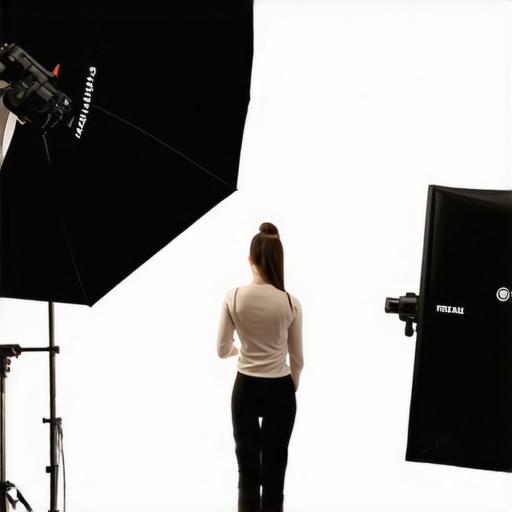
The first step is to place your softbox as your main, or key, light. Think of it like the sun illuminating your scene: it should be slightly above and angled down at your subject. When I set up my softbox for the first time, I made the mistake of placing it directly in front, resulting in flat, unflattering light. By moving it 45 degrees to the side and slightly above eye level, I created natural shadows that added depth and dimension. This setup mimics natural daylight and is the foundation for professional-looking portraits. For detailed guidance, check these key light setup tips.
Use Fill Light to Soften Shadows
Next, add a fill light to reduce harsh shadows created by your key light. Instead of relying on another softbox directly opposite, position a second softbox or an LED panel slightly lower and on the opposite side of your subject. This fill light acts like a gentle reflector, softening shadows without eliminating them entirely, preserving depth. I once experimented with a small RGB tube light as a fill; the flexibility to change colors added a creative flair to my shots. For more techniques, explore softbox fill light strategies.
When it comes to studio lighting, many enthusiasts and even seasoned creators fall into traps that undermine their results. Let’s dig deeper into some of the most misunderstood nuances and misconceptions that can trip you up, despite having good equipment like softboxes, LED panels, or RGB tubes. Understanding these pitfalls is essential for elevating your lighting game and achieving that professional look you envision.
Why Most People Overlook the Power of Light Placement
Contrary to popular belief, owning the best softbox or LED panel isn’t enough. The real magic lies in how you position your lights. Many beginners think that simply placing a softbox in front of their subject guarantees flattering results. But the truth is, subtle adjustments in angle, height, and distance can dramatically change the quality of light. For example, angling your key light slightly above eye level and to the side creates natural, appealing shadows, adding depth and dimension. I learned this the hard way when I kept my softbox directly facing my subject, resulting in flat, uninteresting images. For advanced positioning strategies, check these key light techniques.
Beware of the Fill Light Trap
Another common mistake is misusing fill lights. Many assume that adding more fill light will automatically improve the shot. However, overfilling can flatten the image and remove the shadows that give your subject depth. The trick is to control the fill’s intensity and placement carefully. Using a secondary softbox or RGB tube set to a low brightness on the opposite side of the key light can soften shadows naturally, but too much fill defeats this purpose. For nuanced fill strategies, explore these fill light secrets.
Advanced Lighting Myth Busting
Many believe that high-cost lighting equipment guarantees professional results. While quality gear helps, it’s a myth that expensive means better. Effective lighting depends more on technique than on price tags. For instance, even affordable LED panels like those discussed in this guide can produce stunning results when used correctly. Focus on mastering positioning, color temperature, and diffusion — these are the real game changers. Remember, as lighting expert Joe McNally states, “Good lighting is about technique, not just equipment.”
Have you ever fallen into this trap? Let me know in the comments. Avoid these common pitfalls, and you’ll see your studio shots transform from mediocre to magnificent.
Investing in high-quality softboxes, LED panels, RGB tube lights, key lights, and fill lights is just the beginning. To ensure your studio setup continues to perform flawlessly over time, regular maintenance and smart tools are essential. Over the years, I’ve come to rely on specific practices and equipment that keep my lighting gear in top shape, saving me both time and money in the long run.
How do I maintain my studio lights over time?
First, always keep your softboxes and diffusers clean. Dust and dirt can diminish light quality and cause uneven illumination. I use a microfiber cloth and gentle cleaning solutions recommended by manufacturers to wipe down my softboxes after each shoot. For LED panels and RGB tube lights, regular dusting with compressed air prevents buildup that can cause overheating or flickering.
Next, check the connections and power supplies periodically. Loose cables or worn-out adapters can lead to inconsistent lighting or equipment failure. I personally inspect all my cables weekly and replace any frayed wires immediately. Using high-quality power strips with surge protection prolongs the lifespan of your lights and prevents damage from power surges.
Another crucial aspect is firmware updates and calibration. Many modern LED lights and RGB tubes come with software that requires periodic updates to fix bugs and improve performance. I connect my LED panels to their dedicated apps every month and follow the manufacturer’s instructions for calibration. This ensures color consistency and optimal brightness.
Tools I recommend to keep your gear in shape
One tool I swear by is a lens cleaning and microfiber kit. It helps keep your diffusers and lenses spotless, maintaining light quality and clarity. Additionally, investing in a small, portable vacuum with brush attachments allows me to clean dust from vents and fans without disassembling the lights.
For software updates, always download firmware directly from the manufacturer’s website or official app store. Keeping your firmware current maximizes performance and prevents compatibility issues. I also use a dedicated external hard drive to back up lighting profiles and settings, so I can quickly restore my preferred configurations if needed.
What’s the future of lighting maintenance?
As technology advances, expect more smart lighting systems with self-diagnosis and auto-updating features. These innovations will simplify maintenance and reduce downtime, making it easier than ever to keep your studio lights in prime condition. The trend toward modular, easily replaceable components will also extend the lifespan of your gear, saving money and reducing waste.
Don’t forget—regularly testing your lights before critical shoots helps catch potential issues early. Try setting up a weekly check routine, including brightness, color accuracy, and connection stability. This proactive approach ensures your lighting remains consistent and professional-looking, no matter how long you’ve been using your equipment.
Ready to take your studio maintenance to the next level? Incorporate these tools and tips into your routine today and enjoy flawless lighting results for years to come. For more detailed techniques, explore these comprehensive softbox and fill light strategies.
The Hardest Lesson I Learned About softbox,led panel light,rgb tube light,key light,fill light
One of my most eye-opening realizations was that even the best softbox won’t save a poorly thought-out setup. I used to believe that buying expensive equipment was enough, but I quickly discovered that positioning, angles, and understanding how light interacts with my subject were the real game changers. The moment I started experimenting with different angles and distances, my images gained depth and life that I couldn’t achieve with hardware alone.
3 Myths About softbox,led panel light,rgb tube light,key light,fill light That Held Me Back
Firstly, the misconception that a high price tag guarantees great results. While quality gear helps, technique trumps cost. Secondly, the myth that placing a softbox directly in front of your subject creates flattering light. In reality, slight adjustments in angle and height make all the difference. Lastly, many think adding more fill light always improves the shot. Overdoing it flattens the image instead of enhancing it. Understanding these myths helped me unlock my true lighting potential.
What Experts Won’t Tell You About softbox,led panel light,rgb tube light,key light,fill light
Top professionals emphasize that mastering light placement and control is more important than equipment. For example, Joe McNally often states, “Good lighting is about technique, not just gear.” They also highlight the importance of subtle shadows and natural falloff, which can be achieved through careful positioning of your key and fill lights. This insight shifted my approach from gear obsession to technique mastery, transforming my studio work.
Where to Go from Here
Start by revisiting your lighting setup with fresh eyes. Experiment with the angle and height of your softbox, and don’t be afraid to incorporate creative tools like RGB tubes for color effects. Regularly review and adjust your placement to find the sweet spot that flatters your subject and adds dimension. For detailed guidance, check these key light tips and fill light strategies. Remember, the secret to studio lighting success is continuous experimentation and learning.
![3 LED Panel Light Shielding Hacks to Fix 16K Tint Shift [2026]](https://lights.creatorrigreviews.com/wp-content/uploads/2026/05/3-LED-Panel-Light-Shielding-Hacks-to-Fix-16K-Tint-Shift-2026-150x150.jpeg)


6 responses to “Softbox Lighting Solutions: Top Techniques for Stunning Studio Shots”