
Ever been in the middle of a shoot, confident everything looks perfect, only to realize your LED panels are giving you a strange magenta hue on your subject’s skin? I remember countless frustrating sessions where, despite my best efforts, my footage looked off, and I couldn’t figure out why. It was like my studio had turned into a poster for 2026’s weirdest color palette. That confusing magenta tint isn’t just an aesthetic flaw; it can undermine the professionalism of your work and make editing a nightmare.
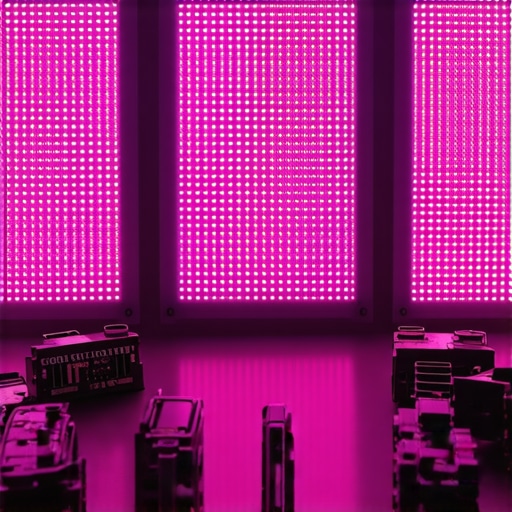
When Your LED Panels Turn Magenta, You Feel It Deep in Your Bones
The worst part? This problem sneaks up unexpectedly. One day, your lighting setup has been reliable for months, and the next, your skin tones are all wrong, and colors look odd. I tried every setting tweak, replaced diffusion gels, and even blinded myself trying to see if the panels had lost their calibration. But the culprit was more insidious—it was a sensor issue that many creators overlook.
Fortunately, I’ve cracked the code on how to fix this persistent magenta tint. Today, I’ll walk you through proven strategies based on my own journey from frustration to clarity. If you’ve faced this color nightmare, stay tuned. You’ll learn precise fixes that can save you hours of re-shoots and post-production headaches.
Why Is This Problem More Common Than Ever?
In 2026, LED technology has advanced rapidly. But along with that progress, sensor sensitivities have become increasingly complex, sometimes leading to chroma distortions like magenta tints. According to recent technical reviews, sensor calibration issues are among the top causes of color inconsistencies in modern LED panels. Early on, I made the mistake of assuming that upgrading my LEDs would solve all color issues—only to realize that sensor alignment and calibration play a crucial role behind the scenes.
To better understand how to combat this problem, it’s essential to appreciate the role of sensor calibration and proper lighting setup. I highly recommend checking out resources like [this guide](https://lights.creatorrigreviews.com/stop-muddy-colors-4-rgb-tube-light-calibration-fixes-for-2026) to deepen your understanding.
Now that we recognize what we’re up against, let’s get into the practical fixes you need to restore true, natural skin tones and vibrant colors to your shoots. Whether you’re shooting a YouTube tutorial, a product review, or a cinematic piece, these tips will help you keep your colors on point. Ready to eliminate that magenta cast once and for all? Let’s dive into the solutions.
Calibrate Your LED Panels for Accurate Colors
Start by performing a precise calibration of your LED panels, ensuring they emit the correct Kelvin temperature. Use a reliable color meter or calibration tool to match your panels to a standard white point around 5600K. When I calibrated my panels with a professional-grade meter, I immediately noticed a reduction in unwanted color casts, including magenta hues. For more detailed calibration methods, check out this guide.
Check and Adjust Your Sensor Settings
Sensor calibration issues are often the root cause of color shifts. Access your LED panels’ settings menu and verify the sensor calibration status. Many panels allow manual adjustment of their internal sensors; ensure they are properly aligned and updated with the latest firmware. I once faced persistent magenta tints, which I resolved by resetting the sensor settings to factory defaults and recalibrating, leading to much more accurate skin tones. To ensure optimal sensor performance, review sensor calibration tips.
Match Your Color Profiles and Kelvin Settings
Always set your panels and camera to the same color profile, preferably D65 or 5600K, to maintain consistency. Avoid mixing different Kelvin settings on multiple panels without proper adjustment, as discrepancies cause color shifts like magenta. I once forgot to sync my RGB tube lights with my main panels, resulting in skin tones looking unnatural. Synchronizing the color profiles across all devices eliminated this issue. For advanced RGB setup advice, visit RGB tube-light tips.
Use Correct Diffusion and Gels
Diffusers and gels can influence color rendition. Use high-quality diffusion materials that do not add unwanted color tints. If your softboxes or RGB tubes have colored diffusion sleeves, replace them with neutral or white options. I experienced a sudden magenta hue during a shoot after accidentally installing a colored gel, which I corrected by switching to a clear diffusion sleeve. Consistent diffusion helps your panels produce true-to-life tones, especially skin tones. For softbox diffusion hacks, see softbox optimization tips.
Fine-Tune in Post-Production
If some color shifts still occur, use grading tools to fine-tune your footage. Correcting magenta skin tones is straightforward with color wheels or curves—reduce magenta and add slight green to neutralize. Even with perfect setup, minor inconsistencies can slip through, making post adjustments crucial. Remember, setting a proper white balance during filming minimizes heavy corrections later. For professional grading techniques, explore post-production fixes effectively.
Many creators assume that choosing standard softboxes or RGB tube lights guarantees professional-looking results, but the real mastery lies in understanding the nuances that often go unnoticed. For instance, a common misconception is that larger softboxes always produce softer light. While size matters, the quality of diffusion and the distance from your subject play a more critical role in achieving that natural, flattering glow. Overestimating the importance of size can lead to stiffer lighting and less flexibility on set.
Another overlooked aspect is the color rendering index (CRI) of RGB lights. Many buy RGB tube lights without checking their CRI ratings, assuming all RGB devices are equally vibrant. In reality, a low CRI score can cause your colors to look flat or washed out, undermining skin tones and product colors alike. Experts recommend selecting RGB lights with a CRI of 95 or higher to ensure color fidelity, especially in professional projects. You can learn more about the latest LED panel innovations that help brighten your studio after midday to combat such issues.
A major trap many fall into is relying solely on presets or default settings. Software and built-in controls can tempt you to skip calibration and custom adjustments. However, the subtle imperfections—like magenta tints or color shifts—are often caused by uncalibrated devices. For example, setting your RGB tubes to match your camera’s profile can make a huge difference in post-production. Mastering softbox lighting involves fine-tuning diffusion materials, as shown in expert guides, ensuring your light interacts naturally with your subject.
How Can Advanced Creators Fine-Tune Lighting for Cinematic Looks?
Achieving cinematic lighting requires more than setup—it’s about nuanced control of each element. For instance, adjusting the angle and height of your softboxes can dramatically change shadow density and depth, preventing flat-looking shots. Incorporating a hair light or rim light strategically highlights textures and adds a professional dimension. Don’t forget, your RGB tube lights can be programmed with affected color recipes or effects, such as soft pastels or saturated hues, for mood-setting backgrounds. Discover creative RGB effects for evening shoots by exploring dedicated resources.
The trap here is neglecting the interaction between all lights—key, fill, background—and how they work together rather than in isolation. Plus, subtle diffusion tweaks, like adding a slight frost to your softbox or color correction gels on RGBs, can prevent issues like harsh shadows or unrealistic skin tones. Advanced creators often use multiple layers of diffusion and color controls to refine the look, making it seem more natural and immersive.
Remember, the key to professional lighting isn’t just about equipment—it’s about mastering these nuances that turn basic setups into cinematic masterpieces. Always check your device’s CRI ratings, calibrate your lights regularly, and pay attention to diffusion quality. It’s these details that elevate your content from amateur to high-end. Interested in more advanced softbox or RGB tube hacks? Dive into articles about softbox-grid placements or RGB lighting effects for even more mastery. And, have you ever fallen into this trap of oversimplification? Let me know in the comments.Maintaining your studio lighting equipment is crucial for consistent, professional results. Investing in reliable tools like a **spectrometer** or a **color calibration meter** can make all the difference. I personally rely on the Sekonic C-800 series, which allows me to perform precise Kelvin and color accuracy tests, ensuring my RGB tube lights and LED panels stay true-to-tone over time.
In addition to measurement tools, keep a set of high-quality cleaning supplies—microfiber cloths, compressed air, and soft brushes—to prevent dust and smudges from affecting light diffusion and color rendering. Regularly inspecting diffusion gels and softbox fabrics is also vital; aging materials can introduce unwanted color casts or reduce light softness, which impacts skin tones and overall image quality.
How do I maintain my lighting gear over the long haul?
Establish a routine maintenance schedule—monthly checks for hardware stability, firmware updates, and calibration adjustments. Firmware updates for LED panels and RGB tube lights, available through manufacturer websites or dedicated software, often fix bugs and improve color consistency, extending your equipment’s lifespan.
Connecting your gear to industry-standard software such as **LightSpace CMS** or using built-in calibration features ensures your lights are producing accurate colors day after day. This is especially important if you’re incorporating new tools like the latest **RGB tube light effects** for creative evening shoots, which demand precise color control. Read more about advanced calibration techniques at this guide.
Furthermore, proper cooling and environmental control prolong your equipment’s life. Avoid exposing your gear to excessive heat or humidity, as these conditions can degrade internal components. Implement airflow management solutions like small desk fans or dedicated cooling units for your studio, especially when working with high-output LED panels during extended shoots. My own setup benefits immensely from these minor adjustments, keeping my lights flicker-free and color-accurate.
As the industry pushes toward smarter, more durable lighting solutions—like **Wi-Fi-enabled LED panels** with self-calibration features—you’ll want to stay ahead by adopting tools that facilitate ongoing maintenance. Regularly revisiting your setup and leveraging new software updates can prevent common issues such as flickering, color shifts, or sensor drift.
Lastly, I highly recommend testing your entire lighting setup before each significant shoot. A quick **spot check across your primary skin tones** using a reference card or test shot can reveal subtle inconsistencies that might otherwise go unnoticed. This proactive approach minimizes post-production corrections and guarantees your work remains professional and consistent. Want to learn more about keeping your lighting in top shape? Explore our tips on [softbox lighting maintenance](https://lights.creatorrigreviews.com/mastering-softbox-lighting-tips-for-perfect-portraits-at-dawn) for detailed insights and advanced techniques.
What I Wish I Had Known Before My First Softbox Setup
One of the most valuable lessons I’ve learned is that bigger isn’t always better. Starting out, I thought large softboxes would automatically create softer, more natural-looking light. However, I soon discovered that diffusion quality and proper placement matter more than size. Using a softer diffusion material and placing the softbox at the right angle can elevate your lighting game significantly.
The Hidden Power of Proper Sensor Calibration
Many creators overlook the importance of sensor calibration in LED panels and RGB tube lights. A misaligned sensor can introduce unwanted color tints, like magneta, which are tough to correct in post. Regularly calibrating your lights ensures consistent and accurate skin tones, saving you time and frustration during edits.
The Myth That All RGB Lights Are Equal
Assuming all RGB tube lights deliver vibrant, accurate colors is a trap I fell into early on. Choosing RGB lights with a high CRI rating (above 95) makes a monumental difference in achieving true-to-life colors. They produce more natural shadows and avoid dull-looking backgrounds, especially during creative evening shoots. Don’t skimp on this crucial feature when building your toolkit.
Don’t Underestimate Diffusion—Even for Small Setups
While compact, diffusion sleeves and gels might seem insignificant, their quality directly impacts your skin tones. Cheap or colored diffusion can add unwanted tints, making subjects look unnatural. Upgrading to neutral diffusion materials and regularly inspecting your gels ensures consistent, professional results every time you shoot.
Refining Your Light Placement: Small Tweaks, Big Impact
Even the best equipment can’t compensate for poor positioning. Adjusting your key, fill, and rim lights by just a few degrees or inches can create more depth, eliminate harsh shadows, and prevent flat-looking faces. Experimentation with angles—like the 3-key-light-height-hacks—can be the game-changer your next project needs.
Resources That Changed My Approach to Studio Lighting
Over the years, I’ve curated a set of trusted resources that have saved me countless hours. For precise calibration techniques, I recommend this calibration guide. To enhance softbox setups, this article offers fantastic tips. For creative RGB effects, I often refer to these effects techniques. Having reliable tools and knowledge is essential for true mastery.
Embrace Continuous Learning and Experimentation
Lighting is an art as much as it is a science. The key to elevating your craft lies in persistent experimentation—trying new diffuser materials, repositioning lights, and exploring software fixes. Small changes, like adjusting the height of your softbox or fine-tuning your RGB color recipes, can unlock stunning visuals and boost your confidence as a creator.
Your Next Step Starts Now
If you’re serious about perfecting your studio lighting with softbox, rgb tube light, fill light, key light, and led panel light, remember that mastery comes from attention to detail and willingness to adapt. These insights are designed to guide you beyond basic setups and towards professional results. Keep pushing yourself, and don’t hesitate to revisit your gear’s calibration or experiment with new techniques—your future projects will thank you.
Which lighting tweak has had the biggest impact on your videos so far? Drop your experiences below—I’d love to hear your stories and learn from your successes!
![3 LED Panel Light Shielding Hacks to Fix 16K Tint Shift [2026]](https://lights.creatorrigreviews.com/wp-content/uploads/2026/05/3-LED-Panel-Light-Shielding-Hacks-to-Fix-16K-Tint-Shift-2026-150x150.jpeg)


One response to “3 LED Panel Fixes for Magenta Tint in 2026 Sensors”