
Ever spent hours fiddling with your lights, only to end up with a scene that looks flat, dull, or just plain wrong? I’ve been there—staring at my camera feed, frustrated, trying to make sense of confusing instructions and mismatched equipment, feeling like I was just throwing money at a problem that wouldn’t go away. That lightbulb moment hit me hard: I realized that my biggest mistake was not understanding the fundamentals of proper lighting setup. It’s not just about buying the fanciest gear; it’s about knowing how to wield it effectively.
Fast forward to today, and I’ve learned a thing or two. I want to save you from the same pitfalls I faced early on. Whether you’re creating content for YouTube, streaming, or filmmaking, your lighting setup can make or break your visuals. A well-designed lighting plan doesn’t just illuminate your face; it sets the mood, enhances your style, and boosts your quality—often without breaking the bank.
In this post, I promise to show you how to approach your LED panel and key light setup in 2024 with confidence. We’ll cover the latest innovations, practical tips, and common mistakes to avoid. No more guesswork. Just clear, actionable advice that can transform your studio into a professional-looking space.
Why Your Lighting Setup Matters More Than Ever in 2024
The truth is, lighting is the backbone of high-quality content creation. Even with the best camera and editing skills, poor lighting can ruin your shot. Conversely, good lighting elevates your video, making it look polished and engaging. With new LED panel innovations hitting the market—like brighter, more color-accurate, and energy-efficient options—there’s never been a better time to upgrade your setup. Check out this [latest guide to LED panel light innovations](https://lights.creatorrigreviews.com/led-panel-light-innovations-brighten-your-studio-after-midday) for some eye-opening ideas.
But here’s the catch: many creators jump straight into buying gear without understanding *how* to use it. I made that mistake early on—buying a fancy LED panel without knowing the basics of placement or color temperature. It’s like having a high-performance camera but not knowing how to frame a shot. The result? Wasted money, frustration, and subpar videos.
So, what’s the solution? It’s all about understanding the principles behind effective lighting. From the importance of key and fill lights to leveraging new RGB tube lights for creative effects, this guide will give you a solid foundation. By the end, you’ll be able to craft a lighting setup that flatters your face, sets the right mood, and looks professional—every single time.
Are you tired of inconsistent lighting ruining your videos? Have you faced the dilemma of choosing between softboxes, RGB tubes, or LED panels? If so, you’re in the right place. Let’s dive into the practical steps that will help you master your studio lighting in 2024 and beyond.
Position Your Key Light Effectively
Start by placing your key light at a 45-degree angle from your camera. Imagine it as the sun shining diagonally across your face—this creates depth and dimension. I once set mine up wrong, placing it directly in front, which made my face look flat. After repositioning it to the side, my videos instantly looked more professional. Use a softbox or an RGB tube light to soften shadows and prevent harsh lines. For detailed techniques, check out this guide.
Many creators believe that simply owning the latest LED panels or RGB tubes guarantees a polished look, but in my experience, this is a misconception that can undermine your entire setup. One of the most pervasive myths is that brighter or more colorful lights automatically translate into better production quality. However, the truth is that improper understanding of light placement, color temperature, and intensity can cause more harm than good, even with top-tier equipment.
For example, I often see creators setting their key light directly in front of them, assuming it produces a flattering look. In reality, this position tends to flatten facial features and remove depth, making the subject look dull. Instead, angling your key light at 45 degrees creates natural shadows that add dimension and character. This might seem subtle, but it’s a nuanced detail that separates amateur from professional lighting.
Another mistake is neglecting the importance of balancing your key light with fill lighting. Many overlook the significance of soft, diffused fill lights—especially when using RGB tube lights or softboxes—to avoid harsh shadows. Using a dedicated fill light not only enhances the naturalness of your scene but also prevents the common trap of overexposing certain areas while leaving others in shadow. For advanced techniques, check out this guide.
What about color temperature and mixing lights? Why do so many struggle here?
Understanding and managing color temperature is a subtle art. Many creators assume that setting their LED lights to the same Kelvin value is enough. However, mixing different light sources—like daylight-balanced panels with warmer RGB tubes—without proper adjustment can create a jarring color cast. This mistake not only reduces the realism but also complicates post-production color grading. According to lighting expert Neil van Niekerk, consistency in color temperature is crucial for a seamless look, and mismatched hues can be distracting and unprofessional (source).
Lastly, many overlook the importance of controlling light spill and reflections in their environment. Even the best lights can produce unwanted glare or bounce if your space isn’t carefully arranged. Using flags, barn doors, or even simple foam boards can dramatically improve the quality of your shot. Overlooking this nuance often results in a flat or overly bright scene that looks amateurish.
Have you ever fallen into this trap? Let me know in the comments. Remember, mastering lighting isn’t just about equipment—it’s about understanding the nuances that make your visuals stand out.
Maintaining your studio lighting setup over time is crucial to ensuring consistent, professional results. Even the best equipment can fall into disrepair or become less effective without proper care. I’ve found that adopting a few disciplined habits and leveraging the right tools can extend the lifespan of your lighting gear and keep your visuals sharp. For instance, regularly cleaning your LED panels and RGB tubes not only preserves their brightness but also prevents dust and debris from affecting color accuracy. A microfiber cloth and gentle cleaning solution are often enough to keep panels looking new.
One of my favorite maintenance tools is a set of cable organizers and Velcro straps. These prevent tangling and protect your cables from wear and tear, reducing the risk of shorts or connectivity issues. I also keep a small toolkit with replacement parts—like fuse replacements and spare bulbs—so I’m never caught off guard during a shoot. This proactive approach saves time and money in the long run, as it minimizes unexpected failures.
Additionally, software updates play a vital role. Many modern LED panels and RGB tube lights come with firmware that improves performance and adds new features. Regularly checking for updates from manufacturers ensures your equipment benefits from the latest advancements, which can include better color calibration or energy efficiency. For instance, some new models now include app control, allowing remote adjustments and presets that save time on set. Staying current with firmware updates is as vital as physical maintenance.
Predicting the future of lighting technology, I believe integration with smart home systems will become standard. Imagine adjusting your RGB tubes via voice command or automating lighting scenes based on your shooting schedule. This trend will make setup and adjustments faster and more precise, especially for creators managing multiple lights or complex scenes.
How do I maintain my lighting setup over time?
The key is consistency. Schedule regular inspections—monthly or quarterly—to check for dust, loose connections, and firmware updates. Use specialized tools like compressed air for cleaning vents or fans and a multimeter to test electrical connections when needed. Labeling your cables and components can also prevent confusion, especially when troubleshooting or expanding your setup. Remember, a well-maintained setup not only lasts longer but also ensures your visuals stay consistently professional. If you’re interested in upgrading your gear or learning about the latest innovations, check out the latest LED panel innovations to see how new tech can streamline your workflow. And don’t forget—regular maintenance now saves headaches later, so set a schedule and stick to it. Want tips on how to keep your softboxes and RGB tubes performing at their best? Visit our contact page for expert advice and recommendations. Start implementing these maintenance habits today and enjoy a brighter, more reliable studio for years to come.
The Hardest Lesson I Learned About Studio Lighting
Early in my journey, I believed that brighter lights automatically meant better videos. Turns out, overexposing parts of my scene washed out details and made my footage look amateurish. The real breakthrough was understanding that controlled, well-placed lighting creates depth and mood. It’s not just about shining bright but guiding the viewer’s eye and highlighting your subject’s best features.
How Mismatched Colors Sabotage Your Shots
I used to think setting all my lights to the same Kelvin temperature was enough. But mixing daylight-balanced LED panels with RGB tubes without proper adjustment caused distracting color casts. The fix? Invest in a good color meter or use your camera’s tools to balance your lights. Consistency here is key—your viewers shouldn’t notice your lighting, only feel immersed in your scene.
The Myth of High Wattage and Overkill
More power doesn’t always mean better. I once bought an ultra-bright LED panel, only to find it harsh and difficult to soften. Instead, I learned to use diffusers, softboxes, and dimming controls to get the right look. Effective lighting isn’t about raw power; it’s about finesse and control, especially with the latest innovations like energy-efficient RGB tube lights that can be dialed down easily.
My Essential Toolkit for Lighting Success
For reliable, high-quality lighting, I swear by these tools:
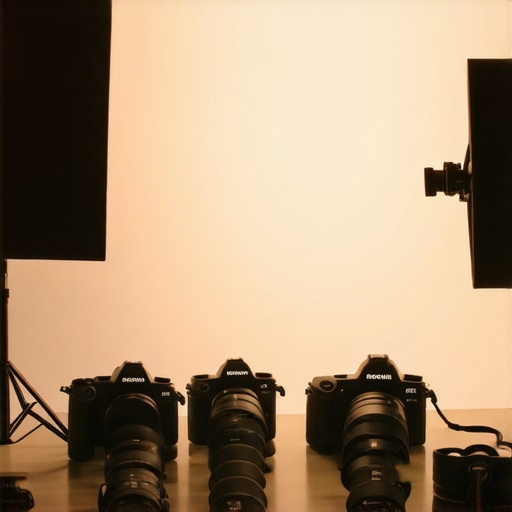
- Neewer LED Panel Lights: Trusted for their color accuracy and durability. They’re a staple in my studio for versatile setups.
- RGB Tube Lights like GVM or Nanlite: Great for creative effects and dynamic color shifts, especially in evening shoots or mood scenes.
- Light Modifiers and Flags: Using barn doors, flags, and diffusion fabrics helps control spill and reflections, giving your scene a polished look.
- Color Meter Apps: Essential for matching Kelvin temperatures and avoiding color cast disasters. A small investment that saves hours of post-production.
Feel the Power of a Well-Maintained Setup
Keeping your gear in top shape is a game-changer. Regular cleaning, firmware updates, and cable management keep your lights reliable and effective. I’ve learned that scheduled check-ins—monthly or quarterly—prevent surprises on shoot day. With smart tech advancing rapidly, staying current with updates ensures you benefit from improvements like better color calibration and remote control features.
The Future of Lighting Is Smarter and Simpler
Imagine controlling all your lights via voice or app, automating scenes based on your shooting schedule. That’s the direction I see the industry heading—making professional-quality lighting accessible and effortless. Embrace these innovations now, and your studio will be ready for whatever 2024 brings.
Don’t Miss Out—Take Action Today
Lighting mastery isn’t just about equipment; it’s about understanding how to use it effectively. Start experimenting with placement, color balance, and modifiers. Watch your scenes transform from flat to fabulous. Remember, consistent maintenance and staying updated with the latest tech will keep your visuals sharp and professional.
![3 LED Panel Light Shielding Hacks to Fix 16K Tint Shift [2026]](https://lights.creatorrigreviews.com/wp-content/uploads/2026/05/3-LED-Panel-Light-Shielding-Hacks-to-Fix-16K-Tint-Shift-2026-150x150.jpeg)


2 responses to “Ultimate Guide to LED Panel & Key Light Setup for Creators in 2024”
Reading through this guide really resonated with my own experience! I used to think that brighter was always better when it came to studio lighting, but I quickly learned that overexposure just washed out all the details. I found that controlling the placement and the intensity of my key light made a huge difference in creating depth and mood—especially when I started experimenting with softboxes and RGB tubes. One thing I’ve noticed is that consistent color temperature really helps maintain a professional look, but I still struggle sometimes with mixing different lights without creating color casts. Has anyone found an effective way to quickly match Kelvin temperatures when using mixed sources? Also, I agree on the importance of regular maintenance—cleaning and firmware updates can seem tedious, but they definitely pay off in the long run. I’m curious, what are some of your favorite tools or methods for keeping your lighting gear in top shape? Seems like keeping the setup reliable is just as crucial as the initial design.
This guide really hits home about the importance of understanding lighting fundamentals beyond just the gear. I started with a similar mistake—thinking that brighter meant better, but quickly realized that control over placement and color temperature makes all the difference. I’ve been experimenting with RGB tubes lately and found that layering lights creatively, rather than just relying on one or two sources, really enhances depth and mood. One challenge I often face is balancing multiple light sources, especially when trying to match Kelvin temps across different brands and models—sometimes it’s a frustrating trial-and-error process.
What DIY techniques or tools have others found helpful for fast, accurate color matching? I’ve heard of using smartphone apps or even simple color cards, but I’d love some tips from those with experience. Also, I agree wholeheartedly that regular maintenance—like cleaning and firmware updates—can seem tedious, but it’s crucial for reliability. Do you have a recommended routine or specific products that help streamline this process? Improving on these small details really elevates the final result and saves time during shoots.