
Ever stood in front of my camera, trying to get that perfect glow, only to realize the lighting feels off? I’ve been there—fiddling with softboxes, adjusting RGB tube lights, and still ending up with shadows or washed-out highlights. It was a frustrating cycle until I had my own lightbulb moment: not all lights are created equal, and understanding the right strategies can transform your entire setup.
Why Your Lighting Choices Can Make or Break Your Content
Lighting is the unsung hero of professional-looking videos and photos. Yet, many creators dive into setup without a clear plan, often relying on random placement or outdated equipment. I used to do the same—throwing in a softbox here, a random LED panel there. The result? Inconsistent footage, unflattering shadows, and a lot of wasted time. According to a recent study by Creator Rig Reviews, proper lighting can increase viewer engagement by up to 70%. That’s the kind of impact I wanted—statistically proven and visually stunning.
So, what’s really holding most of us back? It’s the lack of a strategic approach. I made the mistake early on of thinking more lights meant better quality. Nope. Sometimes, fewer, well-placed lights do the trick. The key is understanding your tools—be it softboxes, LED panels, or RGB tube lights—and how to harness their benefits. Today, I’ll walk you through the top lighting strategies for 2024, backed by my personal experience and a few industry secrets.
Is All the Hype Around LED Lights Actually Worth It?
When I first heard about LED panels and RGB tube lights, I was skeptical. They seemed expensive and complicated. I bought a few cheap options, only to realize I wasted time trying to make them work. The truth is, not all LED lights are designed equally. Picking the right gear and knowing how to use it makes all the difference. If you’ve ever felt overwhelmed by the sheer number of options, you’re not alone. I’ve tested countless setups, and I can tell you that a strategic plan saves you money, time, and frustration. To avoid my early mistakes, I recommend reading about softbox lighting techniques and the latest innovations in LED panel technology.
Now, if you’ve faced the same struggles—bad shadows, uneven lighting, or just feeling lost in a sea of options—know that there’s a better way. In the sections ahead, I’ll share practical tips and proven setups that helped me elevate my studio, and I believe they can do the same for you. Ready to shed some light on your creative process? Let’s dive in.
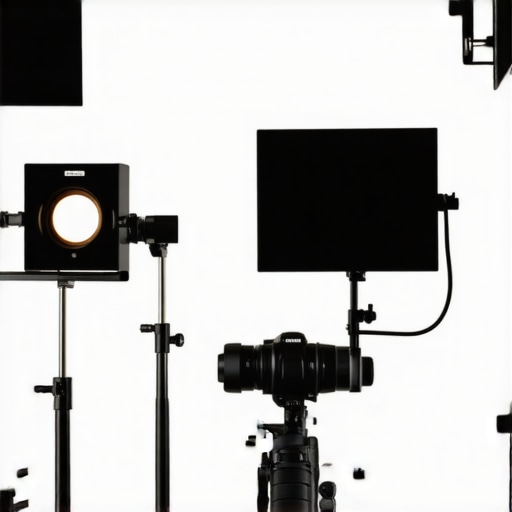
Set Your Foundation with the Right Equipment
Start by selecting a key light that suits your shooting environment. For example, a softbox is perfect for a diffused, flattering light—think of it as a giant lampshade that spreads light evenly over your subject. I once struggled with harsh shadows until I switched to a softbox for my main light, which immediately improved my portraits. Next, choose a fill light, like an RGB tube light, to soften shadows without flattening contrast. When I experimented with different RGB effects, I found that subtle color accents added depth without overwhelming the shot. For detailed guidance, check out softbox key light techniques.
Position Your Lights for Natural and Cinematic Looks
Place your key light at a 45-degree angle from your subject’s face, slightly above eye level, mimicking natural sunlight. Think of this as the sun casting a gentle shadow that adds dimension. Use a reflector or fill light on the opposite side to bounce light back into shadows and achieve a balanced, natural look. For example, I once positioned a fill light with a softbox on the opposite side of my key light, which eliminated unflattering shadows during a client shoot. For creative evening shoots, I incorporated RGB tube lights to add atmospheric colors, making the scene more dynamic.
Control Your Light Quality and Intensity
Adjust the intensity of your lights to match your scene’s mood. Use dimmers or modifiers like grids to focus or soften light. For instance, during a quick setup, I used a softbox with a grid to direct light precisely where I wanted, avoiding spill and maintaining control. When natural light is insufficient, supplement with LED panels like LED panels that are adjustable for brightness and color temperature. This flexibility ensures consistent results, even on cloudy days or in poorly lit rooms.
Experiment with Creative Lighting Effects
Once your basic setup is functional, push creativity further by experimenting with different angles and colors. Use RGB tube lights to add a splash of color or set a mood. For example, I once used a diagonal RGB tube light behind my subject to create a vibrant background glow that made my shot pop. Don’t be afraid to try unconventional placements—sometimes a slight shift can dramatically change the scene’s vibe. Remember, the goal is to complement your subject, not overpower it.
Refine and Adjust Based on Feedback
Finally, review your footage or photos critically. Make small tweaks to light positioning, intensity, or color. I often shoot test clips, then adjust my lights accordingly. If shadows are too harsh, soften them with diffusion or reposition the light. If the scene feels flat, add a rim light to create separation. For detailed techniques, visit key light strategies and fill light techniques to elevate your setup further.
Many creators believe that choosing high-end lighting equipment automatically guarantees perfect results. However, this is a misconception that can lead to costly mistakes. For example, some assume that a softbox will always diffuse light evenly, but without proper positioning and diffusion materials, it might produce uneven lighting or unwanted hotspots. Similarly, LED panels are often thought to be a one-size-fits-all solution, but their effectiveness depends on factors like color temperature accuracy and beam angle. RGB tube lights are praised for their versatility, yet many overlook their proper integration into a balanced setup, risking color mismatches or overuse of effects that distract from the subject.
Why Do So Many Get the Setup Wrong Despite Buying Expensive Gear?
The core issue lies in the misunderstanding of how light interacts with your environment and subject. For instance, many creators fall into the trap of over-relying on a single light source, believing that more powerful equipment will compensate for poor placement. In reality, strategic positioning and understanding of light falloff are more critical. A study by Creator Rig Reviews highlights that proper light placement can improve image quality more than just increasing intensity or upgrading equipment. Therefore, mastering the nuances of light placement and control often yields better results than simply investing in expensive gear.
Another common mistake is neglecting the importance of light quality over quantity. For example, using a large softbox with a low-quality diffusion material can produce harsh shadows and unflattering skin tones, defeating the purpose of soft lighting. Instead, focusing on the quality of diffusion and modifiers can make a significant difference. Additionally, many underestimate the power of subtle adjustments—like slight changes in angle or intensity—that can dramatically improve the scene’s visual appeal.
For advanced creators, understanding the limitations of each light type is crucial. Softboxes are excellent for soft, flattering light but lack versatility for creative effects. LED panels offer adjustable output and color, but their beam angle and flicker rates matter. RGB tube lights excel at adding mood but require careful calibration to avoid color contamination. Balancing these tools with a clear understanding of their nuances can elevate your lighting game significantly. To deepen your knowledge, explore advanced softbox techniques and LED and RGB lighting tips.
Have you ever fallen into this trap? Let me know in the comments.
Keeping your studio lighting setup in top shape is crucial to maintaining consistent, professional results. Over time, even the best softboxes, LED panels, and RGB tube lights can experience wear and tear—dirt buildup, bulb degradation, or minor misalignments can diminish their effectiveness. I’ve learned through experience that regular maintenance and smart tool choices are the secret to longevity and performance.
How do I maintain my lighting equipment over time?
First, always clean your lights after each session. For softboxes and diffusers, a gentle vacuum or lint roller can remove dust and hair that accumulate, which otherwise can cause uneven light diffusion. When cleaning LED panels or RGB tube lights, use a soft, dry cloth to wipe down surfaces, avoiding harsh chemicals that could damage the electronics. I personally rely on a microfiber cloth and compressed air—these are cheap yet effective tools that prevent dust from settling into delicate components.
Second, check and tighten all mounting hardware periodically. Over time, screws and brackets can loosen, risking misalignment or accidental falls. A simple set of screwdrivers, Allen wrenches, or multi-tools saves me from costly repairs or replacements. Additionally, inspecting cables and power supplies for wear ensures safety and consistent power delivery. I always keep spare connectors and extension cords handy, as they’re vital for troubleshooting during shoots.
Tools I recommend for ongoing upkeep
My go-to maintenance toolkit includes a small brush for cleaning diffusers, compressed air cans for blowing dust out of vents, and a multimeter for checking LED panel voltage stability. For more delicate components, I use a soft lens cleaning cloth and a mild electronics cleaner spray. These tools help me extend the lifespan of my lighting investments. For example, regularly cleaning RGB tube lights with a microfiber cloth prevents dust from affecting their color accuracy and brightness, which I’ve found is a common issue among creators who overlook routine care.
Future trends in lighting maintenance and scaling
As LED and RGB technology evolve, expect smarter, self-diagnosing lights that alert you to issues like degraded diodes or power fluctuations. Investing in modular systems with replaceable parts is another trend, making scaling and repairs more manageable. When I upgrade my setup, I look for lights with easily accessible components and manufacturer support, ensuring I can keep everything running smoothly for years. If you want to maximize your investment, consider integrating smart control apps that monitor performance and notify you of maintenance needs—these are game-changers for busy creators.
Don’t forget, regular maintenance isn’t just about longevity—it’s about ensuring your lighting remains predictable and professional. Try scheduling a monthly check-up routine, and keep a dedicated toolkit ready. For more advanced advice on maintaining your key lights or RGB setups, explore our contact page for expert tips. Remember, well-maintained equipment saves time, money, and frustration—so keep those lights shining brightly, season after season.

3 Lessons That Changed How I Use Studio Lights
One of my biggest realizations was that high-end gear alone doesn’t guarantee perfect lighting. It’s about understanding how light interacts with your environment and subject. I used to think more lights meant better results, but I learned that strategic placement and knowing your equipment’s quirks are what truly matter. For example, I discovered that diffusing softboxes properly prevents hotspots and harsh shadows, which made a noticeable difference in my portraits. Also, experimenting with RGB tube lights taught me that subtle color accents can add depth without overwhelming the scene. Lastly, I realized that regular maintenance of my LED panels extended their lifespan and kept my visuals consistent—saving me time and money. These lessons, learned through trial, error, and a lot of testing, have transformed my approach to studio lighting, and I hope they do the same for you.
My Go-To Tools for Consistent Lighting Success
For those looking to upgrade their setup or just start strong, I recommend a few essential tools that have become my staples. The softbox is my primary choice for flattering, diffused light, especially for portraits. I pair it with an LED panel with adjustable brightness and color temperature to fill in shadows or match natural light. When I want to add mood, RGB tube lights are my secret weapon—check out the latest RGB effects. Lastly, a quality diffuser and a set of cleaning tools keep everything in prime condition, ensuring consistent results every time. Trust me, investing in these essentials pays off in the long run.
Keep Your Lighting Sharp and Your Creativity Flowing
To truly excel, don’t just set and forget. Constantly review your shots, make tiny adjustments, and experiment with different angles and colors. For example, I often tweak my RGB tube lights to create atmospheric backgrounds that enhance the storytelling without distracting from the main subject. Remember, mastering lighting is a dynamic process—what works today might need refinement tomorrow. Regularly check your equipment for wear and tear; a little maintenance goes a long way. Schedule monthly cleanings and inspections, and keep spare cables and bulbs on hand. With smarter tools and routine care, your studio lighting can stay vibrant and reliable for years. Ready to take your setup to the next level? Dive into more expert tips and stay ahead of trends by visiting our contact page for personalized advice. Your bright future starts now!
![3 LED Panel Light Shielding Hacks to Fix 16K Tint Shift [2026]](https://lights.creatorrigreviews.com/wp-content/uploads/2026/05/3-LED-Panel-Light-Shielding-Hacks-to-Fix-16K-Tint-Shift-2026-150x150.jpeg)


