
I remember the moment clearly—after hours of fiddling with my old, dimly-lit setup, I finally realized my footage looked flat, uninspired, and lacked the professional polish I was craving. The culprit? Poor studio lighting that failed to do justice to my subject. It was a lightbulb moment that changed everything.
Now, I’ve come to swear by the transformative power of LED panel lights and softboxes. But let’s be honest—getting studio lighting right is a blend of art and science, especially as new options flood the market in 2024. If you’ve ever felt frustrated standing in front of your setup, wondering why your shots don’t pop or look natural, you’re not alone. That’s why I’m here—to share proven tips rooted in experience and backed by the latest innovations.
In today’s post, we’ll tackle the core challenges: how to choose the right LED panel lights, position them effectively, and avoid common pitfalls that can sabotage your studio’s professional look. Whether you’re a seasoned creator or just starting out, mastering lighting can seem daunting. But with a few strategic adjustments, you’ll see instant improvements.
Before diving into specifics, let me ask: Have you ever spent hours tweaking your lights only to end up with washed-out or overly harsh results? If that sounds familiar, stay tuned. I’ll guide you through simple yet powerful techniques that will elevate your studio lighting to the next level.
Let’s start by understanding *why* proper lighting is crucial in 2024. According to recent studies, high-quality lighting can increase viewer engagement by over 30%, which is a game-changer for content creators looking to stand out in a crowded digital landscape. And with innovations like adjustable LED panels and creative effects with RGB tube lights, you have more control and flexibility than ever before. For a deeper dive into creative lighting effects, check out [RGB tube light effects for evening shoots](https://lights.creatorrigreviews.com/rgb-tube-light-effects-creative-uses-for-evening-shoots).
Armed with this knowledge, you’re now ready to explore step-by-step how to optimize your studio lighting setup. From selecting the best key lights to mastering fill techniques, my goal is to help you create stunning visuals that captivate your audience. Are you excited to transform your space? Let’s get started.
Selecting the Right Lights for Your Space
Start by matching your lighting equipment to your studio size and goals. For small setups, compact LED panel lights like those described in this guide are ideal. For more dynamic effects, RGB tube lights offer color versatility. Think of LED panels as the sun in a room—they provide broad, adjustable illumination, while RGB tubes are like mood lighting, adding color and depth to your scene.
Choosing the Main Light: The Key Light
Position your key light at a 45-degree angle to your subject, slightly above eye level. This setup mimics natural sunlight and flatters most faces. Use these techniques to ensure your key light enhances your features without flattening or harsh shadows. Remember, your key light is your primary tool—treat it like a spotlight in a theater, drawing the viewer’s attention.
Adding a Soft Fill With Softboxes
Place a softbox opposite or near your key light to soften shadows. Think of it as a big, translucent cloud diffusing sunlight—this is where softbox mastery comes into play. Aim for a slight reduction in contrast; the goal is natural skin tones and detail. For optimal results, keep your fill light at about 30-50% of your key light’s intensity. Experiment to find what works best for your environment. Pro tip: REGULARLY adjust your softbox’s distance until shadows look natural and not overly blurred.
Positioning RGB Tube Lights for Depth and Color
Use RGB tube lights to add vibrant accents or backlighting. For dynamic scenes, place them behind or to the side of your subject, aiming them at the background or edges. This creates separation and depth, much like a glowing rim that cuts your subject out from the background. Refer to these expert tips for color blending and effects. RGB tubes are also excellent for creating mood lighting—think of them as brushes to paint atmospheric backgrounds.
#IMAGE_PLACEHOLDER_B#
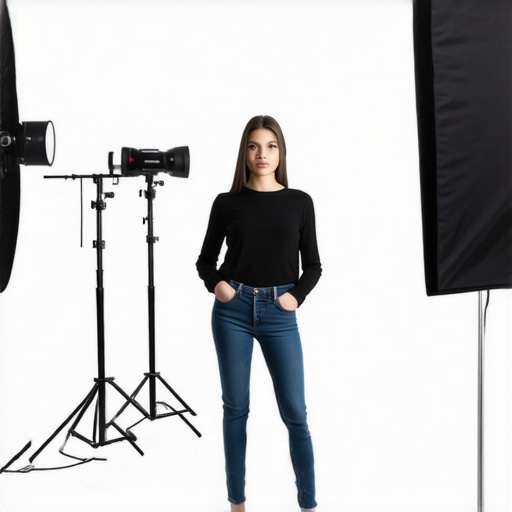
Imagine a studio where an RGB tube emits a subtle blue glow behind the subject, contrasting with the warm softbox light illuminating their face, creating a cinematic feel. This setup elevates your shot from flat to layered, engaging the viewer’s eye.
Mastering Positioning for Natural Look
Align your key light with your camera’s height but keep it slightly above eye level. This prevents unnatural downward shadows. The fill should be on the opposite side, filling in shadows gently—never overpowering your key light. For best results, experiment with distance and angle: closer lights create softer shadows, while farther lights increase contrast. Use this guide for refining your setup. Remember, small adjustments can dramatically impact the mood and realism of your shot.
Fine-Tuning and Consistency
Finally, always monitor your scene through your camera and adjust accordingly. Keep a consistent color temperature and brightness across your lights to prevent color casts. Use dimmers or app controls for real-time tweaks, much like a conductor fine-tuning an orchestra. If you want to learn more about maintaining perfect balance, check out these strategies for softbox and fill light harmony. Remember, mastery comes from practice, so spend time experimenting until your lighting feels natural and intentional for each shot.While many videographers and photographers focus on choosing the right LED panel lights or softboxes, they often overlook the subtle yet critical nuances that differentiate amateur setups from professional-grade lighting. One common misconception is that brighter or more colorful RGB tube lights automatically result in better visuals, but the reality is far more nuanced. In practice, overusing colored lights or selecting overly powerful LED panels without understanding their color rendering capabilities can lead to unnatural skin tones and distorted color accuracy. For instance, RGB tubes with low CRI (Color Rendering Index) values can cast unflattering hues, making subjects appear sickly or washed out, regardless of the mood you’re trying to create. This aligns with expert advice from lighting professionals who emphasize the importance of high-CRI lighting for true color reproduction—something often ignored in DIY setups.
Another trap many fall into is assuming that softer is always better, especially when using softboxes. While diffusion reduces harsh shadows, excessive diffusion can drain the scene of vibrancy and result in a flat, dull look. The key is finding the balance between softness and contrast, ensuring your softbox doesn’t overly flatten your subject’s features. Regularly, creators underestimate the importance of precisely positioning their key and fill lights, leading to unflattering shadows and unnatural lighting ratios. Advanced users know that small positional tweaks during shoots—such as angling softboxes slightly—can dramatically enhance portrait realism.
A crucial, often overlooked aspect involves the synchronization of different light sources. Combining RGB tube lights with LED panels or softboxes without proper color temperature matching can cause color cast inconsistencies. For example, mixing a 5600K LED panel with a 2400K RGB tube might seem harmless but can create color halos or shifts in your footage. This is where understanding the importance of consistent color temperature across your lighting setup becomes vital. For deeper insights on achieving harmonious color balance, check out [these softbox fill light strategies](https://lights.creatorrigreviews.com/effective-softbox-fill-light-strategies-for-stunning-video-in-2024).
What many don’t realize is that the perceived “power” of lights isn’t just about lumen output but also about the quality of light and how it interacts with your scene. Overly intense RGB lights can cause overexposure, leading to a loss of detail and a washed-out look, especially when not properly diffused. Conversely, underpowering your key light may result in inconsistent image quality. The smartest creators measure their lighting setup’s output with a light meter to avoid these issues, a step often skipped in favor of trial and error.
Finally, the importance of understanding your environment plays a significant role. Factors like wall color, room size, and reflective surfaces directly impact how your lights behave. For example, highly reflective walls can cause unwanted hotspots, making your scene appear unprofessional. Advanced professionals often tailor their lighting plans around these nuances, adjusting angles and diffusion accordingly. Recognizing these details can elevate your production from mediocre to cinematic. For more advanced tips on leveraging environment and light interaction, explore [these expert softbox techniques](https://lights.creatorrigreviews.com/ultimate-softbox-and-fill-light-techniques-for-stunning-studio-shots-2024).
Have you ever fallen into this trap? Let me know in the comments. Mastering these nuanced aspects of RGB tube lights, LED panels, and softboxes can dramatically improve your videos’ quality—so don’t overlook the details that make a difference.
Maintaining your lighting setup over time is essential to ensure consistent performance and professional results. One of my favorite practices is regularly calibrating your LED panel lights using a color meter or a spectrometer, such as the Sekonic C-800, which provides precise readings of color temperature and CRI values. This helps detect any drift in light output or color accuracy, allowing you to make small adjustments before shoots. Additionally, keeping your softboxes and RGB tube lights clean is crucial; dust and dirt can dull light quality and introduce unwanted color casts. I recommend using a gentle vacuum with a soft brush attachment or compressed air to remove dust from diffusers and vents. For softboxes, occasional replacement of diffusion material ensures soft, even light without harsh edges. When it comes to software management, I use lighting control apps like LumenRadio CRMX or DMX controllers, which grant fine-tuned adjustments to brightness, color, and effects remotely—saving time on set and reducing the risk of accidental damage.
Another vital aspect is guarding your equipment against environmental factors. High humidity and temperature fluctuations can degrade electronic components and shorten lifespan. Installing humidity monitors and climate control in your studio helps maintain stable conditions. I also invest in surge protectors and dedicated circuits for my lights, preventing power surges that could damage sensitive components. For long-term reliability, establishing a maintenance schedule—checking connections, cleaning diffusers, and verifying control settings—keeps everything running smoothly. Trends suggest that in the coming years, smart lighting systems with integrated AI calibration will become more accessible, simplifying maintenance and ensuring color consistency across different environments.
How do I maintain lighting equipment over time? Regularly inspecting connections, cleaning components, and calibrating color output are key steps I follow. For more advanced techniques, you might consider integrating a spectrometer for calibration or exploring software solutions that automate color consistency. I highly recommend trying out a comprehensive calibration routine using a dedicated tool like the Sekonic C-800, which can dramatically improve your color accuracy and professional appearance. Remember, investing time in maintenance not only prolongs your equipment’s lifespan but also ensures your visuals remain sharp and true to your vision. For detailed guidance on softbox maintenance, check out this resource. Proper upkeep is the secret to a reliable, high-quality lighting setup that impresses every time.
Lessons That Changed My Approach to Studio Lighting
One of the biggest surprises I encountered was realizing that even small adjustments in light angles could dramatically alter the mood and realism of my shots. I used to think more power meant better results, but I learned that controlling diffusion and color temperature often yields more natural, professional-looking footage. Additionally, understanding that high-CRI lighting is vital for true color accuracy transformed my setup—anything less can leave skin tones looking unnatural, no matter how fancy your lights are.
Another lesson was the importance of environment awareness: reflective surfaces and wall colors can reflect light unexpectedly, so customizing softbox and RGB tube placements is key. Lastly, I discovered that scheduled maintenance—like calibrating my LED panels regularly with a spectrometer—keeps my lighting consistent across shoots, helping me avoid those dreaded color shifts that ruin otherwise perfect scenes.
My Top Picks for Elevating Studio Lighting
For reliable softboxes that deliver consistent diffusion, this guide has been instrumental in shaping my softbox setup. When it comes to RGB tube lights, I trust these versatile options for their color fidelity and control, which allow me to craft mood lighting effortlessly. My choice for LED panels remains these innovative models that mimic natural daylight, crucial during overcast days or indoor shoots. Additionally, I lean on primers like this key light setup to get that perfect portrait illumination every time.
Ignite Your Creativity and Push Boundaries
Now is the perfect moment to take your studio lighting to the next level—whether you’re shooting videos, photos, or streaming. Experiment with combining RGB tube accents with softbox diffusions, and don’t hesitate to tweak angles based on your environment. Remember, mastery is born from curiosity and patience—every shot you craft brings you closer to that polished, cinematic look you desire. Dive into the resources mentioned, and keep refining your skills. The world of studio lighting is vast, and with deliberate practice, you’ll find yourself creating visuals that truly stand out.
![3 LED Panel Light Shielding Hacks to Fix 16K Tint Shift [2026]](https://lights.creatorrigreviews.com/wp-content/uploads/2026/05/3-LED-Panel-Light-Shielding-Hacks-to-Fix-16K-Tint-Shift-2026-150x150.jpeg)


