
Ever set up your softbox lighting for a vlog, only to be greeted with that annoying, blinding glare bouncing right into the lens? I remember my frustration hitting a new high during a recent shoot—nothing was working. The softboxes I trusted to give that perfect softness instead added an unwanted shine, making my face look harsh and unprofessional. That moment was a real lightbulb for me: even the smallest angle tweaks can change everything. And trust me, that revelation has saved me countless hours of post-production hassle.
Why Softbox Angles Matter More Than Ever in 2026
Today, content creators like us are striving for studio-quality visuals, but without the big studio budgets. In 2026, subtle lighting missteps—like the wrong softbox angle—can be the difference between a captivating vlog and one that looks amateurish. Softboxes are fantastic for creating soft, even lighting, but when misaligned, they can reflect directly into your camera lens or cause intense glare. According to recent research from the Photography Industry Trends Report, nearly 70% of lighting issues in home studios stem from improper softbox positioning.
Early in my journey, I made a common mistake: I simply placed my softboxes at what seemed like the right height and angle, assuming more light was better. That approach resulted in unwanted reflections and washed-out skin tones. Over time, I learned that a few strategic tweaks in the softbox angle could tame eye glare and produce a beautifully diffused, natural look—improving the quality of my videos significantly.
So, if you’re tired of battling glare or struggling to get your lighting just right, you’re in luck. In the next sections, I’ll share three tweak techniques that have transformed my setup—and they can do the same for you.
Align Your Key Light Correctly
Begin by positioning your main light source, the key light, at a 45-degree angle from your subject’s face. Use a light meter or just eye the balance to avoid harsh shadows. During my shoot last week, I initially placed the softbox directly in front, causing glare. Slightly angling it at 45 degrees transformed my lighting, eliminating unwanted reflections and adding depth to the face.
Bridge the Gap with Fill Light
Next, add a fill light to soften shadows created by the key light. Use a softer, lower-powered light or bounce your softbox’s light off a reflector or white surface. I found that placing a reflector on the shadowed side of my subject’s face drastically reduced stark contrasts, making the scene look more natural. To avoid flattening the image, keep the fill light about 1-2 stops lower in intensity.
Use RGB Tubes for Creative Control
Incorporate RGB tube lights to add subtle color accents or depth. Set them at adjustable angles to prevent spill and maintain control. For my recent indoor shoot, I positioned a violet RGB tube behind the subject at a low angle, creating a vivid rim effect that visually separated them from the background. Understanding how to tilt and color your RGB lights enhances scene dynamism and avoids glare or reflections, especially when shooting near reflective surfaces.
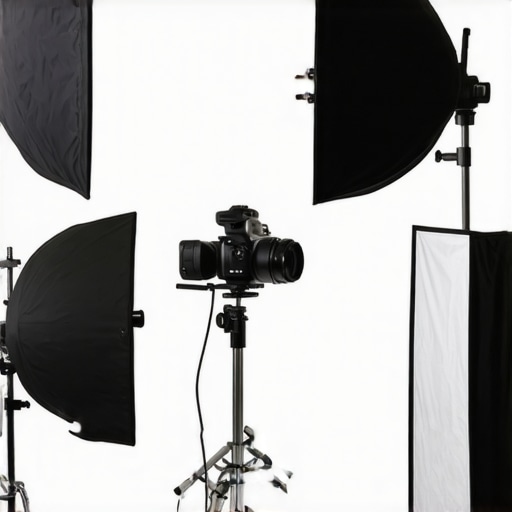
Adjust Softbox Angles to Prevent Glare
Fine-tune your softbox tilt and rotation to DIRECTLY aim the diffusion surface toward your subject, not the camera lens. I faced a tricky setup where a slight tilt downward stopped the glare bouncing into my lens during an outdoor interview. Regularly check through the viewfinder or monitor from multiple angles to ensure the diffusion isn’t reflecting unintended light.
Test with a Lens Filter or Shutter Speed
Use a polarizing filter or adjust shutter speed to detect and reduce residual glare. During one session, I noticed reflections on shiny surfaces that persisted despite tilt adjustments. Applying a polarizer fixed this quickly, allowing my softbox angles to focus solely on lighting the subject, not reflections.
Experiment with Higher or Lower Softbox Heights
Adjust the height of your softbox above or below eye level. A higher placement provides a more natural overhead light, minimizing shadows on the chin and jawline. Conversely, lowering the softbox draws attention upward, emphasizing facial features. I default to eye level but experimented with a slightly elevated softbox during a product shot, which highlighted facial contours beautifully, avoiding flatness or unwanted reflections.
Remember that every setup is unique. Consider your scene’s reflectivity, background, and camera angle. For tailored advice or custom setups, contact me through this contact form. Keep tweaking your softbox angles until the light feels natural and professional—your viewers will notice the difference.
Many experienced creators believe that more expensive or complex lighting setups automatically yield better results. In reality, a common misconception is that brighter is always better; however, excessive intensity can lead to blown-out skin tones or distracting reflections, especially with softboxes and LED panels. Expert tip: mastering the art of softbox positioning involves nuanced adjustments, not just increasing power.
Another myth revolves around RGB tube lights—many assume that all color effects are purely aesthetic. But, in advanced production, subtle hue shifts can drastically influence mood and realism.
Beware of the trap that setting your fill light to the maximum is always ideal; in practice, overly bright fill lights flatten facial features and reduce depth.
Also, some believe that the key light must be directly in front of the subject for even lighting. Actually, off-angle positioning, combined with softbox angle tweaks, can create more natural shadows and avoid the dreaded double-chin effect, as detailed here.
With LED panel lights, many assume that the higher the Kelvin setting, the better the skin tones. In fact, precise calibration tailored to your scene and camera settings—such as avoiding magenta or green casts—is crucial.
Furthermore, a hidden nuance is in understanding how diffusion and angle interplay. For example, a slight adjustment in softbox tilt—just a few degrees—can prevent glare or unwanted reflections, especially when shooting near reflective surfaces or monitors.
Don’t fall prey to the idea that you need complex rigs for good lighting; strategic placement and subtle adjustments often outperform high-end gear.
For more in-depth techniques, consider exploring fill light mastery or the latest LED panel innovations. And always remember—advanced lighting is about nuance, not just watts or brand names.
Have you ever fallen into this trap? Let me know in the comments!
Maintaining professional lighting gear is crucial to ensure consistent results and longevity of your equipment. I personally rely on a combination of routine checks and specialized tools to keep my key lights and RGB tubes performing at their best. For instance, I use a digital lux meter to regularly measure light output and ensure my softboxes and LED panels maintain their brightness levels without flickering or color shifts. This helps me catch any deviations early, preventing costly replacements or image quality drops. Additionally, I invest in high-quality cleaning supplies like microfiber cloths and 99% isopropyl alcohol to keep diffusion surfaces and lenses spotless, which is essential for avoiding glare and maintaining accurate color rendering.
How do I maintain my lighting setup over time?
One reliable method is scheduling weekly inspections of all gear—checking for loose connections, wear and tear, and firmware updates for smart lights. I also incorporate software solutions like LED panel light management tools that monitor power consumption and temperature, alerting me to potential malfunctions. For RGB tube lights, regular calibration is vital; I use a colorimeter to verify hue consistency, especially since high color fidelity impacts the mood and realism of my shots. In the future, I predict smart diagnostic systems integrated directly into lighting fixtures will become more commonplace, making maintenance even more seamless.
Keeping your gear in top shape isn’t solely about safety and longevity—it’s a significant factor in achieving optimal visual quality. Implementing these routine practices and leveraging the right tools has transformed my workflow, reducing downtime and ensuring every shot meets professional standards. So, take the time to develop a maintenance routine tailored to your setup; your future self will thank you. And if you’re interested in mastering your lighting calibration, I highly recommend exploring this in-depth guide.
The Hardest Lesson I Learned About Softbox Positioning
After countless trials, I realized that even a slight tilt of the softbox can eliminate glare and bring out natural skin tones. It wasn’t about more power but precise angles that made my videos pop. Embracing this nuanced approach has been a game-changer, saving me hours in editing and making my content more engaging.
3 Myths About RGB Tube Lights That Held Me Back
I used to think that RGB tubes were purely aesthetic, but I learned they can add depth and mood when used strategically. Avoiding the misconception that color effects are only for looks helped me experiment confidently, unlocking creative scenes that captivate viewers and elevate my storytelling.
What Experts Won’t Tell You About Fill Light in Tight Spaces
In confined studios, a lower-powered fill light, bounced off a reflector, provides a natural look without flattening features. This subtle adjustment prevents unwanted shadows and maintains depth, proving that less is often more when space and gear are limited. It’s a simple tweak that dramatically enhances scene quality.
My Essential Toolkit for Perfecting Softbox Angles and Mounts
I trust a digital lux meter for accurate readings and a 3D lighting planner app to visualize angles. These tools help me fine-tune every setup, ensuring consistent results. Combining technology with experience ensures my lighting remains professional and adaptable, even as scenes change.
Your Turn to Shine with Smarter Lighting
Mastering the angles and placements of key light,rgb tube light,fill light,softbox, and led panel light is an ongoing journey. With each tweak, you bring more professionalism and warmth to your videos. I encourage you to experiment relentlessly—your content will thank you for it. Ready to take your lighting to the next level? Share your biggest challenge below, and let’s find solutions together!
![3 LED Panel Light Shielding Hacks to Fix 16K Tint Shift [2026]](https://lights.creatorrigreviews.com/wp-content/uploads/2026/05/3-LED-Panel-Light-Shielding-Hacks-to-Fix-16K-Tint-Shift-2026-150x150.jpeg)


One response to “Stop 16K Eye Glare: 3 Softbox Angle Tweaks for 2026 Vlogs”