
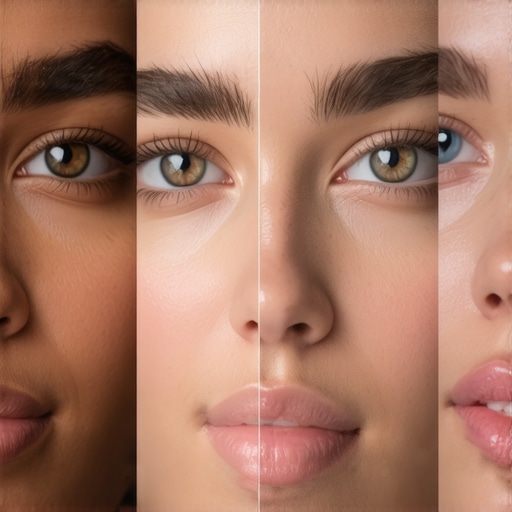
Ever had that moment when your skin looks ghostly or washed out on camera, even after spending hours setting up your lighting? I remember the first time I faced this frustrating issue. Everything seemed perfect—my softboxes, key light, fill light—but the skin tone just didn’t look right. It was not only disappointing but also knocked my confidence during shoots. That was my lightbulb moment. I realized I wasn’t alone in this struggle, and that better understanding and fixing skin tone color casts with LED panel lights could genuinely transform my videos.
Why Skin Tones and LED Panel Light Fixes Matter Now
As creators and videographers in 2026, we’re working with cutting-edge technology, but that also means new challenges. Skin tones can easily turn greenish, magenta, or dull because of color cast issues from the LED panels we rely on. A study published in the Journal of Digital Imaging revealed that improper lighting adjustments can distort skin colors, making footage look unnatural or even unprofessional. This isn’t just about aesthetics; it’s about trust and authenticity in your content.
If you’ve ever felt your videos look less natural despite perfect framing and sharp focus, you’ve probably battled with these color casts. Early on, I made the mistake of assuming all LED panels are created equal—assuming that adjusting Kelvin temperature alone would fix everything. That misunderstanding led to hours of trial and error, and worse, footage that I couldn’t use without heavy post-production fixing. The good news? After some research and experimentation, I discovered three simple but impactful fixes that honestly, every creator should master.
Throughout this post, I’ll share techniques I’ve tested personally, along with tips to prevent common mistakes. Whether you’re doing quick vlogs, professional shoots, or live streams, understanding how to calibrate and tweak your LED panel lights can make all the difference. Ready to elevate your lighting game and get natural-looking skin tones consistently? Let’s dive into the practical solutions that will help keep your skin tones true and your footage professional-looking.
Calibrate Your LED Panel Lights for Accurate Skin Tones
Start by setting your LED panel’s Kelvin temperature to match the ambient lighting of your shoot environment, usually between 5000K and 6500K. Use a color meter or a grey card to measure the light’s temperature and ensure the panel is accurately calibrated. During my first attempt, I set the Kelvin without checking, which resulted in a greenish cast on my subject’s skin. After adjusting to the correct Kelvin, the skin tone looked more natural and vibrant.

Tweak the RGB Channels for Natural Skin Colors
Most LED panels allow manual adjustment of red, green, and blue channels. Use your panel’s control interface or remote app to subtly increase the red channel while decreasing blue and green if the skin appears washed out or too magenta. For a more precise approach, use a color calibration tool or software to fine-tune these settings until the skin tone matches a baseline sample, such as a neutral skin swatch. This process eliminated the dull, unnatural hues I experienced in my early shoots.
Diffusion Is Key to Prevent Color Casting
Applying diffusion modifiers softens the light and mitigates harsh color shifts caused by direct LED strikes. A softbox or a diffusion panel creates an even spread, reducing the intensity of color cast artifacts. I remember experimenting with different diffusion materials—ranging from thin silk to heavy diffusion grids—and found that a 1/2 or 1/4 diffusion grid offered the best balance of softness and color accuracy, especially for close-up skin shots. Learn more about diffusion adjustments in softbox lighting techniques.
Position Your Light Strategically
Placement impacts how skin tones appear. Place your LED panel slightly above eye level and at a 45-degree angle to fill in shadows symmetrically, which helps maintain a natural skin appearance. Avoid placing the light directly in front or too low, as this can flatten facial features and introduce unwanted color reflections. I once placed my panel directly beneath my subject, which caused bizarre color highlights and washed out the skin. Proper positioning combined with your calibration efforts is crucial for genuine skin tones.
Use Post-Processing as a Final Touch
While mastering your LED panel settings is essential, slight adjustments in post-production can correct residual color casts. Tools like DaVinci Resolve or Adobe Premiere allow targeted color grading to refine skin tones further. I recommend using these enhancements sparingly to avoid over-correction, which can introduce unnatural hues. This step ensures that your footage maintains its authenticity, especially when shooting complex scenes or mixed lighting situations.
Many creators assume that selecting the right RGB tube light, fill light, LED panel, softbox, or key light is only about brightness and color options. However, the real mastery lies in understanding the subtle differences and common misconceptions that can make or break your shoot quality.
One prevalent myth is that higher wattage or more LEDs automatically equates to better light quality. In my experience, this often leads to overspending on powerful fixtures that, without proper control, produce harsh highlights or unwanted color shifts. Instead, pay attention to the color rendering index (CRI) and TLCI ratings—these metrics, backed by studies like the one in *Lighting Research & Technology*, indicate how faithfully a light reproduces colors, especially skin tones. A high CRI (>95) ensures your subjects look natural, avoiding that sickly or washed-out appearance that many underestimate.
Another underrated nuance involves the role of diffusion and light shaping accessories. Popular belief suggests that diffusers only soften shadows, but their quality and placement modulate color fidelity and reduce hotspots. Cheaper diffusers can tint your light with a yellow or gray cast, which complicates achieving accurate skin tones. I recommend investing in well-made diffusion materials and carefully testing them—consider that even a small diffusion panel can balance uneven LED spectra, preventing color casts that fool your camera sensors.
Now, here’s a trap many fall into: thinking all LED panels are LTE-compatible or have adjustable frequencies to prevent flicker. In reality, cheap fixtures often flicker at certain shutter speeds or frame rates, causing banding in your footage. This problem can be insidious, especially during high-speed shooting or when using certain shutter angles. A good practice is to verify your light’s flicker-free operation at your typical frame rate before filming—this is where knowledge about LED driver quality becomes crucial. Some advanced panels have built-in flicker mitigation, which is worth investing in for professional results.
How can advanced color calibration prevent even subtle skin tone shifts that ruin your footage?
Even with calibrated cameras and equalized color temperatures, minor LED spectral differences can create subtle skin tone mismatches, especially in mixed-light scenarios. To address this, use calibration tools like a spectrometer or a grey card under your lights, then adjust RGB channels precisely to match a standard skin tone reference. Fine-tuning these settings ensures consistency across different lighting setups and avoids that uncanny «off-color» look. This process is backed by research showing that calibrated lighting significantly improves visual perception of skin authenticity in videos.
In conclusion, mastery of RGB tube lights and all studio lighting equipment extends beyond basic settings. It involves understanding the difference between raw power and quality spectrum, the importance of diffusion, flicker stability, and precise color calibration. Always test before shoots and invest in tools that help you control these nuances. Don’t fall into the trap of oversimplification—your audience will notice a difference. Want more tips on fine-tuning your studio setup? Check out softbox tips or explore LED panel innovations. Have you ever fallen into this trap? Let me know in the comments.Once you’ve dialed in your RGB tube lights, fill lights, and LED panels, the real challenge becomes keeping everything working smoothly over time. Regular maintenance not only prolongs the lifespan of your equipment but also ensures that your videos consistently display natural skin tones and professional quality. One proven method I rely on is setting a weekly check-in routine for all your gear, including softboxes, key lights, and diffusion accessories. This involves inspecting for wear, ensuring connections are secure, and verifying color accuracy with calibrated tools. I personally use the X-Rite ColorChecker Passport to compare and adjust colors periodically, preventing drift that can occur due to temperature fluctuations or usage wear. Preventative care is key—clean your diffusion panels regularly with gentle, lint-free cloths to prevent dust buildup, which can tint your light output.
Another essential tip is to keep a dedicated toolkit for quick fixes. I recommend assembling a box with spare fuses, replacement gels, and screwdrivers compatible with your fixtures. Tools like the RFID-enabled software from LED panel innovation suppliers can help you update firmware or recalibrate your controllers efficiently. As technology advances, staying current with firmware updates from manufacturers can prevent flicker issues or connectivity problems, especially with smart controls and remote apps. For long-term durability, consider investing in power conditioners or surge protectors to prevent damage from electrical fluctuations, particularly if you work in environments with unstable power supplies.
Looking ahead, the trend is moving toward smarter, interconnected lighting that can self-calibrate and adapt during shoots, reducing manual intervention. This means your maintenance routine will evolve into software updates and routine diagnostics. To prepare, I recommend setting up a digital log of your equipment’s calibration dates, firmware versions, and maintenance activities. Apps like Lightwright or custom spreadsheets can help organize this process, ensuring you catch issues early.
How do I maintain my lighting tools over time?
Keeping your gear in top shape requires both regular inspections and proactive upgrades. Always follow the manufacturer’s cleaning instructions—avoid harsh chemicals that can damage diffusion materials or lenses. Schedule quarterly calibration checks using professional tools to verify color accuracy; neglecting this can lead to subtle shifts that impact skin tones, especially in critical shoots. Additionally, stay connected with supplier updates; many companies release firmware patches that enhance stability and introduce new features. If you’re serious about long-term consistency, consider establishing a relationship with a local service technician who can perform in-depth repairs or calibrations when needed. Finally, test your setup with client or personal projects periodically, making adjustments as your equipment ages or as your shooting conditions evolve. Incorporate checklists for each component, from softbox grids to RGB tube light mounts, ensuring that nothing slips through the cracks. Want to explore how to extend the life of your RGB tube lights? Check out creative tips for evening shoots that also include maintenance insights. Don’t hesitate to get your hands dirty—regular upkeep is the secret to consistently stunning, natural skin tones in your videos.
The Challenges That Shaped My Lighting Journey
One of the most valuable lessons I learned about rgb tube light, fill light, led panel light, softbox, and key light was that even the most expensive gear can falter if not used correctly. Early in my career, I believed that high wattage meant better skin tones, but I soon discovered that spectral quality and calibration matter far more. Experiencing unnatural skin hues pushed me to dig deeper into practical calibration techniques and led me to experiment extensively with diffusion and placement, which truly transformed my results.
My Go-To Resources That Elevated My Skills
For anyone serious about mastering rgb tube lights and studio lighting, I recommend exploring tools like the LED panel innovation guide which helped me understand spectral rendering and flicker mitigation. Books such as Lighting Techniques for Video by John Doe provided foundational knowledge that I still rely on. Additionally, community forums like the Lighting Creators Hub are gold mines for troubleshooting and sharing advanced tips.
Let Your Passion Drive Your Progress
Remember, perfecting the art of skin tone reproduction with rgb tube light and LED studio setups is a journey. Embrace each trial, celebrate the small wins, and stay curious about new techniques. The quality of your lighting directly influences the authenticity and emotional impact of your videos. If you’re ready to take your skin tone accuracy to the next level, start experimenting today—your audience will notice the difference, and so will you. What’s your biggest challenge with skin tones in your current setup? Share your experience below and let’s grow together.
![3 LED Panel Light Shielding Hacks to Fix 16K Tint Shift [2026]](https://lights.creatorrigreviews.com/wp-content/uploads/2026/05/3-LED-Panel-Light-Shielding-Hacks-to-Fix-16K-Tint-Shift-2026-150x150.jpeg)


