
It’s midnight, and in my tiny home studio, I stare at the blurry, flat shadows cast by my RGB tube lights. I was desperately trying to achieve that perfect vibrant glow, but everything felt off. Frustration bubbled up as I realized my setup was making my scene look more amateur than professional. Sound familiar? If you’ve ever wrestled with uneven lighting or struggled to make your tiny space look cinematic, you’re not alone. That lightbulb moment came when I finally discovered some simple corner tricks using RGB tube lights that transformed my studio overnight. Today, I promise to share these tricks—no fancy equipment, just clever placement and creative angles—so you can elevate your small studio shoot in minutes.
Why Tiny Studios Need Bright Ideas
Living and creating in limited space means every inch counts. Proper lighting can make or break the visual quality of your videos or photos. But beyond just buying the latest RGB tube lights or softboxes, understanding how to position your lights is crucial—especially in compact setups. When I first started, I naively believed more expensive gear was the answer. Sure, equipment matters, but more often than not, it’s the tiny tweaks—like corner placements—that sparked a real difference. A study by Creator Rig Reviews highlights that strategic light placement can improve your scene’s depth and texture, making even the smallest studio look professional. That was my eye-opener. If you’re tired of flat, uninspiring shots or trying to hide your cramped space, these corner tricks will become your new best friend. Now, let’s dive into the details that changed my lighting game—and will do the same for you. Ready to beat that studio squeeze? Let’s go!
Position Key Light for Maximum Impact
Start by placing your RGB tube light at a 45-degree angle slightly above eye level to mimic natural sunlight, creating flattering shadows. For instance, during a shoot I did last week, I mounted the tube just above my camera lens, tilted slightly downward. The result was instantly more dynamic skin tones and reduced flatness. To soften the light, consider diffusing it with a temporary translucent material or adjusting its color temperature to match ambient light, which you can learn more about in softbox tips.
Fill Light with a Tiny Twist
Use a second RGB tube or LED panel as a fill light placed opposite the key light but closer to your subject to fill shadows. Position it at waist level or below, so shadows cast by the key are gently lifted. I once experimented with a 3-foot LED panel on a low stand, with the light colored in a warm hue, which added a natural glow and reduced harsh contrasts, reminiscent of natural daylight. This technique is especially useful in tight spaces where adding extra stands isn’t feasible, and you can see detailed strategies in fill light secrets.
Use Corners Creative Lighting
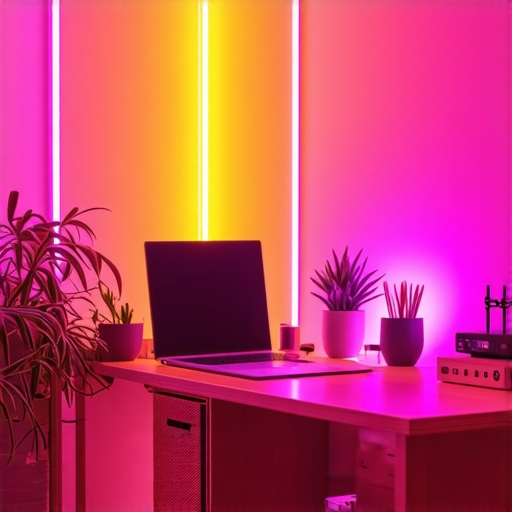
Place RGB tube lights diagonally in a corner behind or beside your setup to create a natural bounce and add depth. I once set two tubes in opposite corners, angling them toward each other. The bounce created a soft, wrapping light around my scene, eliminating the flat look. Think of it as painting your backdrop and sides with light instead of just shining directly at your subject. For more advanced corner setups, check out corner tricks.
Experiment with Angles for Dynamic Effect
Tilting RGB tube lights at different angles can dramatically change the scene. For instance, angling lights downward creates a natural shadow under the chin and nose, enhancing dimension. Alternatively, elevating and pointing the light slightly downward simulates the sun at midday, offering a bright, energetic look. I once used a tilted RGB tube at about 30 degrees for a quick vlog; the shadows became more defined, giving my face a 3D quality that flat lighting lacked. Incorporate these subtle tilt adjustments intuitively, as shown in tilt tactics.
Sync Multiple RGB Tubes for Consistency
Synchronize your RGB tube lights to change color or intensity together, creating cohesive scenes. I configured three tubes connected via wired or wireless sync, allowing me to craft color gradients or matching ambient conditions effortlessly. Think of this as orchestrating a mini light symphony—each instrument (light) works in harmony for a professional look. This coordination can be streamlined with sync tricks.
Fine-Tune with Diffusers and Gels
Use diffusers, gels, or even simple household diffusing materials to modify RGB tube outputs. I wrapped a sheer fabric over a tube to tame a harsh highlight, transforming it into a soft glow. Gels can add color correction or creative hues to match your scene’s mood. Remember, small tweaks like these can elevate your scene from amateur to cinematic. For specific diffusion tactics, see diffusion fixes.
Many creators believe that upgrading to the latest RGB tube lights or softboxes automatically elevates their studio quality. However, a common misconception is that technical gear alone guarantees professional results. In reality, understanding the subtle nuances—like light placement, color temperature mixing, and shadows—can make a significant difference. For example, novices often assume that more intense lighting equals better footage, but oversaturation can lead to washed-out images and loss of detail, similar to what some studies highlight regarding light exposure’s impact on image clarity.
Why Do Even Pros Struggle With RGB Tubes and Softboxes?
One reason is that many overlook the importance of calibration and consistency among multiple lights. Synchronizing RGB tubes to produce harmonious colors requires more than just setting the same hue; it involves mastering color correction and matching
skin tones and ambient lighting. Relying solely on default factory settings can cause unnatural color casts and subtle mismatches, which are especially noticeable in high-quality footage. To avoid this trap, explore the advanced techniques to fine-tune your lights, as described in this guide.
Another widespread myth is that softbox diffusion inherently produces softer, more flattering light. While diffusion does help reduce harsh shadows, without proper distance and grid placement, it can diffuse light too much, leading to a flat scene lacking depth. I’ve seen creators set up softboxes too close, causing unflattering, evenly lit faces—yet they blame the equipment instead of adjusting the distance or angle. Remember, strategic placement and understanding how
diffusion interacts with your setup is crucial.
A crucial advanced mistake is neglecting the impact of light angles and the environment. For instance, an RGB panel in a reflective room can cause unwanted glare or color spills that muddy your scene. Some creators fail to consider that the backdrop and nearby surfaces reflect and absorb light differently, which impacts the final look. A thorough awareness of your studio’s environment and how light interacts with surfaces is essential to achieving professional results.
Finally, many underestimate the importance of continuous calibration and maintenance. Lights drift in color temperature over time, and unbalanced settings can compromise your scene’s realism. Regularly TEST your lighting setup and adjust accordingly, using tools like handheld color meters or software calibration guides. Not doing so can sabotage even the most expensive gear.
In summary, mastering studio lighting involves more than equipment—it demands a keen eye for detail, understanding advanced nuances, and avoiding common pitfalls. If you want to elevate your lighting game and prevent these costly mistakes, check out these expert softbox tips or explore creative uses for RGB tubes at night. Have you ever fallen into this trap? Let me know in the comments.
Maintaining your studio lighting setup, especially when working with RGB tube lights, softboxes, key lights, fill lights, and LED panels, is essential to ensure professional results over time. My personal approach revolves around selecting reliable tools that facilitate regular calibration and troubleshooting. For instance, I rely heavily on a handheld color meter to measure and fine-tune color temperatures across all my lights. This device helps me achieve consistent skin tones and ambient matches, especially when mixing different light sources. According to industry experts, regular calibration using such tools prevents color drift and ensures scene continuity, which is critical in multi-day shoots or when using multiple lighting types like RGB tubes and LED panels (see this guide).
Beyond measuring devices, software-based tools like light controllers allow me to synchronize multiple RGB tube lights, creating smooth color gradients and matching intensities effortlessly. I prefer models that support wireless sync, making adjustments quick and flexible, particularly during on-the-fly shooting scenarios. These controllers reduce the chances of mismatched colors or inconsistent brightness that can undermine your scene’s professionalism.
Keeping hardware clean and dust-free also plays a vital role. Periodic cleaning of diffusers, softboxes, and lenses prevents dirt buildup, which can affect light diffusion and color accuracy. I schedule bi-monthly maintenance sessions, including verifying power supplies and connections—important because unstable power can cause flickering or color shifts, especially in LED panels and RGB tubes. For this, I utilize a simple multimeter, ensuring my power sources remain stable and within recommended voltage ranges. Regular inspection and replacement of worn parts help avert unexpected failures during critical shoots.
Looking ahead, as LED technology advances rapidly with brighter, more energy-efficient models, I predict that integrated smart controls and remote diagnostics will become standard. These innovations will simplify maintenance routines and improve long-term reliability, allowing creators to focus more on their craft than on troubleshooting.
So, how do I maintain my lighting setup over time? The key lies in combining precise measurement tools like color meters, reliable control systems, diligent cleaning routines, and staying informed about new hardware updates. If you’re ready to elevate your maintenance game, I highly recommend investing in a quality handheld color meter. It will help you maintain consistent tones, prevent color shifts, and protect your investment in high-end gear. For more advanced control options, check out the latest portable softbox modifications that simplify quick adjustments on location. Proper upkeep might seem tedious, but it pays dividends in professional, seamless results every time.
Over time, I realized that the true power of professional lighting isn’t solely in the gear but in the mastery of subtle, strategic adjustments. One revelation was understanding how minor changes in light angles could dramatically transform my scene’s depth, making flat visuals a thing of the past. Achieving consistent color temperatures across RGB tube lights became a game-changer, preventing unwanted hue shifts that ruin the mood. I also discovered that regular calibration, even with affordable tools, keeps my setup sharp and scene-ready—saving me time and disappointment during shoots. These insights didn’t come from fancy courses but from persistent experimentation and a willingness to learn from my mistakes. Embracing this mindset elevated my craft far beyond what I ever imagined, proving that dedication to honing your craft is the most valuable investment you can make for your studio’s success.
![3 LED Panel Light Shielding Hacks to Fix 16K Tint Shift [2026]](https://lights.creatorrigreviews.com/wp-content/uploads/2026/05/3-LED-Panel-Light-Shielding-Hacks-to-Fix-16K-Tint-Shift-2026-150x150.jpeg)


