
I remember the moment vividly: I was setting up for a quick recording, eager to get that perfect shot. Out of nowhere, I noticed my key light was so intense that it made my subject look like they were glowing, with harsh shadows and an almost cartoonish glow. It was frustrating because I knew I’d have to redo the entire setup, and I couldn’t help but wonder—why is my key light so overpowering?
When your key light feels more like the sun than a gentle fill
This isn’t just a minor annoyance; it can ruin the mood, distort skin tones, and make editing a nightmare. For many creators, the sudden brightness of a key light can turn a promising shoot into a post-production puzzle. Over the years, I’ve learned that understanding how to control light diffusion isn’t just technical—it’s essential for capturing genuine, professional-looking footage. If you’re tired of battling with overexposed faces or washing out colors, you’re not alone. Many creators face the same problem, and luckily, there are simple, affordable fixes that can make a world of difference.
Have you ever faced the dilemma where your lighting setup looks great in theory but falls flat in practice?
I’ve made my fair share of mistakes early on—like forget to use diffusion or underestimate the power of softboxes—so I totally get the frustration. Even experienced videographers sometimes overlook the importance of diffusion and end up with that dreaded washed-out look. According to professional lighting designers, diffusion is key to achieving natural skin tones and balanced light—something I wish I’d understood sooner. Want to learn how to avoid these pitfalls and make your lighting truly shine? Keep reading, because I’ll walk you through three simple diffusion fixes that will transform your 2026 lighting game.
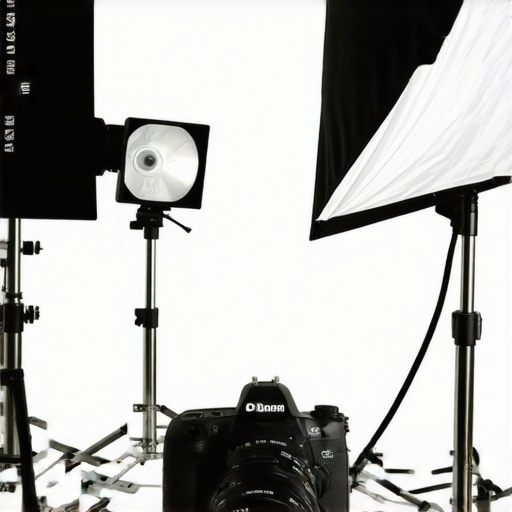
Dial Down Brightness with Softening Techniques
My first attempt at softening a harsh key light was experimenting with a basic softbox. I attached a softbox to my LED panel, but it still produced sharp shadows. I realized I needed an additional diffusion layer. So, I placed a diffusion sock over the softbox, which acts like a translucent curtain, spreading the light evenly. This method is akin to wearing thin, airy fabric over a spotlight to make the beam wider and gentler. Use affordable diffusion materials like silk or nylon sheets to wrap your light source, simulating the effect of a professional softbox, which can be found in [mastering softbox lighting tips](https://lights.creatorrigreviews.com/mastering-softbox-lighting-tips-for-perfect-portraits-at-dawn). This simple step transforms a harsh, direct light into a gentle, flattering glow. For best results, position the diffusion material close to the light source, approximately 2-4 inches, to maximize softness without sacrificing brightness.
Use Bounce Light for Natural Softness
Next, I learned the power of bouncing light off reflective surfaces. I set up foam boards painted with a matte white finish behind my subject. Instead of aiming my led panel directly at the face, I angled it to aim at the foam wall. The light hit the surface and reflected softly onto my subject’s face, mimicking natural window light. Imagine a mirror redirecting sunlight inside a room—this is the same principle. This method is especially useful when working in tight spaces or with limited gear. You can also use a large, white ceiling or wall as a bounce surface. This approach reduces harsh shadows and creates a more organic look, perfect for interviews or vlogs. For comprehensive bounce techniques, consider reviewing [fill light secrets for natural lighting](https://lights.creatorrigreviews.com/fill-light-secrets-achieve-natural-look-in-natural-light-at-6-pm). When bouncing, ensure the surface is large compared to your subject and as close as possible to get softer, more natural light.
Implement Flags and Grids to Control Spill
In my third trial, I faced a common problem: unwanted spill from my RGB tube light. The spill created a bright background glow, distracting from my subject. To fix this, I used a honeycomb grid, which acts like a series of tiny honeycomb cells, narrowing the light beam. I attached the grid directly onto the light, focusing the beam and preventing light from spilling into areas I wanted to keep dark. This is similar to using a flashlight with a snoot to aim light precisely. Grids are vital for controlling where light falls and for avoiding flat or washed-out backgrounds. When experimenting with RGB tube lights, [stop overlighting and get crisp results with a grid](https://lights.creatorrigreviews.com/stop-overlighting-why-your-led-panel-light-needs-a-grid-in-2026). Remember, a grid not only softens the light but also adds depth by creating contrast between lit and shadowed areas. Always adjust the distance between the light and subject to modify intensity after attaching a grid; closer means softer light, farther results in a harder look.

Image showing a LED panel with a honeycomb grid attached, focusing light tightly onto a subject, illustrating spill control.
Many creators assume that simply deploying RGB tube lights, key lights, or softboxes guarantees professional results. However, critical nuances often go unnoticed, leading to subpar footage despite seemingly proper setups. Let’s explore some of these overlooked details that can make or break your lighting quality.
First, there’s a widespread misconception that all diffusion is created equal. Many rely solely on budget softboxes or even no diffusion at all, believing that a bright LED or RGB tube light can be sufficient. But in truth, the quality of diffusion profoundly affects skin tones and overall image softness. Cheap diffusion materials or improper placement can cause color shifting, unwanted hotspots, or harsh shadows. For instance, professional softboxes often incorporate integrated diffusion layers designed for optimal light spread, which you can master using techniques outlined in [mastering softbox lighting tips](https://lights.creatorrigreviews.com/mastering-softbox-lighting-tips-for-perf ect-portraits-at-dawn).
Next, a common trap is underestimating the impact of light placement and angle. Many underestimate how slight changes—like a few inches—alter the light’s quality, softness, and shadows. For RGB tube lights, which are highly versatile, improper angling can result in uneven color mixing or unflattering highlights. Advanced users know that small tweaks, such as adjusting distance or tilt, can significantly influence the final look. Moreover, controlling spill from RGB tube lights with accessories like grids ensures precise placement, preventing light spill that causes unwanted color cast or distraction, as discussed in [stop overlighting and get crisp results with a grid](https://lights.creatorrigreviews.com/stop-overlighting-why-your-led-panel-light-needs-a-grid-in-2026).
Furthermore, there’s a misconception that brighter is always better. Actually, overly intense RGB or key lights can wash out skin tones, especially with cheap panels lacking proper diffusion or dimming controls. Knowing how to balance your fill light, especially in mixed lighting environments, is crucial. The detail lies in understanding your equipment’s true capabilities and limitations, avoiding common pitfalls like overexposure or color tints. For delicate skin tones, employing subtle diffusion layers and adjusting color recipes are invaluable, as highlighted in [fill light secrets for natural lighting](https://lights.creatorrigreviews.com/fill-light-secrets-achieve-natural-look-in-natural-light-at-6-pm).
A less obvious nuance involves the timing and environment during shooting. RGB lights, including tubes, often behave differently depending on ambient ambient light conditions or color temperature variations. Shooting without considering these factors can lead to mismatched color profiles or false-looking footage. Experts recommend calibrating your RGB lights regularly and using color mismatch correction tools when needed. For advanced creative use of RGB effects, check out [RGB tube light effects guide](https://lights.creatorrigreviews.com/rgb-tube-light-effects-creative-uses-for-evening-shoots).
Lastly, the myth that spending more guarantees better quality can be misleading. While high-end gear provides more control and consistency, understanding your tools — from diffusers to modifiers — yields better results than simply upgrading equipment in hopes of instant perfection. A strategic approach, focusing on weaknesses like diffusion, placement, or spill control, often results in superior footage. For example, implementing simple diffusing techniques or grids can elevate standard panels or RGB tubes without hefty investments.
Remember, lighting mastery isn’t just about owning the latest gear but understanding subtleties that influence skin tones, shadows, and color accuracy. Keep experimenting, learn the intricacies, and always question assumptions. Have you ever fallen into this trap? Let me know in the comments.
Running a professional lighting setup isn’t just about purchasing high-quality equipment—it requires diligent maintenance and thoughtful tool choices to ensure longevity and optimal performance. Over time, even the most robust RGB tube lights, softboxes, and LED panels can experience wear, causing diminished brightness, color shifts, or flickering. To avoid these issues, I recommend establishing a regular maintenance routine that includes cleaning, checking connections, and updating firmware when applicable.
Prioritize Regular Cleaning and Inspection
Dust and dirt are silent killers of lighting components. They can dampen light output and cause overheating. Personally, I assign a weekly cleaning schedule using compressed air to blow out vents and soft cloths for external surfaces. Pay special attention to diffusion panels or softbox fabrics; tiny particles often settle there and can impact light diffusion quality. If you notice any dead pixels or flickering on your LED panels, don’t ignore it—these signs often indicate aging components that might need replacement or professional servicing.
Invest in Quality Tools and Accessories
Using the right tools can make maintenance more effective. For example, I highly recommend keeping a set of high-quality connectors, spare bulbs or LEDs, and diffusion materials like professionally designed softbox grids or diffusion sleeves. When I noticed my RGB tube light’s spill became problematic, I employed a honeycomb grid (see this guide) to regain control. Strong, well-fitted accessories not only improve light quality but also extend the lifespan of your equipment by protecting vulnerable components.
Keep Software and Firmware Up to Date
Many modern LED lights and RGB devices come with firmware that can be updated via manufacturer apps. Regular updates can fix bugs, enhance performance, and add new features. I frequently check manufacturers’ websites or download update apps to stay current. Keeping firmware current ensures your lights operate smoothly, especially when used for complex color effects or synchronized multi-light setups. For extensive control over your lighting, consider integrating software that allows seamless adjustments and preset management—this not only saves time but also maintains consistent results across shoots.
Anticipate Long-Term Results and Scaling Needs
As your setup evolves, so should your tools and maintenance routines. Investing in scalable solutions, like modular LED panels or extendable softbox systems, simplifies future upgrades. Think about equipment durability, energy efficiency, and compatibility with accessories. For example, modular LED panels can be expanded with diffusers or barn doors, allowing you to adapt to different shoot requirements without replacing everything. Proper maintenance now ensures your gear remains reliable, and planning for scalability prevents costly overhauls later.
Where Do I Keep My Equipment Healthy?
Store your gear in a clean, dry environment, avoiding extreme temperatures and humidity. Use padded cases for transport and consider desiccants to control moisture. Regularly inspect cables and connectors for wear and replace damaged parts immediately. Remember, consistent care preserves your investment and guarantees that your lights will perform precisely when you need them most. Many creators underestimate the value of meticulous maintenance, yet it is the foundation of professional-quality production. Regularly scheduling these practices ensures your lighting remains dependable over the long haul.
Looking to optimize your setup further? Try advanced diffusion techniques like integrating softbox grids with your LED panels or enhancing spill control using honeycomb grids—these small upgrades can dramatically improve your lighting quality and consistency. For detailed guidance, explore this article on spill control. Remember, sustained maintenance and clever tool choices are your best allies for professional results day after day.
Rediscovering the Power of Diffusion: My Sudden Realization
One of the most eye-opening lessons I learned was how even affordable diffusion materials could dramatically improve my lighting if used correctly. I once relied solely on cheap softboxes, which often resulted in uneven light flats and subtle color shifts. The breakthrough came when I started experimenting with layering diffusion fabrics close to my light source, mimicking professional softboxes. This simple tweak, inspired by my reading of the softbox lighting tips, transformed my footage overnight. It was a reminder that often, the smallest details make the biggest difference in achieving authentic, flattering skin tones.
Challenging the Myth of ‘Set and Forget’ in Lighting Setup
I used to believe that once I got my key and fill lights positioned correctly, I was done—only to find out later that tiny adjustments could elevate the entire shot. My epiphany was understanding how precise angling and distance control, especially with RGB tube lights, could soften shadows or add depth. Regularly tweaking these variables, instead of relying on static setups, allowed me to adapt to different environments and subjects. To refine your setups, consider exploring the key light techniques that professional videographers swear by. Remember, lighting isn’t a one-and-done task—it’s an ongoing conversation between your gear and your environment.
What I Wish I Had Learned Sooner About Spill Control and Softness
Early in my journey, I underestimated the importance of controlling spill from RGB lights. After days of frustration with unwanted background glows, I finally discovered the versatility of honeycomb grids, which focus the light precisely where I wanted it—much like focusing a flashlight and blocking out the noise. This realization came after studying how professional studios manage spill. Now, I make it a practice to always have grids and flags handy, especially when working in tight spaces. These tools empower you to shape your light, add contrast, and prevent flatness, giving your footage a more cinematic quality.
Curated Arsenal for Elevated Lighting Crafting
Over the years, I’ve relied on a few trusted tools that continuously elevate my lighting game. First, investing in adaptable softboxes and diffusion fabrics from this resource helped me craft smoother light spreads. Second, a sturdy honeycomb grid has become my go-to for spill control, especially with RGB tubes, as discussed in this guide. Third, regular firmware updates from the manufacturer ensure my lights perform consistently and incorporate the latest features, which I find invaluable. Lastly, a set of high-quality reflective surfaces—like matte white foam boards—allows me to bounce and soften light without extra gear. Trusting these tools is rooted in their proven ability to make my setups more reliable and professional-looking.
Your Next Step in Lighting Brilliance
Loving your lighting setup and pushing its potential keeps the magic alive. The key is a blend of technical understanding and creative experimentation. Think of each shoot as an opportunity to refine your craft, whether that’s layering diffusion, fine-tuning angles, or controlling spill with grids. Remember, the journey to perfect lighting is ongoing—embrace the process and keep exploring new techniques. Whether you’re just starting or looking to elevate your existing setup, making deliberate, informed choices will always serve you best. So go ahead—dan your confidence in your lighting skills and create videos that truly stand out.
What has been your biggest lesson in controlling spill or diffusion? Share your experiences below—I’d love to hear what’s worked for you!
,
![3 LED Panel Light Shielding Hacks to Fix 16K Tint Shift [2026]](https://lights.creatorrigreviews.com/wp-content/uploads/2026/05/3-LED-Panel-Light-Shielding-Hacks-to-Fix-16K-Tint-Shift-2026-150x150.jpeg)


