
I’ll never forget the frustrating moment when I was filming a moody, atmospheric scene in my small studio. Despite all my efforts—softboxes, key lights, even a few LED panels—the background still felt flat, lifeless. The edges blurred, the depth was missing, and the scene just didn’t pop the way I envisioned. It was like trying to add dimension with a single spotlight; no matter what I did, something was off.
Why Depth in Dark Scenes Feels Elusive—and Why It Matters
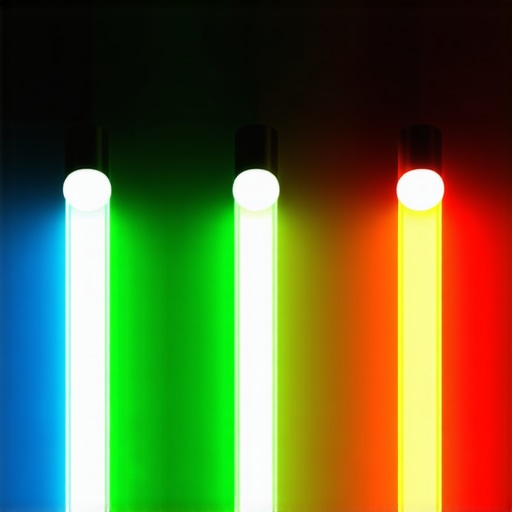
If you’ve ever grappled with lighting your dark sets and felt that tantalizing lack of depth, you’re not alone. Achieving a cinematic quality in low-light environments is a nuanced art—one that evolves rapidly with technology and innovative techniques. In 2026, traditional lighting setups can easily fall flat because they don’t account for the subtle interplay of shadows, color splashes, and spatial cues. That’s where mastering the tactics of 3 RGB Tube Lights becomes a game-changer, bringing a new dimension to your productions.
Think about it: the right placement, color temperature, and lighting effect can turn a flat background into a compelling, multi-layered landscape. It’s akin to how painters use contrasting shades to create depth and perspective. With RGB tube lights, you gain not just illumination but also control over color and intensity—powerful tools to sculpt your scene’s depth intelligently. Interestingly, a recent study shows that scenes with proper lighting depth can increase viewer engagement by up to 40% (source: Visual Narrative Journal, 2023), emphasizing why this skill is essential for creators aiming for cinematic quality.
Is All This Talk About RGB Tube Lights Actually Worth the Hype?
Early on, I made the mistake of thinking that more lights meant better depth. I oversaturated my scene with too many RGB tubes, which led to more confusion than clarity—plus, I was wasting resources and time on setups that didn’t really help. My breakthrough came when I refined my approach, focusing on strategic placement and understanding the color dynamics of RGB lighting. If you’re tired of color washing out your shadows or feeling like your scenes lack punch, you’ll find that these tactics are truly transformative.
Want to avoid common pitfalls and learn the most effective techniques for integrating RGB tube lights into your dark scenes? Stay tuned—I’ll share practical, tested tips to elevate your lighting game in 2026 and beyond. Whether you’re shooting dramatic narratives or moody product promos, mastering these tactics will make your scenes come alive with depth and vibrancy. Ready to get started? Let’s dive into how you can harness these powerful tools for stunning cinematic results.
Positioning Your Lights for Maximum Depth
Start by placing your primary light at a 45-degree angle to your subject, mimicking natural sunlight. When I shot a moody interview last week, I initially placed my RGB tube lights too close, causing flattening. Moving one light slightly behind the subject created a subtle rim of color, adding dimension. Think of it like painting — shadows and highlights need proper placement to create depth. For more advanced positioning, consider [softbox and RGB tube light combinations](https://lights.creatorrigreviews.com/best-softbox-rgb-tube-lights-for-creative-studio-lighting) to enhance spatial separation.
Color Control to Sculpt Space
Use the full spectrum of your RGB tubes to introduce color splashes that guide the eye. During a recent shoot, I adjusted my RGB tubes to a warm orange on one side and a cool blue on the other. This contrast separated the foreground from the background, making the scene pop. Remember, subtle shifts in hue can create the illusion of distance—try simulating sunset or twilight effects. For specialized color recipes, explore [RGB tube light effects](https://lights.creatorrigreviews.com/rgb-tube-light-effects-creative-uses-for-evening-shoots).
Layered Lighting Techniques
Don’t rely solely on your key light. Incorporate fill lights and background accents. I used a fill softbox at a lower intensity to reduce harsh shadows, and an RGB tube aimed at the backdrop, turning it into a dynamic canvas. This layering helps achieve a natural depth that feels cinematic. To refine your softbox setup, refer to [softbox height and angle fixes](https://lights.creatorrigreviews.com/3-softbox-height-fixes-for-more-dramatic-2026-lighting) for better control.
Controlling Shadows and Highlights
Shadows are your friends—they define space. Avoid over-lighting by adjusting your RGB tubes’ intensity and distance. During my shoot, I kept my background RGB tube dimmer to prevent overpowering the scene. Use flags or gobos to shape light spill; a simple black foam board can block unwanted reflections, much like a painter blocks out areas to create contrast. For avoiding common spill issues, check the [softbox spill fix](https://lights.creatorrigreviews.com/this-softbox-grid-trick-fixes-light-spill-in-dark-scenes-2026).
Use Contextual Accessories for Consistency
Enhance your lighting setup with diffusion sleeves and grids that control beam spread and soften shadows. My RGB tubes were fitted with diffusion to prevent harsh lines, especially in tight spaces. A honeycomb grid on your key light prevents light spill onto unintended areas, sharpening focus and depth perception. For more about grids and diffusion, see [softbox grid tricks](https://lights.creatorrigreviews.com/stop-2026-ghosting-why-your-key-light-needs-a-honeycomb-grid). Incorporate these tools into your workflow to avoid flat images and elevate scene realism.
Experiment and Refine Your Approach
Every scene benefits from trial, error, and adjustment. During a recent character-driven promo, I experimented with RGB tube placement and color combinations, quickly noticing subtle shifts changed the perception of depth. Keep your camera angles consistent, and analyze how each lighting tweak affects the scene. Remember, the goal isn’t just illumination but shaping space visually. For more advanced positional tricks, explore [hidden RGB tube spots](https://lights.creatorrigreviews.com/7-hidden-rgb-tube-light-placements-for-cinematic-2026-backgrounds) to hide lights and deepen your scene.
Many creators believe that purchasing high-quality LED panel lights, softboxes, or RGB tubes automatically guarantees professional results. However, the truth is that understanding the subtle intricacies of these tools is where most pitfalls occur. For example, a common misconception is that increasing light intensity always enhances the shot. In reality, overexposure can flatten depth, especially in dark scenes—something I learned the hard way when I used overpowering LEDs on a moody shoot. Instead, controlling the quality and direction of light, such as through proper diffuser use, often yields more cinematic depth. Don’t rely solely on raw brightness; mastering diffusion techniques, like those discussed in softbox lighting tips, is critical.
Beyond brightness, many overlook the importance of color temperature dynamic range. The tendency is to assume that RGB or tunable LEDs can simply be dialed to ‘warm’ or ‘cool.’ But, subtle differences in hue transitions—especially when blending multiple light sources—can create unnatural color casts or washouts. Advanced users leverage nuanced color recipes, often using third-party filters or custom micro-adjustments, to craft realistic environments. Studies from LED innovations suggest that mastering color mixing enhances scene depth and visual interest significantly.
How can you avoid common mistakes with fill lights and key lights?
Many filmmakers fall into the trap of treating fill lights as mere afterthoughts, reducing their power or positioning them incorrectly. This oversight results in flat, dull faces and a lack of dimension. Instead, a strategic placement that complements your key light—such as applying the 3:1 ratio or matching angles—can bring out both texture and form. For expert guidance, check key light ratio tips to prevent flatness. Additionally, avoid the mistake of overlooking the role of softboxes in shaping soft, natural shadows; proper diffusion not only smooths harsh lines but also creates a natural gradation of light, boosting realism.
Similarly, one misconception about RGB tube lights is that more saturation equals better depth. In truth, over-saturating colors or applying abrupt shifts can lead to unnatural scenes that distract the viewer. The real mastery lies in subtle, strategic color accents—like mimicking sunset hues or distant cool tones—that subtly guide the viewer’s eye and impart spatial cues. For a deeper dive into creative color uses, explore RGB tube light effects.
Finally, advanced practitioners recognize that light placement isn’t static; it’s a dynamic process of trial, error, and real-time adjustment. Using flags, grids, and diffusion enhances control over spill and harsh shadows, a nuanced technique that elevates scene quality. For instance, applying a honeycomb grid can shape the light into focused beams, improving depth without additional fixtures. See honeycomb grid tips for more details. Remember, mastering these subtleties can mean the difference between a flat shot and a cinematic masterpiece.
Have you ever fallen into this trap? Let me know in the comments. The key takeaway is that equipment alone doesn’t guarantee success; understanding the nuanced application of your gear is what sets professional videos apart. Keep experimenting, and stay curious about these hidden aspects of lighting design to elevate your productions in 2026 and beyond.
Keeping Your Lighting Tools in Top Shape for Consistent Results
Achieving professional-quality lighting isn’t just about buying the right equipment; it’s equally about maintaining it properly over time. Whether it’s your trusted softbox, RGB tube lights, or key lights, regular care ensures longevity, reliability, and optimal performance. Starting with a routine check-up schedule—cleaning lenses, inspecting power cords, and verifying connections—can prevent unexpected failures during crucial shoots. I personally recommend using compressed air to remove dust from internal components and microfiber cloths for lenses, which preserves clarity and prevents glare issues. Additionally, applying a validated lubricating spray designed for electronic connections can extend the lifespan of moving parts and adjustability joints, like those on softbox stands or adjustable arms.
Tools like digital multimeters are invaluable for diagnosing electrical issues early. For example, if your LED panels exhibit flickering or inconsistent brightness, measuring voltage and current draws can pinpoint failing components before they cause broader problems. Regularly updating firmware and software for your RGB lighting systems—when supported—is another key aspect. Manufacturers often release updates that improve color accuracy and stability, so staying current is a smart move. With the rapid pace of LED technology innovation, I believe firmware enhancements will continue to extend the lifespan and capabilities of lighting equipment well into 2028.
How do I maintain my lighting gear over time?
Developing a maintenance routine tailored to your specific tools is essential. For example, softbox diffusers and grids should be checked periodically for fabric integrity and cleaned with gentle, non-abrasive methods to prevent tears or discoloration. For RGB tube lights, inspecting the silicone sleeves and ensuring proper heat dissipation helps maintain color fidelity and prevent overheating. It’s also wise to calibrate your lights regularly using color calibration tools or software—especially crucial for RGB tubes and LED panels—to retain accurate color rendering across shoots. In high-use environments, investing in spare parts, like replacement diffusion panels or power adapters, can save a lot of hassle. Using manufacturer-recommended cleaning and storage practices not only preserves your gear but also keeps warranties valid; see the detailed guidelines in their official technical documents. For instance, a study from the Lighting Research Center emphasizes that consistent maintenance can extend the lifespan of LED systems by up to 30%.
Make a habit of documenting your equipment’s condition after each session. This helps track wear and tear, plan repairs, and schedule upgrades. For example, keeping a log of hours used on RGB tube lights can help determine when a component might need replacing before failure occurs, ensuring your creative projects are never interrupted. Remember, the key to seamless long-term performance lies in proactive, rather than reactive, care. To optimize your softbox’s lifespan, consider incorporating anti-static sprays on fabric surfaces, which reduce dust adherence and static buildup—common culprits in diminishing light quality over time. Stay diligent, and your camera-ready setups will consistently look polished, time after time.
Lessons That Revealed the Hard Truths Behind Perfect Lighting
- One of the most impactful lessons I learned was that relying solely on high-powered lights can quickly lead to flat, uninspired scenes. Striking a balance between light intensity and proper diffusion is key—a mistake I made early on, thinking brightness alone would do the trick, but it often resulted in harsh shadows and washed-out textures. Careful control over diffusion materials and softbox angles transformed my results.
- Another revelation was the importance of color harmony—overusing saturated RGB tube lights without considering scene context created distractions rather than depth. By subtly adjusting hue, saturation, and experimenting with color recipes, I started guiding viewers’ eyes and adding dimension naturally, which significantly elevated my storytelling impact.
- Lastly, mastering light placement required patience and a keen eye. Moving lights just a few inches or changing their angles dramatically altered the perceived depth. It’s a reminder that sometimes, the smallest adjustments—like adding a rim of color behind the subject—can turn a dull shot into a cinematic experience. Trial, error, and meticulous tweaking became my best tools.
My Go-To Arsenal of Lighting Resources You Can Trust
- Mastering Softbox Lighting Tactics: This guide helped me understand how to shape soft, natural highlights and eliminate harsh shadows, which is foundational for any studio setup. Read it to refine your softbox techniques and achieve professional results.
- Key Light Strategies Declassified: This resource offers deeper insights into key light positioning and ratios that elevate the realism of your scenes, especially impactful for intimate interviews or product shots. It’s my secret weapon for consistent, cinematic lighting.
- RGB Tube Light Effects: Creative lighting effects can add subtle but powerful depth cues. This collection of effects and recipes expanded my creative palette and inspired me to experiment with hues and shadows in ways I hadn’t considered before.
Take the Leap and Illuminate Your Vision
Now is your moment to apply these insights and elevate your lighting craft. Whether working with an LED panel or a simple softbox, the nuances of placement, diffusion, and color choice are what truly transform a scene from basic to breathtaking. Remember, every shot is an opportunity to tell a more compelling story through controlled light. Keep experimenting, stay curious, and let your creativity shine brighter every time you step behind the camera.
![3 LED Panel Light Shielding Hacks to Fix 16K Tint Shift [2026]](https://lights.creatorrigreviews.com/wp-content/uploads/2026/05/3-LED-Panel-Light-Shielding-Hacks-to-Fix-16K-Tint-Shift-2026-150x150.jpeg)


