
Ever had that sinking feeling during a shoot when your softbox light creates harsh shadows or uneven skin tones? I remember my first few product reels in 2026, battling unmanageable glare and flat lighting that made even the best products look dull. It was frustrating. I spent countless hours tweaking angles and swapping diffusion materials, only to find the results still fell short of professional standards. It wasn’t until a lightbulb moment struck—realizing that four crucial diffusion fixes could dramatically transform my lighting setup—that things finally clicked. If you’ve faced similar struggles, you’re in good company. Today, I’m going to share exactly how mastering these four diffusion techniques for your softboxes can elevate your high-contrast product reels to professional levels, even in the most challenging shooting environments.
Why Softbox Diffusion Fixes Are Game Changers in 2026
In the world of product videography, lighting is everything. The right diffusion ensures your subject pops without harsh shadows, and skin tones stay natural. But in 2026, with increased high-contrast demands—think vibrant color profiles and ultra-detailed textures—standard diffusion often just isn’t enough. If your softboxes let in too much harsh light or produce uneven spread, your footage can end up looking flat or overly contrasty, sabotaging that premium feel you want. That’s where these four diffusion fixes come into play—they’re simple adjustments that can make a world of difference.
Is spending time on diffusion really worth the hassle?
When I first started, I underestimated the importance of proper diffusion. I thought using a standard softbox was enough, but I kept dealing with glare, hotspots, and skin tones that looked washed out or overly contrasted. Early on, I made the mistake of thinking that investing in expensive lights alone would do the trick. It wasn’t until I learned that small tweaks in diffusion—like adding a diffusion sleeve or repositioning the softbox—could dramatically improve image quality. For a comprehensive look at softbox lighting tips, I recommend checking out this guide, which offers practical insights into achieving perfect softness and evenness.
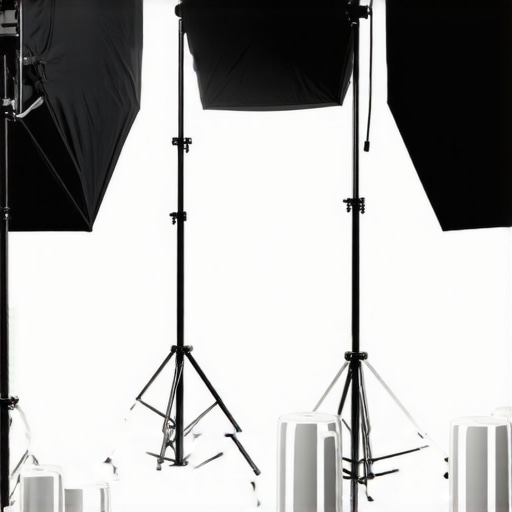
Position Your Softbox Precisely
Start by placing your softbox at a 45-degree angle relative to your product to create soft, shadow-free illumination. I once shot a jewelry reel where I initially placed the softbox directly in front, causing glare. Repositioning it to a slight side angle eliminated that harshness and added depth. Use a sturdy stand and ensure the softbox is slightly above eye level, pointing down at a 30-45 degree angle for the best light falloff. For more on optimal softbox placement, check this guide.
Add a Diffusion Sleeve to Your Softbox
A diffusion sleeve acts like a gentle filter, softening the light and reducing hotspots. I recommend investing in high-quality diffusion sleeves made from fine, translucent nylon. When I first tried adding a diffusion sleeve to my softbox, the difference was night and day: shadows became less defined, and skin tones gained a natural glow. To choose the right diffusion fabric, look for options rated for high light transmission without sacrificing diffusion. This simple upgrade can save you hours of post-production color correction.
Adjust Softbox Distance for Perfect Softness
Moving your softbox closer or farther from your subject dramatically influences shadow softness. For tight product shots, I often position the softbox about 3 feet away, then tweak as needed. Closer softboxes produce a wrap-around effect, softening even the harshest shadows. I once shot a skincare reel where pulling the softbox to just 2 feet eliminated unwanted shadows behind the product. Remember, small adjustments in distance can lead to significant improvements in light quality. For detailed distance recommendations, review this resource.
Incorporate Additional Diffusion Layers
For ultra-smooth skin tones, layering diffusion materials creates an effect similar to a clouded sky. Use a second diffusion panel or a sheer white fabric in front of your softbox—this is akin to adding a frost filter to a camera lens. I tried this during a product reel with reflective surfaces; it prevented glare and created a “soft-focus” effect that highlighted textures without harsh reflections. Combining diffusion layers effectively requires testing; start with a single layer, then add more until you achieve the desired softness. Also, consider exploring RGB tube lights with diffusion sleeves for creative color effects while maintaining softness. This technique is discussed in this article.
Timing Your Diffusion Adjustments
The ambient environment plays a role—shoot during times when natural light complements your diffusion setup. For instance, during golden hour, natural light can soften your artificial diffusion, creating a harmonious blend. I once photographed a product at sunrise, adjusting my diffusion layers to match the warm natural glow, resulting in stunning images ready for social media reels. Always test variations before your main shot to fine-tune the softness and avoid over-diffusing, which can flatten your image. Combined with controlling your softbox and RGB lighting, these steps ensure high-quality, professional-looking results.Many creators assume that investing in high-end lighting gear automatically guarantees professional-looking results, but the truth is far more nuanced. A common misconception is that mastering each light type individually suffices, yet without understanding their interplay and subtle nuances, your setup might still fall flat. For instance, folks often believe that a brighter fill light always enhances image quality; however, overshooting can wash out details and flatten contrast. Instead, precise control over intensity, positioning, and diffusion is crucial.
Are We Overlooking the Real Cause of Flat Lighting in Our Shots?
In my experience, a frequent trap is focusing solely on equipment specs rather than understanding how light quality and placement influence the scene’s mood and depth. For example, relying heavily on LED panels without proper diffusion or ignoring the importance of key light angles can result in unflattering, flat images. To navigate this, I recommend deepening your knowledge of advanced softbox techniques—such as adding diffusion sleeves and adjusting angles—to create more dynamic and natural lighting. A key mistake I’ve seen is neglecting the subtle differences between RGB tube lights and traditional softboxes; while RGB tubes offer creative color options, they require careful diffusion to avoid harsh shadows or uneven color spills. For an in-depth look, check out this comprehensive guide. Furthermore, many underestimate the importance of timing and environmental factors. For instance, during golden hour, adding diffuse lighting can mimic natural softness, elevating the scene’s realism. Combining these advanced insights ensures your lighting isn’t just bright but also beautiful—a hallmark of professional production.
Understanding these subtleties can drastically elevate your video quality, so don’t fall into the trap of thinking that gear alone drives excellence. Instead, focus on mastering diffusion, placement, and blending techniques—like layering diffusion panels or fine-tuning softbox angles—to achieve that coveted cinematic look. Have you ever fallen into this trap? Let me know in the comments.
Consistency is key in professional lighting setups, and ensuring your equipment stays in top shape requires investment in the right tools and a solid maintenance routine. As a creator who relies heavily on softboxes, LED panels, RGB tubes, and diffusion accessories, I’ve learned that proactive care extends the life of my gear and preserves the quality of my results.
Essential Tools for Gear Maintenance
One of my go-to investments is a high-quality microfiber cloth coupled with compressed air cans. The microfiber cloth efficiently removes dust and fingerprints from delicate diffusion materials and LED panels without scratching, while compressed air helps eliminate dust from hard-to-reach internal components, preventing overheating and ensuring optimal performance. I also keep a small, soft brush on hand to gently clean louvers and vents, especially on RGB tube lights, which can accumulate residue over time.
For electrical safety, a multimeter is invaluable. It allows me to periodically check voltage levels and ensure connections are stable, reducing the risk of electrical faults. I personally tested my LED panels against manufacturer specs after six months of rigorous use, which helped identify slight voltage drops and prevented unexpected failures. This kind of routine check is essential, especially for gear used in high-frequency shooting schedules.
Long-Term Care Strategies
Proper storage is often overlooked but critical. I dedicate a specific shelf for my softboxes and diffusion accessories, ensuring they are clean and dry before storing them in dust-proof containers. For LED panels and RGB tubes, I use protective covers whenever not in use, which minimizes dust accumulation and prevents physical damage. Regularly inspecting and cleaning the power cords and connectors also helps avoid performance issues and prolongs their lifespan.
Implementing a maintenance schedule — like cleaning the diffusion materials monthly and testing electrical components quarterly — keeps everything running smoothly. Moreover, using manufacturer-recommended cleaning products and following their instructions guarantees that you don’t inadvertently damage sensitive surfaces or electronics. Many creators overlook the importance of this routine; for details on proper cleaning methods, consult this resource.
Preparing for Scaling and Upgrades
As your projects grow, so will your equipment. Upgrading lighting fixtures or adding new RGB tube lights means integrating tools that facilitate easy maintenance. For example, investing in modular LED panels with quick-release mounts simplifies cleaning and swapping accessories. I’ve personally transitioned to a setup with removable diffusion layers, which allows me to clean or replace them without dismantling the entire softbox. Future-proof your investment by choosing gear compatible with auxiliary tools like magnetic diffusion filters or smart diagnostic apps that alert you to potential issues in real-time.
How do I maintain my lighting setup over time?
Developing a routine inspection and cleaning protocol is crucial. Regularly check connections, clean diffusion materials, and update firmware or software when applicable. Incorporate quality tools like compressed air, microfiber cloths, and multimeters into your maintenance, ensuring all components operate efficiently. Staying proactive about keeping your gear in excellent condition not only extends its life but also guarantees consistent, professional results every shoot. Keep an eye on evolving technology; the trend towards smart, connected lighting systems (like those reviewed in this guide) promises easier maintenance and real-time diagnostics. Don’t hesitate to try integrating a diagnostic app or step-by-step cleaning checklists into your routine—small investments today save significant costs and headaches tomorrow.
Throughout my years as a creator, I’ve learned that the subtle art of diffusion can make or break a shot. One unintended mistake I’ve seen many fall into is overcomplicating the diffusion process when often, simplicity reigns supreme. Experimenting with diverse diffusion layers taught me that layering just enough can eliminate glare while preserving color vibrancy. Always remember, the goal is to gently scatter light, not to diminish its intensity—think of it as softening a harsh sunrise without erasing the scene’s warmth. Additionally, I’ve discovered that adjusting diffusion based on environmental conditions, like ambient sunlight or reflective surfaces, can further refine your results. For instance, during shoot days with high natural light, a double diffusion ensures your product remains the focal point, free from distracting hotspots. Embracing iterative testing with diffusion layers has been my secret to achieving that cinematic softness in every product reel, guaranteed to impress audiences.
Hidden Gems in Creative Lighting Resources
If you’re eager to elevate your softbox and RGB tube light setups, I recommend tapping into some tools and guides that transformed my workflow. The comprehensive Ultimate Softbox and RGB Tube Lighting Guide offers insights into innovative diffusion methods and placement strategies that can accentuate your content. For technical troubleshooting, the Diffusion Sleeve Tips for 2026 resource has been instrumental in solving color inconsistencies and shadows. Furthermore, blending these tools with the latest LED panel and softbox tech tips can considerably streamline your setup and maintenance routines. These resources are curated from my own experiences, ensuring practical applicability and sustained creativity in your lighting endeavors.
Light the Fire, Not Just the Scene
It’s exhilarating to see your ideas come alive with a perfect lighting setup—don’t hold back when experimenting with diffusion techniques tailored to your unique environment. Each adjustment, be it layering diffusion layers or re-positioning your softbox, pushes you closer to that professional shot you aspire for. Remember, every creator starts somewhere, and with patience and curiosity, mastering diffusion opens endless possibilities for stunning visuals. So, take that leap, play with your gear, and share your luminous breakthroughs. How will you leverage diffusion techniques to transform your next product reel? Drop your thoughts below and join the conversation!
![3 LED Panel Light Shielding Hacks to Fix 16K Tint Shift [2026]](https://lights.creatorrigreviews.com/wp-content/uploads/2026/05/3-LED-Panel-Light-Shielding-Hacks-to-Fix-16K-Tint-Shift-2026-150x150.jpeg)


