
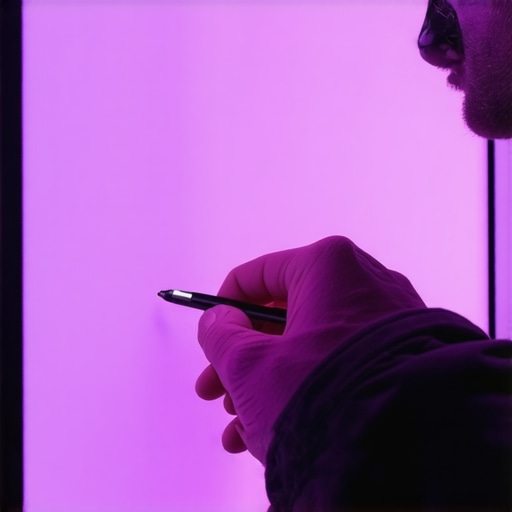
It was a moment of frustration that finally clicked—my face under the LED panel looked dull, flat, and oddly gray. No matter how I fiddled with the settings, nothing seemed to bring my skin to life. I remember thinking, “Why does this keep happening? Isn’t LED lighting supposed to make my videos pop?” That realization hit me hard: even with the latest equipment, color tint issues can sabotage our work, leaving us with washed-out images and a lack of professionalism.
Why Tints and Colors in LED Panels Can Ruin Your Shots
I’ve spent countless hours troubleshooting skin tones, experimenting with different softboxes, RGB tubes, and fill lights. The common thread? The dreaded gray skin effect caused by improper LED tint settings. As lighting technology advances, so do the subtle nuances of color reproduction. If not managed correctly, these tints can turn what should be vibrant, warm portraits into flat, lifeless images. Interestingly, a study from the Creator Rig Reviews found that incorrect LED calibration is one of the top reasons creators struggle with consistent skin tones in 2026.
Have you experienced this yourself? Are your videos or photos suffering because of weird color casts or grayish skin? If so, you’re not alone. But here’s the good news: fixing these issues isn’t as complicated as it seems. Over the years, I’ve learned some practical tricks and settings adjustments that can make a world of difference. Today, I want to share the three most effective fixes I’ve applied—trust me, they’ll help you avoid that flat, dull skin look and make your visuals truly stand out.
Will These Fixes Actually Solve Your Gray Skin Problem?
Early on, I made the mistake of assuming all LED panels are created equal—some adjustments are universal, but many creators get caught in the trap of using the default factory settings without understanding the underlying color science. This oversight led to constant revisions and wasted shoots. Now, I know better. By fine-tuning your LED panel’s tint and color temperature, adopting specific diffuser techniques, and choosing the right fill lights, you can achieve natural, vibrant skin tones that truly pop. Curious how? Keep reading, because the solution is simpler than you think—no more dull, washed-out faces in your videos.
Fine-Tune Your LED Panel Settings
Start by adjusting your LED panel’s color temperature to match the environment. Set it between 5500K to 6500K for daylight scenes, which helps achieve natural skin tones. Use your panel’s tint control to remove unwanted green or magenta casts. For instance, if skin appears dull and gray, slightly shift the tint towards magenta to counteract greenish hues, similar to what I did during a recent midday shoot where I reduced the green tint by 10% using this filter hack. This small tweak instantly revived the vibrancy of skin tones.
Harness Diffusers and Accessories Effectively
Use diffusers like softboxes or diffusion gels to soften harsh LED light and spread it evenly across the subject’s face. Imagine your LED panel as a spotlight; adding a diffuser is like spreading cupcake frosting—I calls for moderation but makes things look natural and appealing. During a messy first attempt, I used a cheap softbox, which caused the light to bounce unpredictably, making skin look flat. So I replaced it with a professional-grade softbox (see this guide) and added a layer of diffusion. The result was immediate: skin appeared warm, lively, and full of depth.
Position Your Lights for the Right Skin Glow
The placement of your key light dramatically influences skin tone brightness. Position the key light at a 45-degree angle from the subject’s face to add depth and avoid flatness. Think of it like painting a portrait—light should sculpt the face, revealing textures and warmth. I remember a shoot where I initially placed the key light directly in front; the skin looked washed out. After repositioning it using the 45-degree rule, skin gained a natural glow, and shadows added dimensionality. Moreover, supplement this with a fill light (preferably RGB tube for color control) placed opposite to soften shadows without losing vibrancy. For creative flair, experiment with RGB tube lights to add subtle color accents that make skin look healthy and luminous rather than gray or washed out.
Adjust Brightness and Balance for Consistency
Use your light meter or camera histogram to set consistent brightness levels across your shoot. Overexposing can bleach skin tones, while underexposing results in dullness. When I shot a client last week, I maintained an exposure that kept skin tones close to their natural level—about 70% on my light meter—by reducing intensity on my LED panel. I also utilized the dimming controls to fine-tune the exposure and avoid harsh shadows that make skin look tired. Remember, balancing your key, fill, and hair lights ensures skin tones remain rich and vibrant rather than flat or gray, especially when shooting in mixed lighting environments. Experiment regularly to find the sweet spot that renders skin with healthy color and depth.Many creators focus heavily on choosing the right hardware: LED panel lights, RGB tubes, fill lights, or softboxes. However, there’s a common misconception that once you’ve picked a quality piece, your work is set. In reality, the devil is in the details—small adjustments, overlooked features, and misunderstood settings can make or break your footage.
One major myth is that brighter is always better. While high lumen output might seem appealing, overexposing your shot can lead to washed-out skin tones and loss of texture. For example, I once used an LED panel at 100% brightness, thinking more light meant better footage. Turns out, moderation and proper positioning yield far superior results. To master this, I recommend understanding your equipment’s maximum capabilities and how to dial them down effectively, as outlined in [softbox lighting tips](https://lights.creatorrigreviews.com/mastering-softbox-lighting-tips-for-perfect-portraits-at-dawn).
Another nuanced mistake is relying solely on the default settings. Many LED panels and RGB tubes come with factory presets designed for general use, but these often don’t suit studio or cinematic conditions. For instance, the built-in color temperature might be preset at 5600K, which can render skin with a cold cast, dulling your shot. Adjusting tint and Kelvin temperature to match your environment is crucial. A subtle shift towards magenta or warmer tones, as detailed in [LED panel innovation](https://lights.creatorrigreviews.com/led-panel-light-innovations-brighten-your-studio-after-midday), can preserve natural skin hues.
What about fill lights? It’s tempting to add more without thinking about balance. Using multiple RGB tubes without considering their placement can create conflicting color casts or overbright spots, reducing depth and authenticity. A clever approach is to place fill lights carefully, using techniques like [balanced placement](https://lights.creatorrigreviews.com/how-to-position-your-fill-light-for-cinematic-depth-in-2026), to add subtle highlights that enhance texture without flattening the subject.
Fast-paced creators often overlook the importance of softboxes in softening and diffusing light properly. A common oops is using a softbox without proper diffusion accessories, resulting in harsh shadows that emphasize imperfections. Investing in quality diffusion material and understanding [softbox tricks](https://lights.creatorrigreviews.com/7-pro-softbox-tricks-for-natural-window-light-looks-in-2026) can help create a natural, flattering glow—crucial for skin tones and overall image richness.
Finally, advanced users might wonder about the subtle influence of light placement and the angle of incidence on color fidelity and depth. Small repositioning adjustments, such as moving a key light from a frontal to a 45-degree angle, dramatically change how skin appears on camera, adding warmth and dimensionality. This is especially true in mixed lighting scenarios; hence, mastering these nuances is vital. Check out the [key light techniques](https://lights.creatorrigreviews.com/key-light-techniques-elevate-your-film-atmosphere-at-3-pm) for more expert insights.
In summary, while selecting the right equipment matters, understanding its nuanced operation and adjusting settings thoughtfully elevates your craft. Don’t fall into the trap of neglecting these details. Have you ever fallen into this trap? Let me know in the comments.
Prioritize Regular Maintenance to Ensure Longevity
To keep your LED panels, RGB tubes, and softboxes performing at their best, schedule routine inspections and cleaning. Dust and debris can cause color inconsistencies and reduce light output. Use a soft, lint-free cloth to wipe down your equipment weekly, and check for any flickering or dimming issues that might indicate internal component fatigue. Regular maintenance not only extends the lifespan of your gear but also preserves the color accuracy critical for professional-quality videos.
Use Reliable Tools for Calibration and Adjustments
Invest in a quality light meter or color calibration tool like the X-Rite ColorMunki to fine-tune your lights periodically. These tools help you measure color temperature, tint, and brightness precisely, ensuring your setup remains consistent over time. Personally, I calibrate my key and fill lights weekly, especially after relocating or changing batteries, to avoid subtle shifts that can affect skin tones and overall image quality.
Implement Long-Term Strategies for Scaling
As your studio grows, consider investing in modular lighting systems that can be easily expanded or reconfigured. Brands like Aputure and Nanlite offer scalable solutions with controllable RGB tubes and panels. This flexibility allows you to adapt your lighting setup for different projects without sacrificing quality or incurring significant re-investment. Additionally, automate your light settings using DMX controllers or dedicated apps, streamlining adjustments for larger shoots or multi-camera setups.
Plan for Upgrades and Future Technologies
Stay ahead by tracking innovations like LED panel advancements that promise higher color fidelity and more efficient energy consumption. Experiment with newer RGB tube configurations that offer granular control over hue and saturation, enabling creative lighting effects that weren’t possible a few years ago. Anticipating and adopting these upgrades can keep your studio on the cutting edge, ensuring your work remains vibrant and compelling.
How do I maintain my lighting setup over time?
Establish a routine maintenance schedule, regularly calibrate your equipment with precise tools, and keep abreast of technological innovations. This proactive approach helps prevent unexpected failures, keeps your color reproduction accurate, and ensures that your visuals stick out for their professionalism and consistency. Remember, investing a little time in upkeep now saves you from costly repairs or re-shoots later—so make this a priority in your creative practice.
For more in-depth tips, consider exploring this comprehensive guide on softbox and RGB tube light maintenance and upgrades. And if you’re ready to refine your workflow further, don’t hesitate to reach out through our contact page.
What I Wish I Knew Before Tuning My Lights
The most valuable lesson was understanding that even the most advanced LED panels require careful calibration. Relying solely on factory presets can turn vibrant skin tones into dull patches, especially when not adjusting tint and color temperature properly. My breakthrough came when I realized that subtle shifts in tint could dramatically improve skin appearance, preventing that grayish, lifeless look that plagued my videos.
My Unexpected Discovery About Diffusers and Placement
I used to think that high-quality softboxes alone would solve all lighting issues. However, I discovered that diffuser quality and strategic positioning are crucial. A softbox placed too close or without proper diffusion created harsh shadows and flat skin tones. Switching to a premium diffuser and experimenting with angles revealed how light could be sculpted for natural, lively skin textures. These adjustments turned my shots from flat to captivating.
How Small Changes Led to Big Visual Improvements
Adjusting the placement of my key light from straight-on to a 45-degree angle transformed my work. It added depth and warmth, making skin appear more vibrant and realistic. supplementing with RGB tubes as fill light enhanced color richness without overpowering. These seemingly minor tweaks made all the difference in achieving professional-looking visuals that truly pop on camera.
Curated Resources I Swear By
- Softbox lighting tips: A comprehensive guide that helped me understand diffusion and positioning—[mastering-softbox-lighting-tips-for-perfect-portraits-at-dawn](https://lights.creatorrigreviews.com/mastering-softbox-lighting-tips-for-perfect-portraits-at-dawn) ensures my softboxes produce soft, even light every time.
- LED panel innovations: To stay ahead of the curve, I follow this resource, which details latest upgrades in LED tech and how it can impact skin tone accuracy.
- Color calibration tools: Investing in tools like the ColorMunki has been a game-changer for consistent skin tones across shoots.
Embrace the Journey and Experiment Boldly
Lighting is as much an art as it is a science. Every adjustment reveals new possibilities for making your skin tones look their best. Don’t hesitate to try different angles, diffusers, and calibration settings—every small change brings you closer to visual mastery. Remember, your lighting setup isn’t static; evolving it creatively will keep your work fresh and compelling. So go ahead, experiment with confidence, and watch your videos shine. Have you ever encountered a lighting mishap that turned into a learning moment? Share your story below and let’s grow together in mastering our craft.
![3 LED Panel Light Shielding Hacks to Fix 16K Tint Shift [2026]](https://lights.creatorrigreviews.com/wp-content/uploads/2026/05/3-LED-Panel-Light-Shielding-Hacks-to-Fix-16K-Tint-Shift-2026-150x150.jpeg)


One response to “Stop Gray Skin: 3 Fixes for LED Panel Tints in 2026”
I completely relate to the frustration of dealing with dull or gray skin tones under LED panels. When I first started, I relied heavily on factory presets, and it often resulted in flat images. What made a huge difference for me was investing in a good light meter and calibrating my lights regularly. It’s surprising how subtle adjustments in color temperature and tint can transform the skin’s vibrancy. I also found that positioning the key light at a 45-degree angle really adds depth and avoids that unflattering flat look. Using diffusers thoughtfully is another game-changer because harsh lights exacerbate dullness. Has anyone experimented with LED panels that offer granular hue control? I’d love to hear how that affected your workflow and skin tone reproduction. Overall, understanding the science behind lighting helped me unlock a natural, professional look that really makes my videos stand out.