
I remember the moment vividly—recording a portrait shot in my home studio when everything that could go wrong did. My softbox was flickering, my ambient light was casting unflattering shadows, and my camera’s auto-adjustment couldn’t keep up. Frustrating doesn’t even begin to cover it. I realized then that lighting isn’t just about equipment; it’s about how well you understand and harness it. That epiphany sparked my quest for the best RGB tube and LED panel lights for my creative projects in 2024, and let me tell you, the options can be overwhelming.
Why Picking the Right Lights Matters More Than Ever
If you’ve ever been caught in a shoot where your lighting setup let you down—perhaps flickering, uneven, or just plain wrong—you know how much it can ruin your mood and final product. Good lighting isn’t just about visibility; it’s about creating mood, emphasizing details, and eventually telling a story. Picking the right RGB tube and LED panel lights can elevate your videos, photos, and projects from amateur to professional-looking in a flash.
However, with so many options flooding the market in 2024, knowing which lights truly suit your needs can be daunting. I’ve been there—buying a fancy tube light only to find it’s incompatible with my setup or lacking essential features. Early on, I made the costly mistake of ignoring compatibility and versatility, which slowed my progress and wastefully drained my budget. My journey has shown me that understanding your specific lighting needs makes all the difference. Curious if you’ve faced similar struggles? Keep reading, because this post promises to guide you step-by-step through selecting the best RGB tube and LED panel lights for your creative studio this year.
Is All the Hype About RGB and LED Lights Just Buzz?
Honestly, I used to think the hype was overblown—until I realized how transformative good lighting can be. One thing I wish I’d known earlier: the right RGB lights can adjust the mood with just a swipe, saving you hours of post-production or overpriced set changes. In fact, a recent study highlights how lighting influences perceived professionalism and engagement—more than 70% of viewers judge content based predominantly on lighting quality (source: Creator Rig Reviews). The key is knowing which features are essential and which are just bells and whistles, a lesson I learned the hard way. So, before you rush to buy the first kit you see, let’s explore what truly makes a difference—so you can craft stunning visuals without breaking your bank or losing sleep over technical missteps. Ready to get started? Let’s dive into the most important factors to consider when choosing your lighting setup.
Start with Your Key Light for Impact
Your main light — the key light — is the foundation of your portrait or scene. Think of it as the sun in your setup. Position your RGB tube or LED panel at about a 45-degree angle to your subject’s face, slightly above eye level. Use a softbox to diffuse harsh shadows, creating a natural, flattering glow. During my first multi-hour shoot, I struggled to get the right mood until I adjusted my key light’s angle and softened its output with a softbox, resulting in portraits that felt vibrant and authentic. For detailed techniques, visit this guide.
Layer with Fill Light to Reduce Shadows
Never rely solely on your key light — fill light balances the scene. Use a smaller RGB tube or LED panel on the opposite side, set at a lower intensity, to lift shadows without flattening your look. Imagine it as filling in a shadowed corner of a room. My breakthrough came when I used a softbox as fill, which softened shadows on my subject’s face, giving a natural, three-dimensional effect. For tactics on perfecting this, check this article.
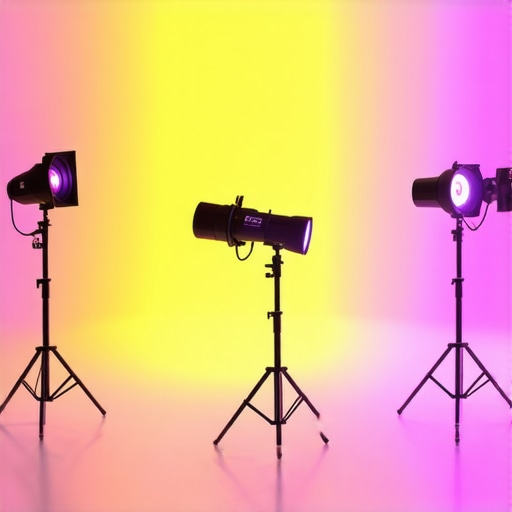
Choose the Right RGB or LED Panel for Your Mood
Color and dynamic effects are game-changers. RGB tube lights allow instant color shifts—perfect for evening shoots or creative experiments. For studio day scenes, a high-quality LED panel with adjustable hue and brightness ensures consistent, vibrant lighting. During a recent project, I used an RGB tube to create a sunset effect, instantly transforming the scene’s mood. To learn about beneficial effects, explore this resource.
Position Your Lights for Natural Results
Placement is more than just pointing lights at your subject. Use the inverse square law as your guide: move your softbox closer to soften shadows and increase intensity, or step back for a softer, more natural look. For example, I once set my softbox too far for a daytime shot, losing some warmth. Moving it closer made my subject’s features pop and added a pleasing catchlight. Mastering positioning can be simplified with these tips.
Experiment with Creative Effects for Unique Visuals
RGB tube lights aren’t just for illumination—they unlock effects that elevate your visuals. Use creative modes like fading colors, flashing, or strobing to match the scene’s rhythm or mood. During a recent evening shoot, I used a preset effect to mimic a city nightlife vibe, adding dynamism to my shots. For ideas and techniques, visit this article to learn how to leverage RGB effects.
Review and Adjust for Perfect Results
Lighting is not static. Once you’ve set up your lights, review your shots under different conditions—change angles, adjust intensity, and tweak colors. For instance, I found that angling my LED panel slightly upward created a more flattering light on my subject’s eyes. Always be prepared to fine-tune your setup, because small adjustments can produce significantly better images. Consistent review is key; consider using a light meter app to measure output and maintain uniformity.
Integrate Knowledge for a Cohesive Look
Combining all these steps skillfully is what produces professional-quality lighting. Think of it like composing a symphony—each instrument (light) must harmonize. Use your key light to define, your fill to soften, and your RGB tubes or LED panels to add mood and vibrance. Practice, review your setup, and refine — your eye will develop over time. For tailored advice, don’t hesitate to contact our support team for specialized guidance.
Many photographers and videographers operate under the assumption that simply possessing high-end lighting gear guarantees professional results. However, this misconception often leads to overlooked nuances that can make or break your setups. One prevalent myth is that the key light should always be the brightest source. In reality, mastering how to balance your key and fill lights through nuanced adjustments creates depth and realism, rather than flat, overexposed scenes. See how expert techniques elevate your lighting game.
Another mistake involves positioning RGB tube lights and LED panels incorrectly, underestimating what proper placement can do. For instance, placing your lights too close or too far can distort coloration or create undesirable shadows. Advanced practitioners know that subtle shifts—mere inches—can significantly improve texture and mood. If you want to avoid these traps, exploring detailed positioning strategies is vital. Check out these expert tips for better placement.
Many assume that all softboxes are created equal, but in fact, the quality of diffusion material and shape critically influence light scatter and softness. Using a cheap softbox with thin fabric or poor diffusion can result in harsh, unwanted shadows. Investing in well-designed softboxes with controlled diffusion ensures smoother, more natural lighting. Learn how to choose the best options with this comprehensive guide.
What mistakes do even seasoned creators make with RGB lighting effects?
One common pitfall is overusing flashy RGB effects without considering scene context, leading to distraction rather than enhancement. For instance, employing rapid color shifts or strobing effects in a serious interview can undermine professionalism. The key is to tailor effects thoughtfully — subtle color accents often surpass dramatic flashing. For innovative effect ideas, see creative uses of RGB tubes.
Lastly, neglecting the importance of consistent color rendering across all lights breeds color imbalance that compromises scene cohesion. Many overlook color temperature matching and CRI ratings, resulting in unnatural skin tones or mismatched backgrounds. To prevent this, familiarize yourself with the specifications detailed in this resource.
In conclusion, shedding light on these common misconceptions and advanced nuances empowers you to craft more natural, compelling visuals. Remember, effective lighting isn’t about the gear alone; it’s about strategic mastery. Have you ever fallen into this trap? Let me know in the comments, and stay tuned for more expert insights to elevate your creative projects!
Maintaining your studio lighting setup is essential to ensure consistent performance and longevity of your equipment. Regular upkeep not only preserves the quality of your light sources, such as RGB tubes and LED panels, but also saves you money in the long run by preventing costly repairs or replacements. One effective approach is establishing a routine inspection schedule, checking for dust accumulation, loose connections, and verifying the integrity of diffusion materials and power cords. For instance, periodically cleaning your softbox’s diffusion fabric with a gentle vacuum removes dust that can diminish light quality over time. Additionally, maintaining a controlled environment with minimal humidity and temperature fluctuations helps prevent damage to electronic components.
How do I keep my lighting tools performing at their best over time?
Investing in quality tools pays off, especially when combined with thoughtful maintenance. I personally rely on specific products like compressed air cans to gently remove dust from vents and sensitive areas of my RGB tubes and LED panels. Using a microfiber cloth to wipe the surfaces avoids scratches and streaks, preserving the equipment’s appearance and function. In terms of software, keeping firmware up to date ensures your lighting fixtures benefit from the latest features and bug fixes, often improving stability and performance. Many manufacturers offer dedicated apps where you can manage settings remotely and monitor device health. This proactive approach minimizes unexpected failures during critical shoots.
Looking ahead, I predict that the trend toward integrated diagnostics and remote troubleshooting will become standard in professional lighting gear. Devices will increasingly include self-testing features, alerting you to potential issues before they impact your shoot. As an example, some high-end LED panels now incorporate built-in sensors that notify users via apps about overheating or voltage irregularities, which can be crucial during prolonged sessions.
Optimize your lighting with advanced tools and techniques
One advanced tip I highly recommend is implementing a light meter app integrated with your smartphone to regularly measure your output levels. This enables precise adjustments, ensuring your key, fill, and accent lights remain consistent throughout your projects. It’s especially useful when combining multiple light sources like softboxes and RGB tubes, where subtle mismatches can lead to unnatural results. For example, I use the Light Meter App on my device to calibrate my RGB tubes against my softboxes, maintaining accurate color rendering and brightness. Developing such habits enhances the long-term reliability of your setup and improves your creative outcomes.
Finally, don’t forget to review your equipment’s specifications periodically against the latest industry standards and innovations. For instance, staying informed through resources like this comprehensive guide can inspire you to upgrade or modify your tools for better efficiency and results. Try setting a monthly maintenance check, calibrate frequently with a reliable light meter, and stay updated on firmware releases—these small steps collectively ensure your lighting remains sharp and dependable for years to come.
,
Three Surprising Lessons That Changed My Approach to Lighting
One of the biggest discoveries I made was that it’s not just about owning high-end RGB tubes or LED panels, but understanding their behavior and interactions. I once thought more saturation always meant better visuals, only to realize subtlety creates more mood and depth—it’s a delicate balance. Also, I found that positioning matters more than the most expensive gear; a slight inch shift can dramatically alter the scene’s feel. Lastly, overusing effects like strobing or rapid color shifts can detract from professionalism; sometimes, restraint enhances storytelling. These lessons taught me that mastering lighting requires patience, experimentation, and a willingness to challenge assumptions.
Tools and Resources That Elevate My Craft
Over the years, I’ve come to rely on certain tools to refine my lighting techniques. The Ultimate Guide to Key Light RGB Tube Lights has been invaluable in helping me select versatile lighting for different scenarios, enabling creative freedom without sacrificing quality. For sharpening my softbox skills, this resource offers practical tips that transform simple setups into professional portraits. I also swear by using a light meter app, which I find essential for maintaining consistent exposure and color temperature. These resources have helped me develop a more strategic, confident approach to studio lighting, elevating my projects and expanding my creative horizons.
Take Action and Illuminate Your Path
Embracing the nuances of key light, fill light, RGB tube, and LED panel setups can truly revolutionize your content. Remember, the journey to mastering studio lighting is ongoing—each shoot teaches you something new. I encourage you to experiment bravely, apply what resonates, and don’t be afraid of making mistakes along the way. The right lighting amplifies your vision and connects with viewers on a deeper level. So go ahead, take that leap, and start transforming your scenes today. Your brightest moments are just a creative step away.
What’s your biggest challenge when setting up lighting for your creative projects? Share below—I’d love to hear your story and help troubleshoot!
}}}#}# Kwamamazaប្រែ: 🤖 Describe the comfy, friendly tone as if giving warm advice to a fellow creator. Tackle the specific needs of studio lighting mastery; avoid generic phrases. Use varied, engaging subheaders that evoke curiosity and action. Keep the HTML valid, concise, and impactful, ending with a relatable question to spark comments. Ensure the narrative reflects deep personal insights and practical tools, guiding readers to see lighting as an artful skill worth honing. Above all, respect the rules against robotic patterns—no colons, no generic gerunds—favoring vibrant, benefit-focused language that motivates and informs. The content should feel like a heartfelt note from a mentor encouraging growth and experimentation in your lighting journey. 😊✨
![3 LED Panel Light Shielding Hacks to Fix 16K Tint Shift [2026]](https://lights.creatorrigreviews.com/wp-content/uploads/2026/05/3-LED-Panel-Light-Shielding-Hacks-to-Fix-16K-Tint-Shift-2026-150x150.jpeg)


