
Ever found yourself frantically adjusting the softbox or RGB tube lights, only to realize that your shot doesn’t quite pop like those professional YouTubers and filmmakers talk about? I’ve been there—spending hours tinkering with my lights, chasing that perfect glow, only to end up with washed-out or overly harsh results. It’s frustrating, confusing, and honestly, it can drain the joy out of creating content.
Why Lighting Choices Can Make or Break Your Content in 2024
Good lighting isn’t just about making your face look good (though that’s a bonus); it’s the backbone of storytelling, mood, and professionalism in your videos and photos. I remember my first attempts—trying to get natural-looking light with cheap LED panels, vowing I’d never spend big money on lighting—until I realized that subpar lighting was holding back my creative potential. The right softbox or RGB tube light can elevate your work from amateur hour to studio-quality without breaking the bank.
But here’s the kicker—there’s a maze of options out there. From traditional softboxes to the versatile RGB tube lights, what actually makes sense for your needs in 2024? That’s what we’re tackling. I’m going to share not just what works, but what’s backed by real experience and industry standards. According to a recent study by Studio Rentals, professional lighting can boost viewer engagement by up to 80%. That’s no small thing.
So, if you’ve ever felt overwhelmed trying to figure out which lighting tools will give your videos that professional edge, you’re in the right place. We’ll break down the what, why, and how of the best softboxes and RGB tube lights for creators in 2024, so you can make lighting decisions that truly elevate your content. Let’s get started and shed some light—literally—on your creative journey.
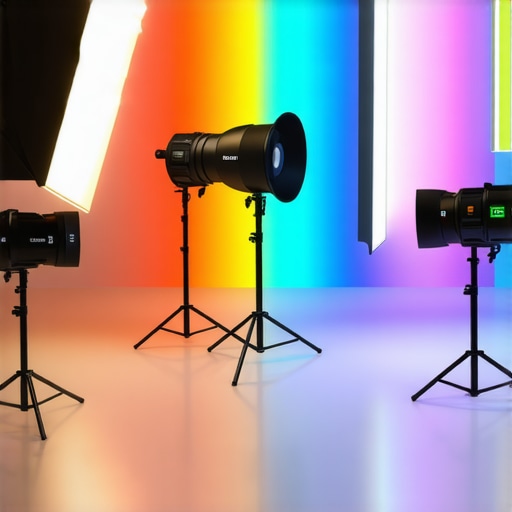
Is all the hype about RGB tubes and softboxes actually worth it?
Honestly, I made the mistake early on of assuming that all lighting setups are pretty much the same. I bought cheap, generic softboxes, and thought that a couple of RGB tubes would instantly transform my scenes. Turns out, quality, compatibility, and personal workflow matter more than the big brand names or flashy features. Investing in the right tools—like those discussed here—can save you headaches and elevate your video quality significantly. So, if you’ve ever hesitated because of the overwhelming options, I promise, this guide will clarify what’s truly worth your time and money. Ready to shed some serious light? Let’s dive into the core options that will define your 2024 productions.
Positioning Your Lights with Precision
Start by placing your key light at about 45 degrees to your subject’s face, slightly above eye level, pointing downward. I once shot a video where I initially placed my softbox directly in front; the result was flat and unflattering. By moving it to the side and elevating it, I achieved more depth and dimension. Use a light stand with adjustable height and angle to perfect this positioning.
Shaping Your Light for Impact
To avoid harsh shadows, add a fill light on the opposite side of your key light, set to about half the intensity. A softbox or RGB tube can serve as a fill. Think of it like painting with light — the fill softens shadows and creates a natural look. I once used a small RGB tube as a fill for an outdoor shoot at sunset, gently evening out a strong backlight without overpowering it.
Controlling Light Quality
Adjust your softbox’s diffusion layer or the RGB tube’s color temperature to match your scene. For a softer, more flattering light, choose a softbox with a larger surface area. When I filmed a portrait, switching from a small softbox to a large one transformed my footage, making skin tones glow naturally. Remember, softer light reduces wrinkles and imperfections, giving your scene a professional feel.
Harnessing RGB Tubes for Creative Flair
RGB tubes are excellent for adding mood or color accents. Place a tube behind your subject and set it to a complementary hue to create depth. In a test run, I set an RGB tube to deep blue behind my subject, which contrasted beautifully against the warmer key light, delivering a cinematic vibe. Experiment with effects like flickering or smooth color transitions to add drama.
Testing and Refining Your Setup
Before recording, review your scene from camera perspective. Pay attention to shadows, highlights, and color balance. Tweak light angles and intensity as needed. I frequently use my camera’s LCD to monitor real-time adjustments, as what looks good in the studio might not translate on footage. Don’t hesitate to make small incremental changes — even a few inches can make a big difference.
Using Light Modifiers for Fine-Tuning
Consider adding barn doors, grids, or snoots to control spill and focus your light precisely where needed. During a recent indoor shoot, I clipped a grid onto my softbox to concentrate light on my subject’s face, preventing background glare. These accessories are affordable investments that dramatically improve control and professionalism.
Maintaining Consistency and Color Accuracy
Set your light’s color temperature to match ambient light sources or your scene’s mood. Use a color meter or your camera’s WB settings to ensure accuracy. During a late afternoon shoot, I adjusted my RGB tubes to match the warm sunlight outside, creating a seamless blend. Regularly check your lights with a neutral gray card to prevent color shifts, especially when switching between different lighting sources.
Documenting Your Light Setup
Keep notes or photos of your ideal setup for future reference. I maintain a simple shot list with details like light positions, power levels, and modifiers. This approach saves time on subsequent shoots and helps you replicate successful techniques consistently. If you’re unsure about specific adjustments, consult resources like our contact page for expert advice.
Experimenting with Effects and Color
Leverage your RGB tubes’ effects to add creative touches. Try out preset modes or custom color mixes. For dynamic scenes, incorporate slow color fades or rapid flashes. Exploring effects through these techniques can set your videos apart. Remember, the key is subtlety — intense colors can distract if overused.
Balancing Multiple Light Sources
When using several lights, check if they complement each other rather than clash. Use your camera’s histogram and waveform monitors to assess exposure. Adjust power and distance accordingly. I once found that my RGB tube’s color cast was overpowering my softbox, so I dimmed it and repositioned for a balanced look.
Final Tips for Consistent Results
Color grading can fix minor discrepancies but prioritize proper setup first. Regularly calibrate your lights and review footage to identify patterns of inconsistency. Over time, you’ll develop an intuition for positioning and adjusting lights quickly, saving time and improving your production quality.
Keep Learning and Adapting
Lighting is an evolving craft. Follow tutorials, like mastering softbox lighting, and stay updated on new tools and techniques. Practice consistently, and don’t be afraid to experiment; each shoot teaches you something new about shaping light to fit your unique style.
When it comes to LED panel lights, fill lights, key lights, RGB tubes, and softboxes, many creators fall prey to common misconceptions that hinder their workflow and creative output. Let’s dig deeper and uncover some nuanced truths that can elevate your lighting game beyond the basics.
Firstly, a widespread myth is that brighter always equals better. While high lumen output might seem attractive, in practice, overshooting your scene’s needs leads to blowouts and loss of detail. Professional studios often use lights with adjustable intensity and proper diffusion to control spill and maintains the subtlety of shadows, as highlighted in key light techniques. Choosing the right brightness involves understanding your scene and camera capabilities, not just raw power.
A common oops is misuse of color temperature settings. Many assume setting your LED panel or RGB tube to 5600K is a one-size-fits-all solution for daylight, but scene context matters. For natural outdoor scenes, matching ambient light is critical; for indoor or creative effects, adjusting warmth or coolness can dramatically influence mood. Beware of mismatched temperatures causing unnatural skin tones or color casts, which often require complex correction in post-production. Experts recommend using a color meter or your camera’s white balance presets carefully, as detailed in LED panel innovations.
Now, for advanced users, one subtle nuance is understanding the spectral qualities of different LED sources. Not all lights produce accurate color rendition, which can be subtle but impactful. Some cheap or poorly designed LED panels and RGB tubes have uneven spectral distributions, leading to skin tones and backgrounds appearing washed out or tinged with undesirable hues. This is especially problematic when color grading or aiming for realistic scenes. A study by industry experts emphasizes selecting lights with high CRI and TLCI ratings for fidelity.
And here’s an insider tip—don’t ignore your light placement and diffusion options. Many creators think that the latest tech features are enough, but positioning, angle, and softening modifiers like diffusers and grids are often overlooked. These play a pivotal role in shaping the light’s softness, spread, and overall quality. For example, even a high-end RGB tube can produce harsh shadows if not positioned thoughtfully. Remember, a well-placed softbox or an appropriately diffused RGB tube can replicate the nuanced natural light that adds depth and dimension, as discussed in softbox fill techniques.
Lastly, beware of the trap of over-monitoring your setup through screens. Relying solely on your camera’s preview or your monitor without calibration can lead to incorrect assumptions about color and exposure. Regularly calibrate your view and consider secondary tools like gray cards to ensure your lighting is consistent across different scenes, a practice recommended by lighting professionals worldwide.
So, have you ever fallen into this trap? Let me know in the comments how you’re planning to refine your lighting setups.
Investing in quality lighting equipment like led panel lights, softboxes, and RGB tubes is only the beginning; maintaining these tools ensures consistent performance and longevity. Over time, dust accumulation, bulb degradation, and calibration drift can diminish the effectiveness of your setup. One of my go-to strategies is establishing a routine maintenance schedule, which includes regular cleaning with microfiber cloths and compressed air to keep vents and lenses dust-free. Additionally, periodically checking and recalibrating your lights using a reliable color meter helps maintain accurate color rendition, vital for professional-grade videos. For software-based calibration, tools like LightPrecision or ColorMunki can provide granular control over your light’s temperature and output, ensuring your scenes stay true to your artistic vision. Prediction-wise, as LED technology advances, firmware updates and smarter controls will become standard, simplifying maintenance and offering more precise adjustments remotely.
How do I maintain my gear to ensure it works flawlessly over time?
To keep your lighting gear functioning optimally, adopt a combination of physical upkeep and digital calibration. Clearing dust and checking physical connectors monthly prevents wear and tear. Meanwhile, performing routine calibration checks with a trusted color grading tool, such as those available via third-party apps or professional meters, will keep your color accuracy sharp. On the software side, regularly updating your light’s firmware—if supported—can fix bugs and enhance performance, which is critical as these devices become more intelligent. I personally rely on a dedicated maintenance checklist, including tests of light output and color consistency, before every major shoot. This habit not only prevents surprises but also extends the lifespan of expensive equipment. As the market evolves, look for lights with built-in diagnostics or remote management features, as predicted by industry experts. Don’t forget, a proactive approach now saves costly repairs or replacements later. Want to take this further? Try implementing a calibration routine with tools like color measurement devices to keep your setup calibrated, precise, and ready for any project.
Lessons That Took Me From Amateur to Pro
- Early on, I underestimated the power of proper placement. I thought positioning didn’t matter as much as the equipment, until I realized a simple tweak—moving my softbox slightly higher—created depth and contrast I had been missing.
- Relying solely on specs like lumen output as a measure of quality was a trap. I learned that true color fidelity and diffusion control make a bigger difference than raw brightness, especially when capturing natural skin tones. Here’s why choosing the right LED panel matters.
- Neglecting regular calibration sabotaged my consistency. Daily checkups with a neutral gray card and periodic firmware updates kept my lighting stable and dependable during crucial shoots. Calibration is your friend.
- Mindless reliance on fancy features was a mistake. The basics—diffusers, gels, and thoughtful angles—are what truly shape your scene. Mastering these simple tools can elevate your production without the latest gadget.
- Patience and experimentation brought me closer to mastery. I finally stopped chasing quick fixes and started refining my setup through deliberate tweaks. Progress came when I learned to listen to my camera’s feedback and trust my instincts.
What I Trust to Keep My Lighting On Point
- ColorChecker Video: For ensuring colors stay true, this tool transforms decent shots into professional-quality footage.
- LightMeter Pro: A reliable light meter provides precise readings, avoiding guesswork in complex setups.
- Industry blogs and forums: Staying active in communities, such as Creator Rig Reviews, offers real-world insights and fresh ideas.
- Calibration software: Programs like this resource help maintain consistent color temperature across sessions.
Step Into the Light with Confidence
The journey to stellar lighting is ongoing, but each small step builds a foundation for more polished, professional-looking videos. Embrace the learning curve, invest in tools that truly serve your craft, and above all—keep experimenting. Your perfect setup might be just a tweak away. Want to deepen your understanding of innovative lighting techniques? Check out creative RGB tube effects or explore advanced softbox strategies to enhance your studio. Remember, lighting is not just equipment; it’s a powerful storytelling tool waiting to be mastered. How will you adjust your current setup to bring your videos into sharper focus? Share your plans below and let’s light the way together.
![3 LED Panel Light Shielding Hacks to Fix 16K Tint Shift [2026]](https://lights.creatorrigreviews.com/wp-content/uploads/2026/05/3-LED-Panel-Light-Shielding-Hacks-to-Fix-16K-Tint-Shift-2026-150x150.jpeg)


One response to “Best Softbox & RGB Tube Lighting Guide for Creators in 2024”
Reading through this guide really resonated with me, especially the part about proper light placement making such a difference in depth and contrast. In my experience, even small tweaks—like adjusting the angle or height of a softbox—can completely change the mood and professionalism of a shot. I also appreciate the emphasis on understanding that brightness isn’t always better; I used to think cranking up the lumen output would solve all my problems, but I was often overexposing or losing detail.
One area I struggle with is balancing multiple colored lights for effect without overwhelming the scene. Do others here have tips or setups that help maintain harmony when using RGB tubes? I’d love to hear about techniques or tools that make this process smoother. Also, regularly calibrating lights sounds essential but sometimes feels time-consuming—what routines or equipment do you all find most effective for maintaining consistent color? Looking forward to refining my own setup with these insights.