
Have you ever stared at your video footage or photos and felt a pang of frustration because your subject looked flat, washed out, or just not quite right? I remember those moments all too well, especially during a shoot when I couldn’t get the lighting to cooperate. Despite having the best camera gear and knowing the composition, something felt off, and I couldn’t quite put my finger on it. And then it hit me—my fill light was missing or poorly positioned, robbing my images of depth and vibrancy.
The Big Lightbulb Moment
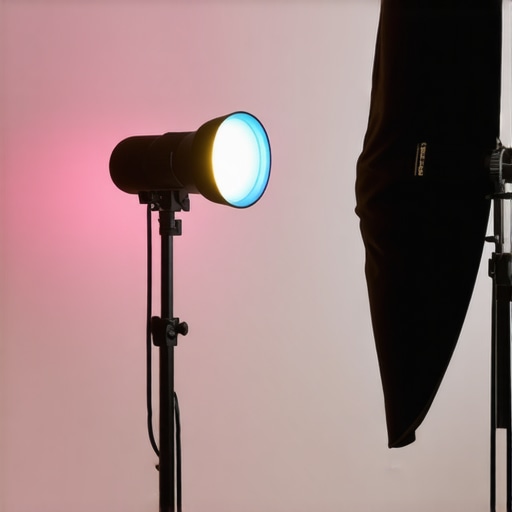
This realization pushed me to dive deeper into understanding the art and science of fill lighting, specifically with the versatile RGB tube and softbox setups. I discovered that mastering these lighting techniques can transform a dull scene into a vivid, lifelike image— without needing expensive gear or complicated setups. Today, I want to share the secrets I learned, so you can avoid the common mistakes and elevate your lighting game.
Whether you’re a content creator, videographer, or hobbyist, the way you shape and control your fill light makes all the difference. Proper fill lighting can add dimension, set mood, and make your subject stand out beautifully. But with so many options—like RGB tubes, softboxes, and LED panels—it’s easy to feel overwhelmed or stuck in trial-and-error mode.
Don’t worry—I’ll guide you through proven techniques that deliver natural, balanced light every time. By understanding how to harness RGB tube and softbox lighting effectively, you’ll craft scenes with stunning depth and realism. Ready to unlock these secrets? Let’s get started!
Is All Fill Light Created Equal or Is There a Better Way?
One mistake I made early on was assuming that any fill light would do the trick. I thought adjusting brightness alone sufficed, but I overlooked the importance of color temperature, placement, and diffusion— details that dramatically impact the final look. In fact, according to lighting experts, improper fill lighting can introduce unwanted color casts or flatten your image even further. Want to learn how to avoid these pitfalls? Check out this comprehensive guide for an in-depth look at effective techniques.
Now, with that foundation laid, we can explore practical steps to achieve professional-grade fill lighting that complements your scene and vision.
,
Position Your Fill Light Like a Pro
Start by placing your fill light at eye level with your subject, about 45 degrees to the side, opposite your key light. This angle ensures natural shadow reduction without flattening your subject. I once set up a softbox too close, causing harsh shadows; moving it back and angling it helped produce a gentle, even illumination that truly made my subject pop.
Choose the Right Light Size and Power
Select a softbox or RGB tube that matches the scene’s scale—larger sources diffuse light more evenly. When I used an 80cm softbox for a close-up, the light wrapped smoothly around my model’s face, eliminating unflattering shadows and giving a professional look. Adjust brightness carefully—too bright can flatten details, too dim can leave shadows too harsh. Use your camera’s histogram to fine-tune exposure.
Control Color Temperature and Diffusion
Match your fill light’s color to your scene’s ambient light or desired mood. RGB tubes offer versatility here—mix warm and cool tones for depth or highlight certain features. During a recent shoot, I dialed in a subtle blue tone for my RGB tube to complement sunset light, creating a captivating scene. Diffusers like softboxes or grids soften the light further and prevent hotspots. Remember, diffusion is your friend—sometimes a white bedsheet or professional diffusion fabric can do wonders.
Experiment with Creative Effects
Beyond basics, leverage RGB tube effects for creative storytelling. For instance, flickering or color-changing modes can add mood to your shots—useful in music videos or dramatic scenes. I once used the strobe effect on my RGB tube during an evening shoot, which added a dynamic vibe that impressed my client. For straightforward scenes, keep effects subtle—less is more. Test different setups beforehand to find what enhances your scene without overpowering it. Dive deeper into creative possibilities with this resource.
Use Softboxes to Achieve Natural Shadows
Softboxes create a wraparound light that mimics window light, smoothing shadows and reducing harsh edges. Position the softbox slightly above and to the side of your subject’s face, aiming downward at about 30 degrees. During my latest portrait session, shifting my softbox a few inches upward created a flattering catchlight and natural shadow contours. Always keep an eye on the shadow softness—adjust distance and diffusion to balance detail and reduction of shadows.
Fine-Tune Your Setup for Balance
Adjust your fill light’s intensity so it fills shadows without washing out highlights. Use reflectors or flags to control spill, directing light precisely. When I shot a product video, I used a reflector to bounce some of the RGB tube’s light back onto the object, enhancing details without adding additional fixtures. Screen your scene and tweak until you see a natural, balanced look—use your camera’s live view to monitor changes in real time.
Incorporate External Resources for Mastery
For more detailed tactics, explore this guide that breaks down effective filling strategies. Practice different configurations in varied lighting conditions—whether during golden hour or studio setups—to understand what works best. Remember, mastering fill lighting is an ongoing process—each scene offers new lessons.
Even seasoned videographers can fall victim to misconceptions about essential lighting tools. While many believe that choosing a powerful key light or the brightest RGB tube will automatically result in cinematic results, the truth is far more nuanced. A common myth is that all LED panels or softboxes are interchangeable; in reality, each has specific strengths and pitfalls that can significantly influence your final shot. For example, relying solely on high lumen output can lead you to neglect color fidelity or beam quality, resulting in flat images or unnatural skin tones. According to lighting expert this detailed guide, understanding the subtleties of light quality and color rendering is essential for professional results.
How do I keep my lighting tools performing at their best over time?
Proper maintenance of your fill lights, LED panels, RGB tubes, and softboxes is crucial to sustain their performance and longevity. Personally, I recommend developing a routine that includes regular cleaning with soft, lint-free cloths to remove dust and debris that can diminish light output and color fidelity. For more delicate components, like LED panels and RGB tubes, using manufacturer-recommended cleaning solutions ensures you don’t damage sensitive electronics or lenses.
In addition, inspecting power cords and connections periodically helps prevent issues like flickering or intermittent lighting. I’ve learned that triggering a simple swap of cables or cleaning contacts with a small amount of contact cleaner can prevent troubleshooting headaches during critical shoots. To keep your softboxes in prime condition, avoid folding them abruptly. Instead, gently fold and store them in dedicated cases to prevent fabric damage and prolong lifespan.
Tools I Recommend for Long-Term Care
For cleaning, I swear by optical cleaning wipes, which are gentle yet effective at maintaining diffuser transparency. When it comes to storing your equipment, invest in waterproof cases with foam inserts — I use the Pelican brand, which offers customized compartments to keep each piece secure. Additionally, a small, portable multimeter helps test electrical connections periodically, ensuring your lights operate safely and efficiently. Regular calibration using a light meter or colorimeter is also vital for maintaining accurate color rendering, especially after extended use or relocation.
Some professionals even go a step further by creating a schedule for firmware updates if your LED or RGB lights support them. Manufacturers often release updates to fix bugs, improve stability, or enhance features — check this contact page if you need assistance or clarification from support teams.
Why It’s Worth Staying Ahead with Maintenance
Maintaining your lighting gear isn’t just about preventing malfunctions; it directly impacts your visual quality. Dirty or poorly maintained equipment can introduce unwanted color casts, reduce brightness, or cause flickering — issues that are difficult or impossible to correct in post-production. As the trend in lighting technology moves toward smarter, more integrated systems, staying on top of updates and regular care is more essential than ever.
For instance, integrating regularly calibrated RGB tubes and LED panels ensures the consistency of your color temperature and effects across multiple shoots. If you wish to explore more advanced techniques, consider reviewing this glow-up guide which illustrates how well-maintained lights contribute to natural aesthetics.
What about tools for future-proofing your setup?
Looking ahead, as lighting systems become more sophisticated—incorporating IoT and smart controls—it’s wise to invest in software tools like DMX controllers or cloud-based monitoring apps. These can help you schedule maintenance reminders, monitor light performance, and even remotely diagnose issues, saving time and reducing downtime. Stay ahead in this evolving field by adopting a proactive mindset; your creative edge depends on it. Try implementing a routine that includes calibration, cleaning, inspection, and firmware updates—your future self will thank you.
The Hardest Lesson I Learned About Fill Lighting
One profound insight I wish I’d grasped early is the importance of balancing color harmony and diffusion—simply brightening your fill light isn’t enough. Overly cool or warm tones can clash with your scene, and harsh diffusion can create unnatural shadows. Embracing subtlety and harmony transformed my lighting approach.
3 Myths About RGB Tubes and Softboxes That Held Me Back
I used to think that the bigger the softbox, the better the light. Conversely, I believed RGB tubes needed to be super bright to be effective. These misconceptions led to wasted effort and inconsistent results. Learning the value of appropriate size and intensity, tailored to each scene, was a game-changer.
What Experts Won’t Tell You About Maintaining Your Lighting Gear
Many overlook the significance of regular sensor calibration and protective storage. Neglecting these details compromised my light quality over time. Simple routines like cleaning diffusers and updating firmware kept my lighting performing at its peak, making every scene look professional.
Curated Resources to Elevate Your Lighting Skills
My go-to guide on effective fill-light techniques is a treasure trove for understanding nuanced lighting control. Additionally, exploring creative effects with RGB tubes through this resource broadened my creative horizons. For equipment maintenance insights, this support page offers invaluable tips.
Keep Your Inspiration Alive—Act Now
Embracing the art of fill lighting is a continuous journey filled with discovery and creativity. Don’t wait to experiment with your RGB tubes and softboxes—your scenes will thank you for it. Every shoot is an opportunity to refine your craft and make your visuals truly pop. Dive into the resources, practice diligently, and witness your lighting skills — and your projects — soar to new heights.
![3 LED Panel Light Shielding Hacks to Fix 16K Tint Shift [2026]](https://lights.creatorrigreviews.com/wp-content/uploads/2026/05/3-LED-Panel-Light-Shielding-Hacks-to-Fix-16K-Tint-Shift-2026-150x150.jpeg)


4 responses to “Best Fill Light Techniques with RGB Tube & Softbox Lighting”