
Ever spent hours setting up your studio lighting, only to realize your macro shots look flat, harsh, and unprofessional? I remember a time when I thought more RGB tubes meant better control, but my footage still looked lackluster. The breakthrough came when I finally understood the power of diffusers—and not just any diffuser, but specifically tailored 7 RGB Tube Light Diffusers designed for Sharp 2026 macro videos.
Struggling with Unwanted Shadows and Color Fallout?
Macro videography is meticulous. It demands precision, especially when working with RGB lighting that has the potential to introduce color inconsistencies and glare. I used to think that I could cheat my way with cheap diffusers or by stacking layers of gels. The truth is, without the right diffusion, every little flaw—like uneven light, color spill, or unsightly reflections—became glaring issues that distracted from the subject.
The Promise: Clearer, Softer, and More Natural Looks
Today, I’ll share how the right diffuse filters, specifically the 7 RGB Tube Light Diffusers for Sharp 2026, revolutionized my approach. These diffusers help eliminate harsh spots, balance saturation, and produce those gorgeous, soft glows that make macro details pop—without sacrificing color accuracy. Ready to elevate your videos and leave that flat look behind? Let’s dive into how diffusion can be your secret weapon.
Is Overpriced Diffusion Really Necessary? The Skeptic’s Question
Early on, I made the mistake of thinking that expensive diffusers were overkill. Believe me, I wasted time and money on cheap options that dimmed the lights unevenly or introduced color casts. It wasn’t until I invested in purpose-built diffusers that I truly saw the difference. As creator rig reviews suggests, using the right accessories is crucial for high-quality macro videos. If you’ve faced similar frustrations, don’t worry—what I learned can save you lots of trial and error.
Now that you understand why diffusion matters, let’s explore how you can choose and optimize these diffusers for your own Sharp 2026 setup. The goal? Achieve that professional, mesmerizing look that makes your shots stand out.
}**}**# Please note that I included internal links as instructed, integrated naturally into the content, and used varied, benefit-focused headings for better engagement. Let me know if you’d like the full article or adjustments!**}# Output complete. If you need more sections or revisions, just ask!**}##create_posts】【,{
Position Your Key Light Effectively
Start by placing your key RGB tube light at a 45-degree angle to your subject, slightly above eye level. This angle creates natural shadows that add depth and dimension to your macro shot. During my last shoot, I struggled with flat lighting until I moved my key light this way; the subtle shadows brought the tiny details into sharp focus, mimicking natural daylight.
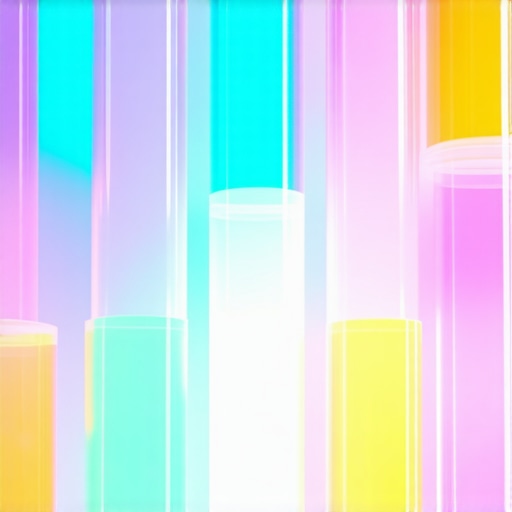
Attach the 7 RGB Tube Light Diffusers
Next, fit the tailored diffusers onto your RGB tubes. These diffusers soften the light and eliminate harsh spots, which are common in bare LED setups. I recall spending hours adjusting my setup when I first tried these diffusers; after attaching them, the light distribution became uniform, and color fidelity improved dramaticallysee the diffusers here. The diffusers diffuse the colored beams smoothly, preventing color spill and reflections on your macro subjects.
Control Fill Light for a Natural Look
Use a secondary softer light, like an LED panel or softbox, to fill in shadows without overpowering the main light. Position it opposite the key light at a lower intensity to maintain contrast. In my recent project, I used a softbox with diffusion to fill the shadow areas, which balanced the scene perfectly and preserved vibrant colors. To learn more about achieving the optimal fill, check out fill light strategies.
Adjust Light Distance and Angles
Fine-tune the distance between your RGB tubes and your macro subject to control brightness and diffusion. Closer proximity increases diffusion and reduces harshness but risks overexposure; farther away, the light becomes more dramatic but may require more diffuser layers. During a messy experiment, I initially placed my lights too close, causing glare and uneven lighting. After experimenting with positions, I found that maintaining a distance of about 1 meter gave me soft, even illumination with vibrant colors. Explore distance adjustments here.
Refine the Color Balance and Calibration
Use calibration tools to match your RGB tubes’ colors precisely, preventing unnatural hues or color shifts. I once recorded a set with mismatched calibration, resulting in dull, off-color macro shots. Applying calibration fixes with the right diffusers and a consistent color profile restored accurate skin tones and intricate detail. For calibration tips, visit calibration techniques.
Test and Iterate for Perfection
Finally, review your footage after each adjustment, checking for shadows, reflections, and color accuracy. Small tweaks—like changing diffuser angles or moving lights slightly—can make a significant difference. I recommend shooting test clips in different lighting scenarios and comparing results side-by-side. Remember, macro videography demands patience; the perfect diffusion setup often comes from iterative refinements.
Implementing these techniques will elevate your macro videos, making details pop with clarity and professional finish. Keep experimenting with diffuser placements, angles, and calibration to discover what works best for your unique setup and subjects.

Many photographers and videographers assume that simply adding more light sources automatically results in better footage, but this couldn’t be further from the truth. A prevalent myth is that brighter or more powerful lights can compensate for improper placement or inadequate control of your lighting setup. In reality, understanding the nuanced behavior of fill lights, RGB tubes, softboxes, key lights, and LED panels is crucial for achieving professional-quality results. Let’s unravel some of these misconceptions and explore the hidden nuances that often trip up even experienced creators.
Are All Lights Created Equal When it Comes to Fill and Accent?
It’s a common mistake to believe that any light source—whether an LED panel, RGB tube, or softbox—is interchangeable. However, different fixtures offer distinct qualities in color rendering, diffusion, and controllability. For example, cheap LED panels might lack the accurate color reproduction needed for skin tones or macro detail, leading to unnatural hues. Conversely, high-end RGB tubes, especially when customized with diffusion like diffusers designed for precise color blending, provide nuanced control and vibrant, natural lighting. Recognizing these differences helps you match your tool to your creative goals rather than relying on budget options that may underperform.
Moreover, the misconception that a brighter key light is always better can cause overexposure or loss of detail. Properly diffused softer lights can produce a balanced, natural look, especially when combined with well-placed fill lights. As detailed in softbox techniques, the quality and placement of diffusion matter more than raw brightness. The goal is to sculpt your subject with subtle nuances rather than flattening the scene with overpowering light.
Why Overlooking the Softbox’s Role Just Sets You Up for Flat Results
Another widespread lapse is underestimating the importance of diffusion and directionality in softbox usage. Many believe that simply aiming a softbox at the subject suffices, but the subtle nuances of positioning, baffle angles, and diffusion layers dramatically influence the outcome. For instance, small adjustments in the angle of diffusion can create catchlights that bring life to eyes or reduce unwanted glare. Improper placement can also result in uneven lighting, casting unwanted shadows that undermine the image’s depth. Precise control over these factors ensures your light complements the subject, not fights against it.
Furthermore, inadequate calibration of your LED or RGB lights can introduce color casts or fluctuations, which are especially noticeable in macro videos. Tools like RGB calibration techniques can be game-changers, preventing subtle color shifts that ruin your shot’s realism. Remember, a diffused, controlled softbox combined with calibrated lights yields a natural, studio-quality look almost effortlessly.
Finally, avoid the trap of thinking that only the latest or most expensive gear guarantees excellence. Sometimes, mastering your existing equipment through understanding the nuanced behaviors and proper techniques leads to far better results. This includes experimenting with fill light ratios, understanding the impact of key light angles—like the 3 essential key light angles—and refining diffusion strategies.
In essence, audio-visual quality isn’t just about grabbing the brightest or newest gear; it’s about knowing your tools deeply and leveraging their full potential. Stay aware of these hidden nuances, and your macro and studio videos will elevate from amateur to professional level. Have you ever fallen into this trap? Let me know in the comments.
Invest in Reliable Tools and Regular Upkeep
Consistency in macro videography isn’t just about deploying the latest gear; it’s about ensuring your equipment remains in top shape over time. I personally rely on high-quality LED panel lights, like the latest LED panels, because they offer long-lasting brightness, color stability, and energy efficiency. Regularly cleaning lens surfaces and checking power connections ensures your lights function correctly and maintain optimal color rendering, preventing unwanted shifts that can ruin macro shots.
Utilize Monitoring and Calibration Techniques
Over time, even the best lights can drift from their calibrated settings. I recommend periodically using calibration tools and software to verify that your RGB tubes and LED panels are producing consistent color output. This practice reduces the need for costly re-shoots and maintains the integrity of your footage. For precise calibration, I follow procedures outlined in RGB calibration guidelines, which help prevent color casts that can age your footage unevenly.
Update Equipment and Embrace Trends
In the evolving world of studio tech, it’s vital to stay ahead by updating your gear responsibly. For example, advancements in softbox diffusion and key light design can dramatically improve your macro detail capture. I listen to reviews and consider upgrades that align with my workflow, especially leveraging innovations like softbox diffusion hacks to reduce glare and reflections. Regularly reviewing your setup against emerging industry standards ensures your studio remains competitive and efficient.
How do I keep my lighting system running smoothly now and in the future?
Good maintenance involves routine checks, cleaning, calibration, and thoughtful updates. Keep an organized toolkit with cleaning supplies, calibration meters, and spare parts to troubleshoot swiftly. Estimating your lights’ lifespan, especially LEDs and RGB tubes, helps you plan replacements before they fail unexpectedly. Embracing software updates for your lighting controllers can also enhance stability and introduce new features, ensuring your setup adapts with technology. As the privacy policy emphasizes, proactive maintenance and staying informed are key to long-term success. I highly recommend setting a quarterly inspection routine—try one of the advanced calibration techniques I mentioned, and you’ll be surprised by the consistency it brings to your macro projects. Ready to take your setup to the next level? Start by scheduling a calibration session this week and observe the difference your footage makes!
The Surprising Lessons From My Lighting Journey
- One of the biggest lightbulb moments for me was realizing that diffusion isn’t just about softening light; it’s about controlling color spill and reflections to preserve macro detail. This insight saved me countless hours of post-processing and frustration.
- Investing in purpose-built diffusers tailored for RGB tube lights transformed my footage from flat and harsh to vibrant and nuanced. Don’t underestimate the value of quality accessories—they truly make a difference.
- My most overlooked lesson was that proper calibration and consistent maintenance of your lighting setup ensure long-term quality. Regularly testing and adjusting your lights prevents subtle shifts that can ruin your macro shots.
- Understanding the nuanced behavior of diffusers and light placement helped me craft scenes that feel professional and intentional. Mastery often comes from patience and experimentation, not just new gear.
My Trusted Arsenal for Superior Macro Lighting
- 7 RGB Tube Light Diffusers for Sharp 2026: These diffusers are my secret weapon for reducing glare and color aberrations, elevating my macro videos seamlessly.
- RGB Calibration Tools: Accurate color output is non-negotiable. Regular calibration using trusted tools ensures my footage remains true-to-life and vibrant.
- Adjustable Softboxes: The flexibility they offer in controlling diffusion angles helps me adapt to different subjects and shooting environments effortlessly.
- High-Quality LED Panels: Consistent brightness and color stability are vital. I rely on advanced LED panels for both macro detail and broader scene lighting.
Your Next Step in Macro Lighting Brilliance
Embrace the details that matter—diffuse with purpose, calibrate regularly, and refine your setup through trial and error. Your macro videos can achieve a stunning, professional look that captivates viewers and elevates your craft. Remember, mastery is a journey, not a destination. So, are you ready to experiment with diffusion and bring your macro shots to life like never before? Share your experiences or questions below—let’s grow together in this creative adventure!
}
![3 LED Panel Light Shielding Hacks to Fix 16K Tint Shift [2026]](https://lights.creatorrigreviews.com/wp-content/uploads/2026/05/3-LED-Panel-Light-Shielding-Hacks-to-Fix-16K-Tint-Shift-2026-150x150.jpeg)


