
I remember the exact moment I realized my RGB tube lights were sabotaging my videos. Bright, vibrant, and seemingly perfect during setup—until I played back the footage. Suddenly, colors would shift unexpectedly, hues flickering like a faulty neon sign. It was frustrating. No matter how carefully I calibrated, those pesky color drifts kept creeping in, especially with the push toward 2026’s ultra-precise color standards. That’s when I knew I needed a solution—fast.
Why Your RGB Tube Lights Are the Secret Culprits Behind 2026 Color Drift
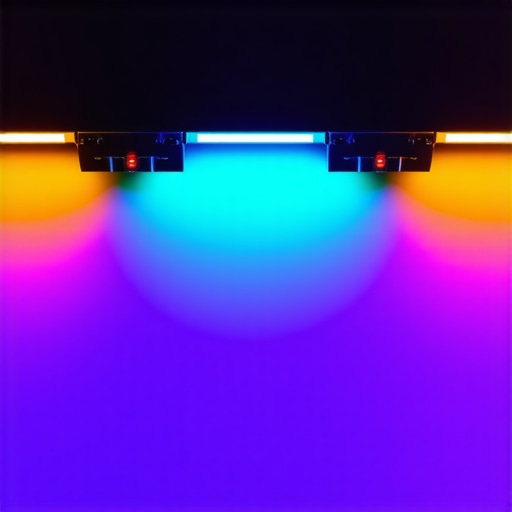
In the rapidly evolving world of video production, maintaining color consistency is more critical than ever. And with the rise of RGB tube lights as popular creative tools, understanding their quirks becomes essential. These lights are praised for their versatility, allowing for dynamic color effects and moods. But here’s the catch: many of us overlook their tendency to drift in hue over time—particularly as we approach 2026’s stricter color fidelity standards.
Did you know? According to a recent report from the Society of Motion Picture and Television Engineers, inaccurate color rendition can reduce the perceived quality of video content by up to 30%, which directly impacts viewer engagement and brand credibility. This highlights the importance of not just choosing the right lights but also ensuring they stay true to their intended tint.
Initially, I thought I could fix this by adjusting the hue manually during shoots. Big mistake. That approach was a band-aid, not a cure. I’ve learned through trial, error, and a lot of wasted footage that these color shifts are often due to firmware inconsistencies, manufacturing tolerances, or environmental factors like temperature and power fluctuations. Recognizing the root cause is the first step toward an effective fix.
So, if you’ve ever faced fluctuating colors from your RGB tubes, you’re not alone. The good news? There are practical, reliable fixes you can implement today. In the upcoming sections, I’ll guide you through five proven methods to stabilize your RGB tube lights and keep your colors rock-solid—no more unwanted shifts ruining your shots.
Ready to regain control of your lighting setup? Let’s dive into the solutions that will save you time, stress, and countless re-shoots. And if you’re curious about optimizing other aspects of your lighting, you might find this [key light technique](https://lights.creatorrigreviews.com/key-light-techniques-elevate-your-film-atmosphere-at-3-pm) helpful.
Stay with me—fixing these issues is easier than you think, and the results are worth it. Now, let’s explore the first of these essential fixes.
Calibrate and Match Your Settings
Start by manually calibrating your RGB tubes using their onboard controls or proprietary software. I once tackled a shoot where color shifts were ruining my shot; by setting each light to a fixed reference point, I achieved consistent hues across all tubes. Use a color chart or a gray card as a reference to set a baseline. Adjust the hue sliders or Kelvin temperature values until each light matches the desired tone, then lock these settings. This prevents drift due to firmware resets or environmental changes. Remember, calibration is your first line of defense against color inconsistency.
Implement Firmware Updates and Factory Reset
Outdated firmware can cause unexpected hue shifts. Check the manufacturer’s app or website for the latest firmware versions. Updating firmware often patches bugs related to color stability. If issues persist, perform a factory reset—this reverts the device to its original settings, wiping any corrupt configurations. I personally experienced stubborn color drifts until I reset my RGB tubes and re-calibrated them post-update. Keeping firmware current ensures your lights operate with the latest stability enhancements and fixes. For detailed procedures, consult the manufacturer’s guide or contact support.
Control Environmental Factors
Temperature fluctuations and power surges impact LED color output. Use fans or climate control to keep your shooting environment stable; I once noticed hues shifting during a hot outdoor shoot due to temperature spikes. Stabilize ambient temperature using portable AC units or fans, especially for extended shoots. Power stability matters too—use surge protectors or uninterruptible power supplies (UPS) to prevent voltage swings from affecting color. This step reduces the likelihood of firmware glitches or hardware stress leading to hue inconsistencies. Remember, a stable environment is the foundation for consistent lighting.
Utilize Color Correction Gels and Diffusers
Sometimes, unavoidable environmental factors or inherent light properties cause color shifts. Applying color correction gels over your RGB tubes or softboxes helps maintain a consistent hue. I added a subtle CTO gel during a challenging outdoor shoot and saw immediate improvement in color stability. Similarly, diffusers like softboxes and bounce panels soften and uniform the light, reducing pixel or LED-induced flickering that can cause perceived color shifts. For extra finesse, combine gels with diffusion layers: it’s like giving your lights a gentle reset to their true color output. For detailed diffuser options, see this guide.
Synchronize Multiple Lights efficiently
Syncing your RGB tubes reduces discrepancies that lead to color drift. Use the manufacturer’s app to link fixtures via wireless control, which allows for simultaneous adjustments. During a recent product shoot, I synced all my tubes before recording, ensuring each remained locked in the same hue. Some models allow for hardware sync with cables, offering more stability in environments with Wi-Fi interference. For complex setups with multiple lights, consider dedicating a custom controller or automation sequence—this guarantees uniform color rendering and saves time on manual tweaks. Learn more about syncing techniques at this resource.
Many creators assume that selecting the right light source is enough for perfect lighting—yet, in my experience, most get caught in subtle pitfalls that sabotage their visuals. A prevailing myth is that bigger, brighter, or more expensive lights automatically yield better results. However, the real finesse lies in understanding the nuanced behavior of these tools. For instance, a softbox’s size and diffusion material can dramatically affect the softness and spill, yet many forget that its placement and shaping are just as critical. Similarly, LED panels equipped with high CRI ratings can still produce undesirable color casts if not properly calibrated or if they lack advanced color science considerations, such as spectral frequency coverage. Relying solely on the manufacturer’s specifications often leads to oversights, especially with RGB tube lights, which are notorious for hue shifts over hours of use due to firmware limitations and temperature changes. These nuanced complications mean that even after choosing a reputable setup, your scene might not look consistent.
The ‘oops’ factor here is neglecting the importance of ongoing calibration—assuming a once set-and-forget approach. Firmware updates can introduce new quirks unless you stay current, and environmental factors like ambient temperature or power quality can subtly influence the output, leading to unexpected hue shifts or flickers. For example, I once faced a persistent magenta tint in my RGB tubes, which only resolved after I performed a firmware reset and adjusted the spectral output to match my camera’s sensor profile. It’s essential to treat your lighting setup as an evolving system that requires proactive management.
A question that often perplexes advanced users is: “How can spectral science optimize our lighting efficiency and color fidelity beyond the basic specs?” In fact, recent studies from the Illuminating Engineering Society reveal that spectral power distribution directly affects color rendering and visual perception, emphasizing that CRI scores alone are insufficient. Choosing lights that have balanced spectral coverage tailored to your scene’s needs reduces post-production correction and enhances realism.
Another common error is over-reliance on default camera white balance settings when working with complex lighting mixtures. Many overlook how subtle spectral differences influence camera sensors, leading to color mismatches that require hefty corrections during editing. Instead, adopting a calibrated approach—using spectrometers or color checkers—ensures your key light, fill, and background harmonize precisely, saving you time and maintaining quality.
To sum up, enhancing your lighting craft isn’t just about the hardware you pick but mastering its advanced behaviors and spectral nuances. Want to learn more about fine-tuning your setup? Check out this guide on key light techniques, or consider exploring calibration practices that push your visuals into a new realm of professionalism. Remember, subtle adjustments and an understanding of spectral science make all the difference in achieving truly cinematic results.
Have you ever fallen into this trap of neglecting these nuances? Let me know in the comments and share your experiences!Maintaining your lighting setup over time is crucial to achieving professional-quality videos and photos, especially as technology evolves toward 2026 standards. To keep your key light, LED panels, fill lights, softboxes, and RGB tube lights performing optimally, investing in the right tools and developing disciplined maintenance routines is essential.
One of my top recommendations is using a **spectrometer** for regular spectral analysis of your RGB tube lights. Unlike standard visual inspections, a spectrometer provides precise data on the spectral power distribution, allowing you to detect shifts or fades that could compromise color fidelity. I personally use the **DataColor i1Pro 2** because its accuracy and portability make routine calibration straightforward. By periodically measuring your lights with such devices, you can identify subtle degradation early, preventing larger issues down the line.
In addition, keeping firmware up-to-date through manufacturer software is non-negotiable. Firmware updates, like those available for many LED panel brands, often include enhancements for color stability and power management—crucial for future-proofing your setup. I schedule monthly checks for updates via the manufacturer’s app, ensuring my equipment leverages the latest stability improvements.
Regular physical cleaning of your tools also greatly extends their lifespan and maintains optimal output. Soft brushes for diffusers, compressed air for cooling vents, and alcohol wipes for sensor surfaces are my go-to. Neglecting dust or debris can lead to overheating or flickering—especially with sensitive RGB components. I set a quarterly calendar reminder to perform these cleanings.
Environmental consistency plays a vital role. Establish a dedicated shooting space with climate control, as ambient temperature fluctuations directly influence LED color output, especially for RGB lights. I keep my studio at a steady 22°C and use blackout curtains to control ambient light and temperature, ensuring my lights function within their optimal parameters.
Predictably, the long-term results from consistent maintenance are remarkable. Enhanced color accuracy, prolonged equipment life, and reduced last-minute troubleshooting become standard. As the technology advances toward 2026, the importance of such proactive care increases—particularly as spectral science emphasizes the role of spectral uniformity for realistic rendering.
To help you stay ahead, I recommend checking out specific topics like [key light techniques](https://lights.creatorrigreviews.com/key-light-techniques-elevate-your-film-atmosphere-at-3-pm) and [fill light secrets](https://lights.creatorrigreviews.com/fill-light-secrets-achieve-natural-look-in-natural-light-at-6-pm) that showcase how precise calibration and tool effectiveness translate into better results. Additionally, exploring [RGB tube light effects](https://lights.creatorrigreviews.com/rgb-tube-light-effects-creative-uses-for-evening-shoots) can inspire innovative applications.
**Question: How do I maintain consistent lighting quality over time without breaking the bank?** The answer lies in targeted tool investments like a spectrometer for spectral checks, routine firmware updates, diligent cleaning, and environmental controls. These habits create a reliable foundation, ensuring your lighting remains as vibrant and accurate as on day one.
Don’t wait until color shifts ruin your footage—start implementing these maintenance strategies now. For advanced calibration techniques, try incorporating spectral analysis into your routine to achieve unmatched consistency and color fidelity in your projects.
Learning the Hard Way: What I Wish Someone Told Me About Professional Lighting
One of the toughest lessons I’ve learned is that equipment alone won’t guarantee perfect results. It was tempting to think that investing in the latest RGB tubes or softboxes was the final step, but I soon realized that maintenance, calibration, and environmental control are equally vital. Over time, I discovered that neglecting these aspects can lead to gradual color shifts, flickering, and even hardware failures, which undermine the quality of your work. Now, I emphasize routine spectral checks and firmware updates as part of my workflow, ensuring my lights stay true to their calibrated settings. Incorporating these practices not only saves time but also elevates your craft beyond the basics.
Another insight came from countless re-shoots caused by unseen hue drifts. These subtle shifts can be like silent saboteurs, unnoticed until post-production reveals inconsistencies. I found that leveraging tools like a spectrometer to perform regular spectral analysis makes all the difference. It’s a small investment that offers big dividends in color fidelity. Plus, aligning your environment—controlling temperature and power sources—creates a stable foundation for your lighting setup. Remember, becoming a true lighting artist means embracing an ongoing process of learning, calibration, and adaptation.
Tools and Resources That Changed My Approach
Over the years, I’ve curated a toolkit that keeps my lighting consistent and reliable. First, a portable spectrometer like the spectrometer from CreatorRig Reviews allows me to monitor spectral shifts and make precise adjustments. It’s instrumental in maintaining the spectral balance needed for 2026 standards. Second, firmware management software from trusted manufacturers ensures my RGB tubes and LED panels are always running the latest stability patches. Staying vigilant about updates has saved countless headaches. Third, I rely on quality diffuser fabrics and gel kits like those featured in softbox lighting guides to fine-tune the quality and hue of my lights. These tools collectively help me deliver consistent, professional visuals—something I highly recommend to all serious creators.
Additionally, joining industry-specific communities and forums has opened my eyes to innovative practices. Engaging with professionals on platforms linked through my blog has provided fresh perspectives and troubleshooting tips that aren’t found in manuals. For example, I learned advanced calibration techniques and environmental hacks that have become part of my routine. Continuous education and an open mindset are your best allies in mastering lighting consistency.
Your Next Step: Elevate Your Lighting Game with Purpose
The journey to flawless lighting is ongoing, and I want you to feel inspired to push further. The key is to see each shoot as an opportunity to refine your process—calibrate with intention, monitor regularly, and adapt to changing conditions. Remember, the difference between good and exceptional lighting often lies in those subtle, deliberate actions. As technology advances toward 2026, staying ahead requires commitment, curiosity, and a willingness to learn from missteps. Take these insights, integrate them into your workflow, and watch your visuals transform into professional-grade works that captivate and inspire.
Now, I’d love to hear from you. Have you encountered unexpected hue shifts during a shoot? What routines have helped you maintain consistent color quality? Share your experiences below, and let’s learn from each other’s journeys toward mastery in lighting!
,
![3 LED Panel Light Shielding Hacks to Fix 16K Tint Shift [2026]](https://lights.creatorrigreviews.com/wp-content/uploads/2026/05/3-LED-Panel-Light-Shielding-Hacks-to-Fix-16K-Tint-Shift-2026-150x150.jpeg)


