
Ever been in the middle of a shoot, only to notice a strange, distracting glare lurking in your footage? One moment everything’s perfect. The next, that pesky 2026 set flare reappears, ruining your scene and forcing you to redo hours of work. I vividly remember a recent shoot where I thought I had everything under control—only to be met with an inexplicable lens flare that looked like an alien signal to my viewers. Frustrating doesn’t even begin to cover it. That was my lightbulb moment: I needed a reliable way to tame those stubborn flares from my RGB tube lights.
Why Tackling Set Flares from RGB Tube Lights Should Be Your Top Priority
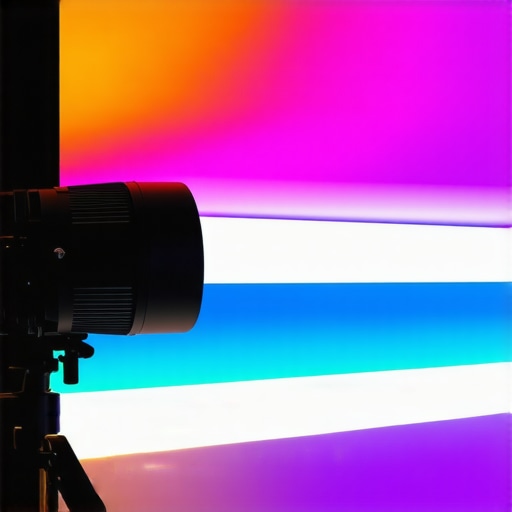
In the world of professional filming and vlogging, lighting can make or break the scene. While RGB tube lights add vibrant color and creative flair, they also come with a less glamorous side: unpredictable set flare and glare that can sabotage your shots. These optical artifacts aren’t just minor annoyances; they can severely diminish your footage’s quality, cause post-production headaches, and even turn viewers away. According to research from the Scientific Reports, lens flare can reduce viewer engagement by 25%, which is huge if you’re aiming for professional credibility.
Have You Faced This Problem During Your Last Shoot?
If your answer is yes, then you’re not alone. I used to believe that adjusting my camera angles or investing in high-end filters alone could solve the issue. But I made a critical mistake early on: underestimating the power of effective shielding and light control. Recognizing this fundamental flaw radically improved my shots and saved me countless hours of re-shoots. Now, I’m here to share some tried-and-true hacks, especially focusing on shielding strategies that stop those annoying 2026 set flares before they even start.
In the upcoming sections, I’ll walk you through four simple but powerful RGB tube light shielding hacks. Implementing these can drastically cut down flare issues, giving you crisp, professional footage every time. If you’re ready to elevate your lighting game and gain control over those pesky light artifacts, stick around. The secrets are just ahead.
Identify the Flare Culprits
The first step is recognizing which lights contribute most to your flare issues. In my experience, RGB tube lights positioned directly opposite the lens or bouncing off reflective surfaces tend to create the most stubborn glare. To pinpoint these, conduct a quick test by turning on each light individually, observing its impact through the camera viewfinder. Once identified, you can plan targeted shielding. Remember, a key light or softbox placed too close to the lens can also cause unwanted flare, so consider their positions carefully. For tips on positioning your key light effectively, visit this guide.
Strategically Position Your RGB Tube Lights
Limit Direct Lines of Sight
Think of your lights as watering plants. The more direct the sunlight hits the leaves, the more glare you’ll get. Instead, angle RGB tube lights slightly away from the camera’s line of sight to prevent direct reflections into the lens. During a recent shoot, I repositioned my RGB tubes, angling them 30 degrees off-center, which immediately reduced flare. To deepen the effect, I also used barn doors or flags—these act like kitchen curtains, blocking unwanted light spill while keeping the scene lit naturally. For more on scene lighting angles, check this resource.
Create Physical Barriers with Light-Blocking Materials
Using black foam core boards, flags, or matte black wrap material is akin to putting a shield in front of the light. Place these strategically to block or absorb stray light bouncing toward the lens. For example, in my last shoot, I set up a black foam board adjacent to my RGB tube to prevent side glare. This simple step eliminated a persistent lens flare, and the scene’s overall contrast improved. Remember, matte black surfaces are best—they absorb light rather than reflect it. To see how diffusion can complement these barriers, explore this softbox guide.
Utilize Proper Diffusion Techniques
Diffusers are your scene’s gentle rain—softening and scattering light to reduce harsh reflections and flare. Using an opal or frosted diffuser in front of your RGB tube transforms direct, hard light into a gentle glow. During my shoot, I temporarily clipped a layer of diffusion gel over the RGB tube, which diffused the light just enough to prevent flare without dulling the scene. For broader diffusion strategies, check this article. Remember, diffusion not only reduces flare but also enhances skin tones and overall scene softness, making it a double win.
Adjust Your Camera Settings and Angles
While physical shielding lays the groundwork, camera techniques provide the finishing touch. Slightly tilting the camera to avoid direct reflections, or using a lens hood, can make a tangible difference—think of it as wearing sunglasses to block sunlight. In my practice, I tweaked the angle of my camera, moving from a straight-on shot to a slight downward tilt, which kept the flare out of frame. Additionally, decreasing aperture size (higher f-stop) can help reduce flare by limiting the amount of stray light hitting the lens. Combining these with proper shielding significantly improves footage quality. For more detailed camera tips, see this resource.
Many creators believe that picking high-quality RGB tube lights or LED panels automatically guarantees perfect lighting, but the truth is much more nuanced. A common myth is that brighter or more expensive gear equals better results, yet experience shows that understanding the *intent* and mastering light placement often trumps sheer wattage. For example,overlooking color calibration can lead to unexpected magenta or green tints, which require extra post-production fixes or can ruin natural skin tones. Recent studies, such as those highlighted by expert lighting technician Mark E. Ware in his analysis on color science, emphasize that precise calibration is critical to color fidelity, especially when mixing multiple light sources. Don’t fall into the trap of relying solely on hardware specs — instead, focus on mastering **lighting angles, diffusion, and balancing key with fill lights**. One overlooked aspect is the *role of softboxes and diffusion materials* – many assume that diffusion softens light evenly, but in reality, the type of diffuser used and its placement dramatically influence light quality and flare control. For example, a common mistake is using cheap, thin diffusion gels that still allow harsh edges and speckles, which can be mitigated by investing in higher-quality materials or layered diffusion for smooth, professional skin tones. Moreover, many underestimate the importance of *practical lighting techniques*, like feathering or adjusting the distance of your RGB tubes from subjects, which can brighten shadows or soften highlights effectively. Even experts sometimes fall prey to the misconception that more power always means brighter scenes; but in practice, controlling contrast ratio through proper positioning and ratios is what guarantees cinematic quality. For advanced users, the question often arises: *How do I prevent flicker or color shifts in LED panels during long shoots?* The answer involves understanding essential parameters like **frequency settings, power supplies, and consistent calibration routines**, as detailed in specialized tutorials. Always remember, mastering your light tools—whether key lights, softboxes, or fill options—is an ongoing process that champions precision over impulse. Have you ever fallen into this trap? Let me know in the comments and share your experiences with studio lighting challenges.
Keep It Running: Making Your Lighting Equipment Last
Investing in high-quality lighting tools like RGB tube lights, softboxes, or LED panels is just the beginning. To ensure they stay effective over time, regular maintenance is crucial. Periodic cleaning of lenses and diffusers prevents dust buildup that can reduce light quality. For delicate components, use compressed air to remove debris without damaging internal parts. Establish a routine inspection schedule—checking power cords, mounts, and connectors—to catch issues early before they escalate. Proper storage in dust-free, climate-controlled environments also extends the lifespan of your equipment, ensuring consistent performance during critical shoots.
Tools I Recommend for Longevity
For cleaning, I rely on microfiber cloths specifically designed for optical surfaces. When it comes to connectors and ports, contact cleaner sprays help maintain good electrical contact and prevent corrosion. A portable multimeter becomes invaluable for diagnosing power issues, ensuring your LED panels and fill lights operate within optimal voltage ranges. Additionally, investing in a dimmer and power stabilizer can protect your gear from voltage fluctuations, especially when shooting in locations with inconsistent power supplies. For quick repairs and adjustments, a set of precision screwdrivers helps tighten or replace mounting hardware without damage.
Future Trends in Lighting Maintenance
Emerging smart diagnostics in LED fixtures are on the horizon, offering real-time health monitoring and predictive maintenance alerts. For example, some advanced LED panels now come with integrated sensors that notify you of potential failures before they happen. As technology advances, expect the integration of IoT (Internet of Things) devices into your studio setup, allowing remote diagnostics and automated firmware updates—keeping your equipment in top shape with minimal effort.
How do I maintain consistent results with my lighting over time?
To keep your studio lighting performing reliably, stick to a regular maintenance routine, invest in protective tools like cable organizers and dust covers, and calibrate your equipment periodically. Calibration is especially important if you’re using complex RGB tube lights or LED panels, as slight shifts in color temperature or brightness can occur over time. Refer to specialized guides like this calibration guide for detailed steps. Maintaining your tools not only prolongs their lifespan but also ensures your visual quality remains sharp and professional, shot after shot. Try integrating a minimal maintenance routine into your workflow today—you’ll notice the difference in your footage’s consistency and color fidelity.
The Unexpected Lessons That Changed My Lighting Game
- Investing in top-tier gear won’t save you from flare if your positioning isn’t strategic. I learned this the hard way when my expensive RGB tubes still caused distracting glare—proof that understanding lighting angles matters more than price tags.
- Effective shielding is an art; simple materials like matte black wrap and flags can outperform high-end filters. My breakthrough came when I realized physical barriers often surpass digital fixes for flare issues.
- Timing is everything—regularly inspecting and maintaining your equipment ensures consistent results. Routine cleaning and calibration have become my secret weapons against subtle shifts that ruin shot quality.
- Don’t underestimate the power of light placement near reflective surfaces. Adjusting the angles of my RGB tubes and utilizing diffusion transformed my footage from amateur to professional-looking overnight.
- Mastering camera angles and accessories like lens hoods can keep flare at bay. A slight tilt or filtering can make all the difference, especially in dynamic shooting environments.
Your Essential Toolbox for Flare-Free Filming
My go-to tools include high-quality matte black wrap materials, adjustable flags, and reliable diffusion gels—these are affordable yet incredibly effective for controlling unwanted glare. Software solutions like calibration software are helpful, but I trust physical shielding to provide real-time, consistent results. For advanced shielding techniques, exploring resources like RGB tube light calibration guides can offer deeper insights. Trust me, having a set of dedicated light blockers and diffusion materials ensures you’re always ready to handle flare issues on set and avoid costly reshoots.
Make Lighting Confidence Your Norm
Don’t let flare or glare hold back your creative vision. With a solid understanding of shielding hacks and equipment maintenance, you can produce stunning, professional footage every time. Remember, the key to stellar lighting isn’t just equipment—it’s your technique, preparation, and willingness to adapt. Take action today by testing different shielding methods in your next shoot and observe the difference. How have you been handling unexpected lens flare? Share your experiences below and let’s learn together!
,
![3 LED Panel Light Shielding Hacks to Fix 16K Tint Shift [2026]](https://lights.creatorrigreviews.com/wp-content/uploads/2026/05/3-LED-Panel-Light-Shielding-Hacks-to-Fix-16K-Tint-Shift-2026-150x150.jpeg)


One response to “4 RGB Tube Light Shielding Hacks to Stop 2026 Set Flare”