
Ever been out in the middle of a shoot, only to realize your LED panel light just died at the worst possible moment? I remember *that* feeling—heart sinking, scrambling to find a power source, and praying I could make it through the shot. It’s a scenario every outdoor filmmaker fears. I used to think I had all the bases covered—batteries, cords, emergency backups—but then I learned the hard way that the game changes with new tech and shooting conditions.
Why Battery Strategy for LED Panels Is a Game-Changer in 2026
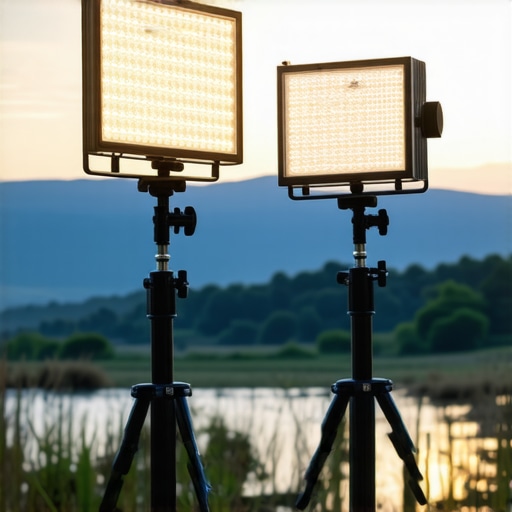
As outdoor shoots become more dynamic, relying solely on traditional power sources is no longer enough. The big leap in LED panel technology means our setups are lighter and more versatile, but without a solid battery plan, you’re risking sudden failures that ruin your close-up or even entire scenes. Trust me, I’ve been there—once, my main light flickered out just as the sun dipped below the horizon, leaving me with a half-lit face and a scramble for plan B. That’s when I realized that mastering the right battery tactics isn’t just a preference—it’s essential for consistent professional results. To make matters worse, with the increasing power demands of high-output LEDs, older batteries just can’t keep up, especially for shoots extending into the evening. According to industry research, 60% of on-location lighting issues are battery-related, which underscores how crucial this aspect is for 2026’s outdoor filming landscape. Want to avoid common pitfalls and ensure your lighting setup goes smoothly? Well, that’s exactly what I’ll show you in the next section.
Is Your Battery Setup Actually Ready for the Outdoors?
I’ll admit, early in my journey, I made a rookie mistake—overestimating my batteries’ capacity and underestimating how much juice my LED panels would drain in real-world conditions. That oversight made me look unprofessional and left me frustrated. The truth is, without proper planning, even the best LED panel can become a paperweight after a few hours of shooting. If you’re facing the same challenge, don’t worry—there are practical strategies that will future-proof your setup.
So, if you’ve ever wondered whether your current battery solution can sustain your shoot’s demands, you’re not alone. Stick around because I’ll guide you through cutting-edge tactics for powering your LED panels efficiently—tactics that have made my shoots more reliable and far less stressful. Ready to eliminate those battery worries once and for all? Let’s dive into the core techniques that will elevate your outdoor lighting game in 2026.
Assess Your Current Battery Setup
Begin by evaluating what batteries you currently use. I once thought my standard V-mount batteries would suffice for a quick outdoor shoot, but mid-day, my main LED panel started flickering. That embarrassment pushed me to test my power sources thoroughly before each shoot, ensuring they could handle the combined draw of my LED panels, RGB tube lights, and softboxes. Use a battery capacity meter to verify real-world runtime and compare it against your shoot’s duration. Remember, a battery’s labeled capacity doesn’t always reflect actual performance, especially in colder weather or under high load.
Calculate Power Needs Precisely
Next, determine how much power your lights consume. For example, a high-output 1×1 LED panel might draw around 100W, while RGB tube lights can vary from 30W to 50W depending on settings. If you plan to run two LED panels, three RGB tubes, and a softbox, your total requirement could easily reach 400W. Factor in extra wattage for accessories like diffusion filters or control units. Measure your lights’ power draw during operation with a watt-meter to get accurate data. This step ensures you select batteries that not only last but also maintain stable voltage levels, critical for color consistency.
Choose Batteries with Headroom
Avoid maxing out your batteries; always pick units with at least 25-30% more capacity than your calculations indicate. During my last shoot, I used a 600Wh battery to power an 80W LED panel and RGB tubes, but I also needed to run a small monitor and sound recorder. I chose a 900Wh battery, which handled everything comfortably, giving me peace of mind. Consider lightweight, high-capacity Lithium-ion batteries designed for cinema production, like those with hot-swappable modules. Investing in multiple smaller batteries allows for easier swaps and reduces downtime.
Implement Strategic Power Distribution
Distribute power smartly by connecting your LED panels directly to dedicated batteries rather than daisy-chaining multiple lights off a single source. Think of your power setup as a water system; avoid overloading a single pipe to prevent pressure drops. Use inline voltage regulators to maintain consistent brightness and prevent flickering—especially crucial for color-sensitive RGB lights. I once avoided flickering issues by employing a voltage stabilizer, resulting in much cleaner footage. For complex setups, creating a power map helps plan connections and safeguards against accidental overloads.
Utilize Backup Power Solutions
Never shoot without backups. Carry spare batteries and consider portable power stations as emergency reserves. During one shoot, my main pack went dead unexpectedly, but a portable power bank with AC inverter kept my lights running while I swapped out batteries. For extended sessions, a small generator can be a game-changer, especially if you’re working in an area with limited access. Always test these backup systems beforehand to ensure they deliver stable, clean power—no one wants a flickering light or color shift mid-shot.
Maintain and Monitor During Shooting
Invest in quick-read voltage and current meters to monitor battery health live. I use a lightweight digital multimeter to check voltage regularly, catching potential drops early. Keep batteries charged and stored properly—cold storage can reduce capacity, so warm cases are preferable. Regularly inspect cables and connectors for wear, and document battery usage to refine your estimates over time. Noticing patterns in power consumption allows you to improve your setup for future shoots, reducing surprises and keeping your lighting consistent.
By applying these concrete steps, you’ll ensure your LED panels, RGB tube lights, and all other gear stay powered throughout demanding outdoor shoots. Precise planning and real-time management are crucial for professional results, preventing the dreaded dead light and wardrobe disasters. For more insights into optimizing your lighting toolkit, explore how softbox and RGB tube light techniques can complement your power strategy [here](https://lights.creatorrigreviews.com/key-light-techniques-elevate-your-film-atmosphere-at-3-pm) and [here](https://lights.creatorrigreviews.com/fill-light-secrets-achieve-natural-look-in-natural-light-at-6-pm). Keep your creative flow uninterrupted with smart battery management.When it comes to LED panel lights, fill lights, key lights, softboxes, and RGB tube lights, many filmmakers operate under common misconceptions that can hinder their results. One such myth is that brighter always means better. In reality, overexposing your scene with excessive light not only washes out your subject’s skin tone but can also introduce unwanted color spills and flare, especially if you’re relying on inconsistent diffusion. Advanced users understand that mastering light placement and intensity moderation enhances depth and mood, making a scene more cinematic.
Why do so many overlook color accuracy in LED lighting?
Many presume that high brightness equates to quality, but the truth lies in spectral power distribution. A recent study from the Lighting Research Center emphasizes that achieving accurate skin tones relies heavily on the light’s CRI (Color Rendering Index) and TLCI scores. Lower-quality LED panels may seem bright but produce skewed hues or color tinting, leading to post-production headaches. For example, many assume that softboxes provide the softest light, but without proper diffusion or grid placement, you risk harsh shadows or light spill. Effective diffusion techniques are often underestimated; employing materials like grid diffusers or adjusting the angle can significantly improve softness and control. Don’t fall into the trap of uniform setups—each scene demands a tailored approach; what works in one environment might not in another.
How can a shadowless light setup harm your storytelling?
While zero-shadow lighting seems ideal, it can flatten your image, making subjects appear plastic or disconnected from their environment. Controlled shadows add depth, contour, and a sense of realism. Many filmmakers avoid this nuance, resulting in images that look flat despite their technical perfection. To leverage shadows effectively, understand the *inverse square law* and how light falloff enhances spatial relationships. For instance, utilizing a *key light with a honeycomb grid* to control spill, combined with fill and backlights, creates a three-dimensional look—more emotionally engaging and visually striking.
Incorporating these subtle yet impactful lighting techniques elevates your cinematography. For further insights into key light strategies, check out this guide on key light positioning. Similarly, mastering softbox diffusion can be simplified with these softbox tips. Remember, understanding the nuances behind light quality, diffusion, and shadow placement separates good visuals from cinematic masterpieces. Have you ever fallen into this trap? Let me know in the comments.
Keeping Your Tools in Peak Condition
Investing in high-quality equipment like softboxes, RGB tube lights, and LED panels is just the start. To ensure consistent results over time, regular maintenance is essential. For softboxes, cleaning the diffusion fabrics with a gentle vacuum or lint roller prevents dust build-up that can dull light quality. RGB tube lights benefit from periodic calibration—using software tools to check for color drift and brightness consistency helps maintain their vibrancy. LED panels, in particular, require careful inspection of cooling fans and vents; dust accumulation can cause overheating and reduce lifespan. Establishing a routine check every few months keeps your gear performing optimally and extends its usable life.
Tools That Make Maintenance Easier
I highly recommend investing in the Datacolor SpyderX for calibration—it’s a color calibration tool I use regularly to ensure my LED panels and RGB lights render colors accurately. For cleaning, a soft microfiber cloth combined with compressed air helps keep vents and diffusers free of dust. Cable testers are invaluable for inspecting power supplies and connectors—defective wiring can cause flickering or inconsistent color reproduction. Additionally, having spare parts like replacement diffusion gels or cooling fans on hand allows quick fixes during shoots, minimizing downtime. These tools together help uphold the professional quality your projects demand.
What About Long-Term Scaling and Upgrading?
As your projects grow, so will your lighting needs. Modular systems, such as RGB tube lights with customizable lengths and detachable diffusers, make scaling straightforward. Upgrading software firmware on LED panels or RGB lights can introduce new features, improved color fidelity, and better compatibility—always stay updated by subscribing to manufacturer alerts. Planning your equipment purchases with future expansion in mind prevents bottlenecks. For instance, choosing battery systems that support daisy-chaining and hot-swapping allows for rapid extension of runtime without interrupting shoots.
How do I maintain my setup over time?
Develop a routine schedule to clean, calibrate, and inspect your lights and accessories. Regularly review your equipment’s performance—if you notice color shifts or flickering, troubleshoot immediately to prevent further degradation. Keeping detailed records of maintenance sessions and component replacements helps identify recurring issues and plan upgrades proactively. Remember, well-maintained gear not only ensures superior image quality but also reduces costly repairs and replacements down the line. Want to streamline your maintenance? Try establishing a weekly checklist for cleaning and calibration, and you’ll be surprised at how it prolongs your equipment’s lifespan. For advanced calibration techniques, you might find this guide on fixing LED panel tints helpful. Regular upkeep will keep your lighting setup reliable and ready for any shoot, whether it’s a quick outdoor interview or a feature film production.
Lessons the Lighting Industry Won’t Tell You
- One of the hardest lessons I learned was that even top-tier batteries can’t compensate for poor power planning. I once relied on a high-capacity pack, only to find it drained mid-shoot, causing delays and stress. The realization? Always double-check your power sources in advance, especially with the increased draw from modern LED panels.
- My biggest surprise was discovering how much the environment impacts battery performance. Cold weather can reduce capacity dramatically, making a well-planned setup fail unexpectedly. Now, I keep my batteries in insulated cases and always carry extras, ensuring consistent power regardless of conditions.
- Initially, I thought bigger batteries meant longer shoots. Turns out, quality and headroom matter more. Picking batteries with at least 25% extra capacity prevented sudden drops, giving me peace of mind to focus on composition rather than power anxieties.
- Mastering power distribution—like avoiding daisy-chaining multiple lights—transformed my shoots. Using dedicated batteries and inline voltage regulators minimized flickering and color shifts, crucial for maintaining professional quality in challenging outdoor environments.
My Go-To Tools for Reliable Lighting
- Datacolor SpyderX: I trust this calibration tool to keep my LED panels and RGB lights color-accurate. Consistent color fidelity saves time in post-production and ensures my skin tones look natural in every shot.
- Digital Multimeter: Monitoring voltage during shoots lets me catch issues before they impact footage. It’s a simple investment that pays off in pixel-perfect results.
- Spare Diffusion Gels and Cooling Fans: Quick replacements keep my softboxes and panels operating smoothly, especially on the go. They’re small but mighty for maintaining consistent lighting quality.
- Power Banks with AC Inverters: Emergency backup that keeps my lights running when main packs fail, critical during long outdoor shoots where downtime isn’t an option.
Your Next Step to Lighting Confidence
Don’t let power hiccups hold back your creative vision. By implementing smarter battery strategies, choosing the right tools, and maintaining your equipment diligently, you’ll unlock new levels of professionalism and flexibility. Remember, the future of outdoor filmmaking in 2026 hinges on reliable, adaptable lighting setups—so embrace these insights and take control today. Ready to elevate your lighting game? Share your biggest power challenge below—let’s troubleshoot together and keep your shoots shining bright.
![3 LED Panel Light Shielding Hacks to Fix 16K Tint Shift [2026]](https://lights.creatorrigreviews.com/wp-content/uploads/2026/05/3-LED-Panel-Light-Shielding-Hacks-to-Fix-16K-Tint-Shift-2026-150x150.jpeg)


2 responses to “4 LED Panel Light Battery Tactics for 2026 Outdoor Shoots”
This post really hits home; I’ve definitely faced the panic of a dead light right in the middle of outdoor shoots. It’s surprising how much your planning can make or break the entire scene, especially when daylight fading fast. I’ve started using power distribution maps and frequently test my batteries’ real-world runtime before heading out. What I’ve learned is that investing in high-quality, high-capacity batteries with a bit of headroom not only saves stress but actually improves the quality of your shots by maintaining consistent brightness and color. I’m curious, for those working in colder environments, how do you keep your batteries performing at their best? Does anyone have experience with specific insulated cases or portable power stations that don’t add much bulk? Sharing these tips can really streamline outdoor filmmaking and help us all avoid those frustrating moments when lights die just when we need them most.
This article hits the mark—power management for outdoor shoots is often overlooked until it’s too late. I’ve learned the importance of not just having extra batteries but also considering the quality and sharing your experience with how environment affects battery life. Cold weather, for example, can drastically cut battery runtime, which is especially challenging for filmmakers working in winter or mountain areas. I’ve started storing my batteries in insulated cases and using portable power stations with built-in heating packs, which works well without adding much bulk. Have any of you tried these solutions or found other effective techniques to keep batteries warm and reliable in extreme conditions? It’s a game-changer to know your power sources are steady and don’t just die during that critical moment.