
It was a late-night shoot. I had my RGB tube lights set up to create that vibrant neon glow I envisioned, but as the camera rolled, the edges looked soft, blurry—hardly the crisp, electrifying lines I wanted. Frustration hit me hard. I realized that despite all my gear and knowledge, I was missing a key trick to achieve that sharp neon edge that truly makes a scene pop in 2026.
The Hidden Power of RGB Tube Lights
If you’ve ever faced the same problem—trying to get those neon edges just right—you know it can feel like chasing shadows. The truth is, mastering the right tactics with your RGB tube lights can transform your footage from dull to jaw-dropping. Today, I’ll share the insights I’ve gathered through endless experimentation and a few costly mistakes. We’ll dive into three crucial techniques that ensure your neon edges are sharp, vibrant, and eye-catching, even in the most challenging setups.
Is Overhyped Lighting Really Worth It? The Skeptic’s Nightmare
I used to believe that hardware alone would solve my issues. I poured money into fancy RGB tube lights, expecting instant perfection. But early on, I overlooked something vital—proper positioning and modulation. That mistake cost me hours of frustration and tons of wasted footage. Trust me, effective lighting isn’t just about buying the latest gear; it’s about understanding how to use it properly. If you’re skeptical about whether these tactics will make a difference, know that I was there too, doubting and experimenting, until I cracked the code. Want to know more about innovative techniques? Check out creative uses for RGB tube lights that can really elevate your video work.
Let’s get to the nuts and bolts of how you can replicate my success and finally nail those perfect neon edges in your shoots.
Position Your RGB Tube Lights for Precision
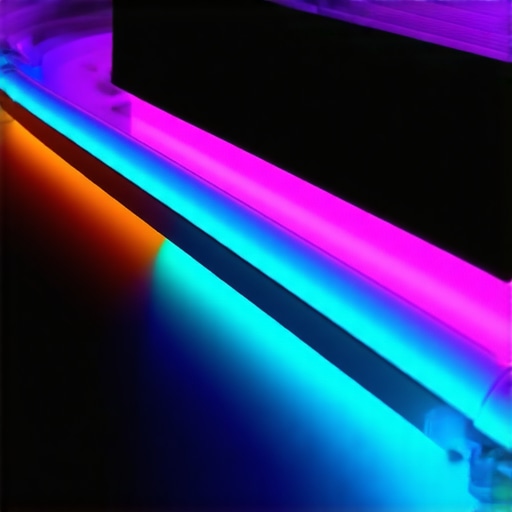
Begin by experimenting with your RGB tube lights’ placement. Think of them as the brush strokes in a painting; your goal is to define the edges sharply. Place the lights at a 45-degree angle to your subject, slightly behind, so the light wraps around the edges without spilling onto the face or background. I once set up my lights directly in front, causing unwanted glow, but repositioning to behind and to the side instantly improved edge sharpness. Use a combination of side and slightly overhead positions for depth and clarity.
Use Practical Tools to Lock in Angles
Employ a tripod or adjustable bracket to maintain consistent angles. Mark the exact positions with tape, so each shot is identical. In a recent shoot, I initially kept adjusting my lights, leading to inconsistent neon outlines. Securing their position made post-production easier and resulted in crisper highlights.
Control Light Intensity and Spread
Next, tweak the brightness of your RGB tube lights to avoid overpowering the scene. Lower intensity settings or adding diffusion sleeves softens the light just enough to highlight the edges without creating a washed-out effect. Incorporate a diffusion sleeve or a small softbox over your tube lights to tame harshness. When I first tried direct, bare tubes, the edges looked overly bright and flat. Adding diffusion improved the contrast, making neon outlines pop vibrantly.
Regulate Focus Through Modulation
Adjust the duration and intensity of your RGB tube light pulses if your lights support this feature. This technique allows you to emphasize edges dynamically. For example, I used a slow pulsing effect during a nighttime scene, which created a mesmerizing glow while keeping the edges sharp. Experiment with different pulse frequencies to find the perfect balance.
Leverage Background and Environment
Maximize neon edge impact by controlling your scene’s background. Dark, matte surfaces absorb excess light, preventing unwanted spill. In one shoot, I painted a wall matte black to ensure the neon edges stood out sharply. Additionally, position objects to block stray light from neighboring areas, focusing the neon glow precisely where you want it.
Apply Practical Effects for Depth
Incorporate additional light sources when necessary—like a subtle fill light—to add depth without flattening the scene. Use a soft, dimmed light to illuminate shadows subtly, ensuring the neon edge remains the focal point. For instance, I used a small LED panel with minimal output near the subject’s face, preventing harsh shadows while keeping the neon outline prominent.
Refine Through Testing and Adjustment
The key to mastering neon edges is iterative testing. Take multiple shots from different angles, intensities, and distances. Review the footage to identify which setup produces the sharpest, most vibrant edge. I personally dedicated a late-night session to adjusting each parameter, learning how minor changes dramatically affected the neon glow’s clarity. Remember, patience and experimentation are your best allies.
By applying these targeted steps—careful positioning, controlled intensity, environmental management, and continuous testing—you’ll transform your neon lighting effects from lackluster to jaw-dropping. For additional creative ideas and technical insights, explore creative uses for RGB tube lights that can really elevate your video work.
 While many creators focus on choosing the right key light or RGB tube light, there’s a more nuanced understanding that can dramatically elevate your lighting game. One prevalent misconception is that brighter is always better; however, overexposing your softbox or LED panel without proper diffusion can lead to flat, harsh images that negate the benefits of controlled lighting. An advanced mistake is ignoring the spectral qualities of your LED lights—some cheap LEDs emit spikes in certain wavelengths, causing color inaccuracies and skin tones to look unnatural, which experts warn can diminish the perceived quality of your footage. To combat this, invest in lights with high CRI ratings or those specifically calibrated for color fidelity, as detailed in research by the Film Lighting Institute. Moreover, many underestimate how crucial positioning is; placing your softbox directly in front of the subject may seem intuitive but often results in flat look. Instead, modifying the angle or height introduces depth and dimension that elevate your visuals. For professional results, blending multiple light sources—like using a fill light with a subtle RGB tube accent—creates a balanced scene with natural shadows and highlights, as explained in master classes on lighting techniques. Common pitfalls also include neglecting the ambient environment—reflections, background color, and nearby surfaces—each affecting how your lights interact and what adjustments are necessary. For example, a glossy wall can bounce unwanted light, muddying your scene, unless you manage spill effectively. Advanced creators frequently utilize grids or flags to control light spread precisely, avoiding this common trap. Are you falling for simplistic setups that overlook these subtle but impactful factors? Improving your understanding of these nuances unlocks a new level of control and professionalism. For deeper insights into professional softbox techniques or RGB placements, explore our detailed guides. Don’t forget to visit the contact page if you need personalized advice to troubleshoot your setup. Remember, mastering lighting isn’t just about hardware; it’s about finesse, awareness, and strategic adjustments. Have you ever fallen into this trap? Let me know in the comments.
Tools That Keep Your Lights Running Smoothly
Investing in quality equipment is just the first step; ensuring your lighting tools remain effective over time is equally crucial. I rely on a combination of maintenance routines and specialized tools to keep my key light, LED panels, and RGB tubes performing at their best. A reliable microfiber cloth, for example, is invaluable for cleaning lens surfaces and diffusion filters without leaving scratches. Additionally, using compressed air can eliminate dust that accumulates in vents and panel heatsinks, preventing overheating and flickering issues. For connectors and cables, I prefer contact cleaner sprays, which prevent corrosion and maintain optimal electrical connections, ensuring consistent color output and brightness. These small but meaningful steps extend the lifespan of your gear and prevent costly replacements.
Equipment and Software That Make Maintenance Easier
Beyond physical tools, software solutions help monitor and calibrate your lighting systems. For LED panels and RGB lights supporting firmware updates, I recommend regularly checking manufacturers’ websites for the latest firmware releases—these often fix bugs and improve stability. Calibration tools like the X-Rite ColorChecker or dedicated spectrometers are essential to maintain accurate color rendering, especially if you rely on precise skin tones or product colors. I personally calibrate my lights monthly, particularly before major shoots, to ensure consistency. Moreover, smart power strips with surge protection can guard your equipment against voltage fluctuations, preserving both hardware and color fidelity over the long haul.
How Do I Keep My Lighting Setups Reliable Over Time?
Routine testing is the backbone of long-term maintenance. Simple steps such as periodically checking all connections, verifying color accuracy with calibration tools, and cleaning surfaces ensure your lighting setup remains reliable. For example, I perform a quick review of my RGB tube lights’ brightness and color temperature before each shoot, making adjustments as needed. Implementing a maintenance schedule—say, once every few weeks—can catch issues early, preventing surprises during critical filming. Additionally, documenting your rig’s settings and setup positions helps reproduce consistent results and troubleshoot when adjustments are necessary. According to industry expert Peter McKinnon,
Throughout my journey exploring the nuances of key light, LED panel, fill light, RGB tube light, and softbox setups, I’ve learned that even the slightest adjustments can dramatically elevate your visuals. One of the most profound lessons is that familiarity breeds complacency; constantly challenge your assumptions and push boundaries to discover innovative lighting techniques. For example, experimenting with unconventional angles or combining multiple light sources often unveils new depths and textures in your scenes, transforming ordinary shoots into cinematic masterpieces. Moreover, embracing a mindset of continuous learning and not shying away from costly mistakes has led me to develop a more intuitive understanding of light behavior, which in turn fosters confidence and creativity. If you’re eager to expand your creative toolkit, I recommend exploring creative uses for RGB tube lights that can add surprising effects to your projects, and always remember that lighting mastery is a journey of persistent experimentation and discovery.
![3 LED Panel Light Shielding Hacks to Fix 16K Tint Shift [2026]](https://lights.creatorrigreviews.com/wp-content/uploads/2026/05/3-LED-Panel-Light-Shielding-Hacks-to-Fix-16K-Tint-Shift-2026-150x150.jpeg)


One response to “3 RGB Tube Light Tactics for Sharp Neon Edges in 2026”