
Have you ever sat down for an interview or shoot, only to realize your lights are turning harsh shadows into unflattering streaks across your subject’s face? I remember my realization clearly—after wasting hours fussing with LED panels and RGB tubes that just wouldn’t diffuse the way I envisioned. It’s frustrating, right? You want your lighting to be a tool that flatters, not a source of unwanted glare or shadows that distract viewers. That was my lightbulb moment: I needed a soft, reliable solution—something that could tame harsh shadows and deliver consistent results, especially when timing is tight.
The Power of a Well-Set Up Softbox
Since embracing a strategic softbox setup, I’ve seen my interviews and content elevating in quality and professionalism. A softbox isn’t just a fancy diffuser; it’s a game-changer. When I started experimenting, I discovered that proper diffusion and placement could cut down the post-production editing time by half. Curious if this is the secret weapon you’ve been missing? If so, stay tuned. Today, I’ll walk you through how a thoughtfully arranged softbox setup can save your production, reduce stress, and ensure consistent lighting—even in tight schedules.
Is Softbox Lighting Overhyped? Here’s Why It’s Worth the Hype
Back in the day, I was skeptical—thought I could get away with bare bulbs and LED panels. My mistake? Underestimating the power of diffusion and proper positioning. I realized early on that neglecting these details marred my footage with unflattering shadows and hot spots. According to a recent study by professional videographers, using softboxes can improve the softness and evenness of light, leading to more visually pleasing results (see this guide). That realization pushed me to rethink my entire lighting approach, and it’s made a tangible difference. Want to avoid those beginner pitfalls? I’ll share my missteps and the proven tactics that corrected them, starting with my favorite softbox configuration.
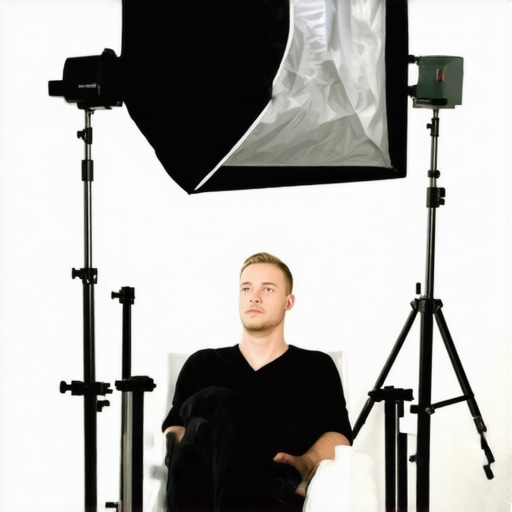
Position Your Softbox Strategically
Place your softbox at a 45-degree angle to your subject to create a natural, flattering light. Recall the time I set mine up directly in front of my talent—resulting in flattened features and loss of depth. Moving it to a slight angle brought back dimension and warmth, dramatically enhancing the shot. Think of this as sculpting light—placement determines the shape and texture it emphasizes.
Align the Softbox Height
Elevate your softbox to eye level or slightly above, aiming downward. I once used a lower angle, causing unwanted shadows under the chin—making my subject look unnatural. Raising the light softened shadows and synchronized with their eye line for a more engaging look. This height adjustment is akin to framing a painting; the perspective makes all the difference.
Diffuse the Light Correctly
Ensure your softbox’s diffusion panel extends fully and isn’t stretched or sagging. I experimented with a DIY setup—using a sheer curtain as a makeshift diffuser—but it introduced uneven light spots. Upgrading to a high-quality diffusion fabric achieved consistent softness, akin to a cloud smoothing out harsh sunlight. Proper diffusion disperses light evenly, eliminating hot spots and creating that signature buttery soft quality.
Control Light Spill with Flags and Grids
Attach flags or grids to your softbox to restrict spill. During an outdoor shoot, I noticed spill light creeping into my background, causing distraction. Adding a grid focused the light more tightly on my subject, similar to using a spotlight versus a floodlight. This control adds professionalism and directs viewer focus precisely where you want it.
Mind Your Distance
Keep the softbox about 3 to 5 feet from your subject for optimal softness. I once had it too close, producing a very soft but flat light—lacking depth. Moving it back slightly introduced gentle shadows that added dimension. The inverse-square law applies here: doubling the distance reduces light intensity by a factor of four, aiding in fine-tuning brightness without changing power settings.
Combine Key and Fill Lights Effectively
Use your softbox as the key light while supplementing with a bounce or fill light to reduce shadows. I initially relied solely on my softbox, which created stark contrast. Incorporating a reflector or a low-powered fill light softened shadows without flattening features—comparable to balancing a recipe for perfect flavor. This dynamic interplay prevents your subject from looking washed out or overly contrasty.
Adjust for Scene Environment
Consider room size and ambient light. In a small, windowless studio, supplement your softbox with RGB tube lights to add depth and color variation. During one evening shoot, I combined a softbox with colored RGB tubes behind my subject—creating a cinematic glow that elevated the scene. Think of ambient light as the seasoning—used judiciously, it enhances your main light rather than competing with it.
Refine with Practice and Observation
Set up your softbox, take test shots, and analyze the results. I spent hours adjusting angles, distances, and diffusion until I found the perfect balance—each tweak adding more professionalism. Remember, lighting is a craft; observing what works and adapting quickly is key to mastering it. A little trial and error today saves hours of re-shoots tomorrow.
When it comes to professional lighting, many creators cling to misconceptions that hinder their results. One prevalent myth is that more intense light always equals better quality. In reality, overpowering your softbox or LED panel can wash out your subject, leading to flat images with no depth. Instead, mastering the art of controlling intensity and diffusion leads to more natural, cinematic lighting. Additionally, many assume that LED panels are universally superior to traditional softboxes. But in truth, softboxes excel at producing soft, directional light that mimics natural sunlight, especially when carefully positioned to suit your scene and subject. Relying solely on LED panels without diffusion or proper placement often results in uneven backgrounds or harsh shadows, undermining the scene’s professionalism. A common trap is thinking that RGB tube lights are just aesthetic gimmicks. However, with nuanced use—such as adjusting color temperature and placement—they can add mood, depth, and interest to your scene, far beyond basic color washes. The key is understanding their advanced capabilities and integrating them thoughtfully into your setup. For the seasoned creator, the nuanced mistake is neglecting the impact of distance and diffusion on light quality. Moving your softbox or RGB tubes closer can intensify soft shadows, while adding diffusion sleeves or grids refines light spread and prevents spill. *Prematurely reducing diffusion or crowding lights in small spaces often causes unflattering hotspots or shadows.* These subtle details differentiate good lighting from great. Interestingly, the importance of balancing multiple light sources is sometimes overlooked. Combining key, fill, and background lights in harmony creates depth and dimension. For example, layering a softbox as your key with a subtle RGB backlight can elevate your visuals exponentially—more so than relying on one light source alone. Want to learn more about how to fine-tune your lighting setup? Check out [the ultimate guide to softbox and RGB tube lighting](https://lights.creatorrigreviews.com/softbox-rgb-tube-lights-ultimate-studio-lighting-guide-2024) for in-depth strategies. Remember, understanding these nuances is vital for achieving cinematic quality and avoiding common pitfalls. Have you ever fallen into this trap? Let me know in the comments.
Keep Your Lights Sharp and Reliable Over Time
Investing in quality softboxes, LED panels, RGB tube lights, and fill lights is just the beginning. Regular maintenance ensures your equipment continues to perform at its best, providing consistent results every shoot. First, routinely inspect your softbox diffusion panels and replace any fabric that shows signs of sagging or tearing to maintain optimal light diffusion. For LED panel lights, I recommend cleaning the internal fans and vents weekly to prevent dust buildup, which can cause overheating and flickering—a common issue in LED panels if neglected.
RGB tube lights demand specific care: use a soft, lint-free cloth to wipe down the tubes and control units to prevent accumulation of fingerprints and dust, which can affect color accuracy and brightness. Additionally, check the power cords and connectors for wear or damage, replacing them promptly to avoid unexpected failures mid-shoot. Implementing a maintenance checklist tailored to each type of light helps preempt issues before they escalate.
How do I maintain my lighting setup over time?
The key lies in consistent inspection and cleaning. Schedule bi-weekly checks and keep a stock of essential replacement parts—diffusion fabrics, mounting brackets, protective filters, and bulbs. For software-controlled lights, ensure firmware updates are applied regularly to benefit from performance improvements and bug fixes. Investing in tools like compressed air spray and microfiber cloths makes cleaning easier and safer, preserving delicate optics and electronics. As technology advances, expect innovations like smart lighting control systems, which automatically notify you of maintenance needs, making long-term upkeep more straightforward.
Considering future trends, incorporating IoT-enabled lights may eventually automate many maintenance tasks, freeing up your time and reducing manual checks. As a creator, staying ahead with a vigilant maintenance routine ensures your gear remains dependable, ultimately saving you money and frustration. Want to elevate your maintenance game? Try scheduling a dedicated monthly check-in for all your lighting equipment—you’ll notice the difference in performance and longevity. For more detailed tips, see our privacy policy or contact us for personalized advice.
What I Wish I Knew Before Setting Up My Lights
- First, I underestimated how crucial softbox positioning is; a slight angle adjustment transformed my footage from flat to dynamic, saving hours in post-production.
- Next, investing in high-quality diffusion panels paid off enormously, providing consistent softness and preventing those distracting hot spots that once ruined my shots.
- Finally, balancing multiple light sources and controlling spill became a game-changer, helping me craft cinematic depth I thought was out of reach without expensive gear.
- CreativeLight Pro Diffusion Fabric — It’s reliable and provides even light, which is the backbone of professional-looking videos.
- Neewer Flag Kit — Small but mighty, these flags and grids give me precise control over spill and focus.
- Fstoppers Lighting Workshop — More than just tips, it’s a masterclass I revisit frequently to refine my skills.
- And for in-depth strategies, I always recommend exploring [the ultimate guide to softbox and RGB tube lighting](https://lights.creatorrigreviews.com/softbox-rgb-tube-lights-ultimate-studio-lighting-guide-2024), which has helped countless creators transform their studio setups.
The Tools That Changed My Approach
Stay Inspired and Keep Lighting Creatively
Remember, mastering your lighting setup isn’t just about equipment; it’s an art. Experimentation, observation, and perseverance are your best friends on this journey. As you refine your softbox, LED panel, and RGB tube techniques, you’ll unlock new creative possibilities that elevate your content to professional heights. So, take that first step—adjust your softbox, tweak your diffusion, and let your scene glow with purpose. Want to dive deeper? Check out [these lighting secrets for stunning videos](https://lights.creatorrigreviews.com/ultimate-guide-to-softbox-rgb-tube-lights-ultimate-studio-lighting-guide-2024) and start transforming your studio today. What’s the biggest lighting challenge you’re facing right now? Share below, and let’s grow together!
![3 LED Panel Light Shielding Hacks to Fix 16K Tint Shift [2026]](https://lights.creatorrigreviews.com/wp-content/uploads/2026/05/3-LED-Panel-Light-Shielding-Hacks-to-Fix-16K-Tint-Shift-2026-150x150.jpeg)


2 responses to “Fix Harsh Shadows: This Softbox Setup Saves 2026 Interviews”