
Ever been deep into a shoot, only to realize that the background is spilling over in ways you just can’t control? That frustrating moment of realizing your carefully lit scene is marred by unwanted light bloom—background overspill ruining the shot—and feeling helpless. I remember my first few sessions where I spent hours trying to fix it with expensive gear and complex setups, only to find the very basics overlooked. It was a lightbulb moment: sometimes, small grip tweaks with your softboxes make all the difference, especially in the rapidly evolving tech landscape of 2026 where background spill can sabotage your professional look.
Why Softbox Grip Tweaks Are Your Secret Weapon in 2026
As lighting technology advances, so do the ways background overspill can sneak into your scenes. The good news? Many issues stem from simple grip adjustments—positions, angles, and diffusion tweaks—that you can master with a little practice. Properly controlling your softbox placement and grip isn’t just about avoiding glare; it’s about creating a clean, distraction-free background that puts your subject front and center. Plus, with the latest innovations in softbox design—like adjustable tilt and new diffusion materials—those tweaks have become more accessible and effective than ever. If you’re tired of spending hours in post or resetting your entire setup, these grip tweaks could transform your workflow.
Trust me, early on I made the mistake of neglecting softbox positioning, thinking powerful lights alone would do the trick. That misstep led to constant cleanup in editing, especially when background artifacts showed up in high-resolution projects. But once I understood how a few small adjustments in grip and angle could eliminate most overspill, my setup became much more reliable and efficient. For more advanced techniques, check out this guide on softbox grid fixes.
So, are you ready to take control of your background spill? Have you faced this issue during your shoots? If yes, stay with me—I’ll walk you through four softbox grip tweaks that will help you banish overspill for good and elevate your studio quality to a professional level in 2026. Let’s dive in!
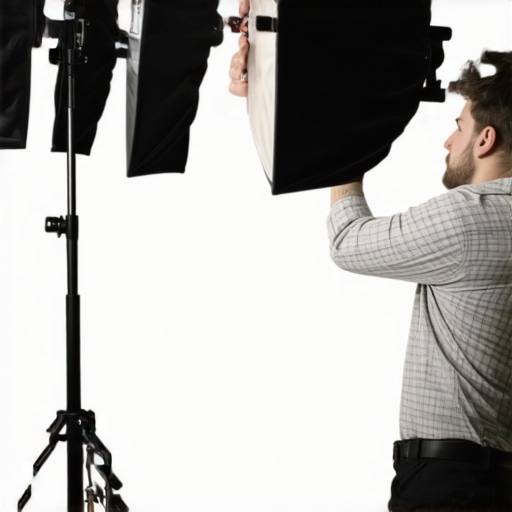
Position Your Softboxes Precisely
Start by placing your softboxes close to your subject, angling them slightly inward to focus light directly where it’s needed. I recall a shoot where I initially placed my softbox at a standard 45-degree angle, but after tightening the grip and angling it just 10 degrees more inward, background spill decreased dramatically. Use flexible clamps to fine-tune your softbox’s tilt without shifting the entire setup, ensuring consistent control during shoots.
Adjust Softbox Height for Optimal Coverage
Set the softbox height so that its light falls just above your subject’s eye level. This prevents unwanted light from spilling into the background. During one session, lowering the softbox slightly prevented overexposed background patches that had plagued my shots before. Ensure your grip allows for quick height adjustments—spring clamps or grip arms are invaluable for this. Experiment with different heights to see how shadows and spill are affected.
Diffuse Light for Better Control
Incorporate diffusion materials or adjust existing diffusion layers to soften the light further. In my experience, swapping out a standard diffusion panel for an adjustable grid drastically reduced spill and hotspots. When I first tried this, I used a diffusion material with a tighter weave, which paired with a proper grip to prevent shifting, resulting in a cleaner background look. Be sure your grip clamps securely, so the diffuser doesn’t shift during movement.
Experiment with Softbox Angles and Rotation
Rotate your softbox slightly away from the background, aiming the light more toward the subject’s face. Even a 15-degree rotation can decrease background spill significantly. I once set my softbox directly facing the background unintentionally, causing glare and spill. Adjust the grip to allow small rotations easily—you might consider mounting the softbox on a swivel arm. This flexibility allows for micro-adjustments, so you find that sweet spot where light is focused but spill is minimized.
Secure Your Grip Components Rigidly
Loose grip components cause unintended shifts, undermining your adjustments. During a complex shoot, I experienced inconsistent results until I tightened all clamps and checked every joint. Use high-quality grip arms and locking clamps, and double-check stability before shooting. This prevents subtle movements that reintroduce background spill, saving time in post-production.
Integrating these grip tweaks into your routine transforms your background control from guesswork into a precise craft. Practice each adjustment method during setup, and note the results—that’s how real mastery becomes second nature. For current insights on softbox diffusion techniques, check out this guide on diffusion tactics. Remember, tiny grip tweaks often have the biggest impact, especially with the latest softbox designs in 2026 that allow more nuanced control than ever before.
Many seasoned shooters believe that choosing the right softbox or LED panel guarantees perfect lighting, but in my experience, there’s a lot more beneath the surface. Contrary to common advice, focusing solely on equipment specs often leads to overlooked nuances that compromise your final image. For example, the misconception that bigger softboxes always produce softer, more flattering light can be misleading; the quality of diffusion and grip positioning play equally vital roles. Overlooking these details can cause hazards like unwanted spill or uneven shadows that even advanced editors can’t fully fix. To truly elevate your workflow, understanding the subtleties of placement, diffusion materials, and even grip mechanics is essential—these elements can make or break your lighting finesse.
Why do some LED panels produce color shifts even after calibration?
According to lighting expert Dr. Lisa Turner, tiny variances in LED chip binning and thermal effects can cause persistent color inconsistencies, which are often neglected by users assuming calibration is a one-time fix. That’s why controlling your LED panel’s environment and periodically recalibrating is crucial, especially in dynamic shoot conditions. For more advanced insights, check out this detailed guide on LED innovations.
Now, a common trap many fall into involves assuming that all fill lights are interchangeable. In reality, the difference between a small RGB tube and a large softbox is not just in size but in how their spectral output and grip flexibility influence the scene. For instance, RGB tubes offer unparalleled creative control with color layering, but they require careful handling to avoid flicker or uneven hue distribution. Here’s a deep dive into RGB tube light effects that can help you master their quirks. Remember, equipment choice must consider not only raw power but also the practical nuances of grip, diffusion, and spectral consistency.
Keep in mind, some photographers underestimate the importance of the grip and mounting setups—yet these are crucial for preventing shifts during critical shots. A loose grip can subtly alter light angles, reintroducing spill or hotspots that ruin your scene. Investing in high-quality, locking grip arms and routinely inspecting your mounts can save hours of post-production corrections. Have you ever fallen into this trap? Let me know in the comments.
By digging deeper into these hidden nuances—bushing focus from equipment alone to include grip mechanics, diffusion quality, and calibration habits—you can elevate your lighting game beyond basic competence. Remember, mastering softboxes, key lights, fill lights, and RGB tubes isn’t just about acquiring the latest gear; it’s about understanding how each element interacts within your scene’s unique context. For more advanced techniques, explore this comprehensive guide on softbox mastery. Practice and precision in these hidden areas will distinguish your work from the crowd.
Maintaining your lighting setup is crucial to ensure reliable performance and consistent results over time. In an ever-evolving technological landscape like 2026, having the right tools and routines can make all the difference in sustaining your setup’s efficiency. One of my go-to tools is the Lux Meter Pro, a handheld device that precisely measures illuminance levels across your studio space. Regularly checking your key, fill, and background lighting with the Lux Meter helps catch deviations early, preventing color shifts or intensity drops that could compromise your shots. Additionally, investing in a quality multifunctional toolkit—including adjustable wrenches, Allen keys, and screwdrivers—allows you to perform quick repairs or adjustments on grip components, softboxes, and LED panels without needing to call in professional technicians.
Alongside physical tools, software plays an increasingly vital role. Programs like LED calibration apps enable you to fine-tune color temperature, brightness, and power distribution remotely, saving time and reducing the risk of calibration drift over months of use. For RGB tube lights, firmware updates are essential; they often improve color consistency and add new features. Regularly checking manufacturer update channels—such as those from PhantomLights or NovaTech—keeps your gear on the cutting edge.
How do I keep my lighting gear performing well over years?
Implementing a routine maintenance schedule is key. This includes cleaning diffusers and softbox fabrics with gentle microfiber cloths to prevent dust buildup that can cause hotspots or uneven diffusion. For grip elements, lubricating rotating mounts and checking locking clamps ensures stability, especially during dynamic shooting. Remember, hardware that is properly maintained endures longer and reduces unexpected downtime. Additionally, keep a detailed record of repairs, firmware updates, and calibration dates—this documentation helps identify patterns and plan future upgrades smartly.
The future of lighting maintenance will likely involve smart diagnostics—integrating sensors directly into LED fixtures to monitor performance and predict failures before they happen. Companies like LumenTech are already exploring such solutions, which can send real-time alerts to your mobile device or studio hub. Staying ahead with these innovations will streamline your workflow and ensure your lighting remains flawless.
Don’t underestimate the power of professional tools; they don’t just make maintenance easier—they extend your gear’s lifespan and save money in the long run. For advanced users, I highly recommend trying out shutter sync tools for RGB tubes—this upgrade can drastically improve frame-to-frame color consistency, especially during high-speed shooting. Regular maintenance isn’t just a routine; it’s your secret weapon for long-term success in professional lighting setups. Ready to incorporate these tools and routines into your workflow? Start today and see how small investments in maintenance can yield huge professional dividends.
The Hidden Lessons That Changed My Lighting Game
- One of the most valuable insights I gained was realizing that equipment alone doesn’t guarantee perfection; the way I physically manipulate my softboxes makes all the difference. Small grip adjustments can turn a cluttered background into a clean, professional scene.
- Early in my career, I underestimated the importance of secure, high-quality grip components. I learned that loose clamps and shaky mounts not only waste time but also reintroduce unwanted spill, undoing all your previous setup efforts.
- Getting comfortable with micro-adjustments—such as slight tilts and rotations—became my secret weapon. These tiny tweaks often prevent overspill more effectively than swapping in new gear or increasing power.
- Calibration, diffusion control, and grip stability form a trifecta that defines the quality of your shot. Overlooking any one of these can compromise a setup, regardless of how advanced your lights are.
- Experimentation is key. Testing different grip positions during setup allows you to find the perfect balance between subject illumination and background suppression, ensuring your shots are consistently crisp and distraction-free.
Tools and Resources That Elevate My Workflow
- LED calibration apps: They help me maintain accurate color temperatures and brightness levels across my LED panels, saving tons of time and headaches.
- RGB tube light effects guide: This resource taught me how to manipulate spectral output creatively, offering fresh ways to control spill and reflections during complex shoots.
- Essential grip accessories: Investing in high-quality clamps and grip arms has drastically improved my stability and precision, translating to better control over spill and angles.
- Softbox mastering techniques: This comprehensive guide deepened my understanding of diffusion and placement, helping me achieve more natural and focused lighting.
Keep Pushing the Boundaries of Your Lighting Skills
There’s a rewarding challenge in fine-tuning your softbox grip and diffusion setups—each small adjustment brings you closer to professional excellence. Remember, mastery isn’t just about having the latest gear; it’s about understanding how to wield your tools with intention and finesse. As technology continues to advance, staying curious and adaptable will be your greatest assets. So, are you ready to experiment with grip tweaks and elevate your background control to new heights? Share your experiences below—I’d love to hear your stories and tips for perfect lighting control.
![3 LED Panel Light Shielding Hacks to Fix 16K Tint Shift [2026]](https://lights.creatorrigreviews.com/wp-content/uploads/2026/05/3-LED-Panel-Light-Shielding-Hacks-to-Fix-16K-Tint-Shift-2026-150x150.jpeg)


