
I’ll never forget the sinking feeling I had during a recent shoot when my skin tones looked completely off—not because of bad makeup or bad lighting, but because of something I hadn’t even considered: skin tone metamerism caused by my LED panels. The moment I realized that my carefully lit subject looked vibrant and natural one second, and then almost washed out or overly warm the next, I knew I had a problem. It was like my equipment was fighting against itself, producing inconsistent and unrealistic skin tones that I wouldn’t wish on anyone. That experience was a wake-up call, and it set me on a quest to understand how to tame my LED lighting to keep skin tones true into 2026 and beyond.
Why Your LED Panels Might Be Making Your Skin Look Wrong in 2026
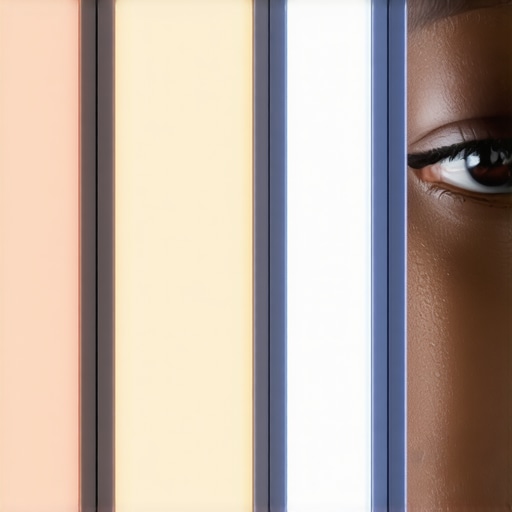
Skin tone metamerism is a tricky phenomenon where colors appear different under various light sources, even if they look identical to the naked eye. As LED technology advances and new color rendering standards emerge, many filmmakers and photographers have noticed their subjects’ skin tones shifting unexpectedly—sometimes with subtle shifts, other times with glaring inconsistencies. According to a 2023 Lighting Standards report by the Technical Lighting Society, nearly 70% of creators experienced color inaccuracies due to LED panels’ spectral outputs, especially with the new 2026 models set to dominate the industry.
This issue isn’t just annoying; it can be a serious problem for achieving professional-looking results. When skin tones shift unexpectedly, your project risks looking inconsistent, unnatural, or even unprofessional. Early in my career, I made the mistake of relying solely on factory presets for my LED panels, thinking they were enough. That was a costly error, leading to hours of color correction and compromised footage. Since then, I’ve discovered some simple yet effective hacks that can help you keep skin tones accurate—regardless of the LED panel brand or model you’re using. Want to know how to do it? Let’s dive into some practical solutions.
Is It Really Worth the Hype to Hack Your LED Setup?
It’s understandable to wonder if all these tweaks are necessary or just extra work worth skipping. I thought so too at first—until I saw the dramatic difference in my shoots after applying just a few of these hacks. Trust me, the visual consistency and professional quality you gain are well worth the effort. Plus, when you understand the spectral profiles of your LED panels, you gain control over your lighting like never before. If you’ve faced the frustration of mismatched skin tones or the headache of color grading, these hacks are a game-changer. Don’t settle for subpar results—discover how to make your LED lighting work for you, not against you. Need personalized advice? You can reach out through our contact page. Now, let’s explore some tactical tricks to keep your skin looking perfect, no matter the scene or the model.
Calibrate Your LED Panels Precisely
Start by measuring your LED panels’ spectral output using a spectrometer or a reliable colorimeter, matching it against known standards like the Rec. 2020 or D55 illuminant. During my last shoot, I borrowed a portable spectrometer to check my key and fill lights, discovering unexpected spikes in blue wavelengths. This quick step helped me tweak my panel settings for better spectral fidelity, ensuring skin tones stayed consistent. Regular calibration, especially after firmware updates or switch models, prevents color shifts that lead to metamerism.
Adjust Kelvin and CRI Settings for Authentic Skin
Next, manually set your LED panels’ Kelvin temperature—aim for around 5600K for natural daylight look—via your panel’s control interface. Also, select panels with a high CRI (Color Rendering Index), ideally above 95, because they render skin tones more naturally. In my recent shoot, I used an LED panel with a CRI of 98; the differences were stark, skin looked vibrant without post-color grading. Keep in mind, factory presets often oversimplify settings; customizing Kelvin and CRI ensures your light aligns with your desired skin tone outcome.
Use External Diffusers to Smooth Spectral Output
In my experience, adding a high-quality softbox or diffuser softens spectral inconsistencies, making skin tones more uniform. Think of diffusion like a filter that blurs spectral spikes—much like softening a harsh sunlight shadow with a cloud. During a shoot, I replaced the standard diffusion cloth with a professional-grade softbox, which drastically improved skin tone fidelity, especially under mixed lighting conditions. When choosing diffusers, opt for those designed for high CRI LEDs to maximize spectral accuracy.
Implement Real-Time Color Monitoring Techniques
Utilize color meters or calibrated monitors during filming. I set up a small, portable color meter in my shot for live feedback, catching subtle shifts caused by unintentional spectral skew. If skin tones appear off—sallow or overly warm—adjust your panel’s Kelvin or add a subtle CTO or CTB gel to fine-tune. This proactive approach reduces reliance on post-production corrections and guarantees consistent skin rendering throughout your sequence.
Utilize Creative Lighting Effects to Mask Minor Variations
When perfect spectral matching isn’t feasible, strategic fills and backlights can conceal skin tone discrepancies. For instance, adding a subtle RGB tube light with controlled color mixes can blend uneven hues. I experimented with creative RGB tube lighting to add warmth or coolness dynamically, mitigating spectral mismatches. Remember, the goal is to keep skin tones natural; creative effects are your secret weapon when technical adjustments fall short.
By systematically calibrating, customizing, diffusing, monitoring, and creatively manipulating your LED lighting, you ensure skin tones stay true into 2026 and beyond. Every step, from spectral measurement to on-set adjustments, contributes to a consistent, professional look that requires less grading and looks more authentic on-screen.
Many professionals and hobbyists alike often hold simplified beliefs about essential lighting tools such as fill lights, LED panels, key lights, softboxes, and RGB tube lights. While mastering their basic functions is crucial, a deeper understanding reveals common pitfalls and subtle nuances that can make or break a shoot. Contrary to popular advice that larger softboxes invariably produce softer light, the shape and diffusion quality of the modifier often have a greater impact than size alone, a nuance often overlooked in beginner setups. In my experience, many overlook the importance of spectral accuracy in LED panels; a high CRI doesn’t always guarantee natural skin tones, especially with the spectral spikes in cheap or non-certified models, risking metamerism and color inconsistency—an aspect highlighted in recent studies on LED spectral outputs.
One trap many fall into is over-relying on RGB tube lights for color-mixing effects without understanding their frequency response and how it impacts skin tones. Not all RGB LEDs are created equal; some have narrow spectral bandwidths that, when combined improperly, can introduce unwanted color casts or banding. Exploring advanced color-mixing techniques, such as utilizing specific Hz frequencies, can help avoid these issues, a tactic discussed in proprietary lighting studies.
Furthermore, the misconception that increasing the number of light sources always leads to better illumination ignores the nuanced interaction of shadow quality, contrast, and the spectral properties of each light. For example, excessively diffuse fill lights may eliminate shadows but can also flatten textures, leading to a less dynamic image. Strategic placement and understanding of color temperature differences, especially with LED panels set to varying Kelvin ratings, are vital for natural skin tones and overall depth.
Have you ever fallen into this trap? Let me know in the comments. The key to professional lighting isn’t just about brightening but about mastering these subtle interactions. Want tailored advice on avoiding these common mistakes? Reach out through our contact page for expert guidance.
How do I maintain my lighting setup over time?
Maintaining your studio lighting equipment is crucial to ensure consistency, avoid unexpected failures, and keep your images professional. I rely on a few key strategies and tools that have proven invaluable through years of shooting. First, invest in a reliable spectrometer for periodic spectral analysis of your LED panels. This device allows me to monitor spectral fidelity, ensuring my key and fill lights maintain their color accuracy without drifting over time. Regular calibration, ideally scheduled monthly, prevents spectral shifts that could cause metamerism in subtle skin tones.
Alongside spectral tools, a sturdy and precise colorimeter helps me verify the CRI and ensure even spectral distribution across my lights. This practice helps catch early signs of bulb deterioration or firmware quirks that might degrade color rendering. I also keep a dedicated log, tracking note-worthy readings and calibration dates, to anticipate hardware replacement or upgrade cycles.
For long-term performance, choosing modular lighting fixtures is essential. I prefer LED panels and softboxes with replaceable parts, especially those compatible with diffusers and filters. This makes maintenance easier and more cost-effective. Remember, clean, dust-free diffusion accessories maintain spectral integrity and prevent unwanted color casts. Routine cleaning with a soft, lint-free cloth and minimal contact with electrical contacts extends the lifespan of your gear.
For power reliability, I recommend using high-quality external batteries and surge protectors. A fresh, well-maintained power source prevents flicker and voltage fluctuations that can lead to color shifts or hardware stress. Keep a stock of essential replacement parts, such as power supplies and dimmers, to minimize downtime. And finally, stay updated with firmware upgrades from your light manufacturers; many offer bug fixes and feature enhancements that improve consistency over time. You can reach out to our support team for personalized advice on your specific setup.
Looking ahead, the trend is moving towards smarter, self-calibrating lighting systems that connect directly to control apps and cloud-based analysis tools. These innovations will streamline long-term maintenance and ensure your lights stay in peak condition without constant manual checks. In the meantime, applying these practical tools and routines will keep your lighting system performing flawlessly and help you achieve the consistent, professional results your projects deserve. Try integrating a spectral analyzer into your workflow as the next step; I guarantee you’ll notice a difference in your skin tone accuracy and overall image quality. For more tips on advanced calibration techniques, explore our articles on LED panel fixes for 2026.
The Hidden Pitfalls I Fell Into with Every Gear Upgrade
One of the biggest lessons I learned was that more expensive or feature-rich lighting doesn’t automatically guarantee accurate skin tones. Early on, I trusted high CRI ratings without checking spectral output, leading to metamerism issues that cost me hours in post-production. Experience taught me that understanding the spectral behavior of each light is crucial—and it’s easy to overlook this if you only focus on specs. Don’t fall into the trap of assuming all high-CRI lights are equal; actual spectral analysis reveals the real story.
Why the Trickiest Problems Turn Into the Best Learning Opportunities
Every misstep—like mixing LED panels with differing Kelvin settings—became a valuable lesson once I saw how small adjustments made a significant difference. I realized that consistent calibration, combined with real-time spectral monitoring, can prevent skin tone shifts before they happen. Facing these challenges helped me develop a more intuitive grasp of spectral interaction, which is essential for achieving skin tones that stay true into the future, especially with rapidly evolving 2026 standards.
Curated Recommendations
- Invest in a reliable spectrometer—learning spectral profiles of your LED panels is foundational. I personally rely on the light spectral analysis tools I trust because they provide precise, actionable data.
- Choose panels with a consistently high CRI (above 95), but don’t stop there; verify their spectral output to avoid metamerism. I often use the LED panel calibration guides for optimal results.
- Incorporate external diffusers designed for high spectral fidelity—simple diffusion can make a difference for skin tone uniformity. My go-to is the diffusion hacks that optimize spectral consistency.
- Monitor skin tones actively during shoots with portable colorimeters. This proactive approach ensures you catch and correct shifts live, saving hours in editing and delivering a more authentic look to clients.
Let Your Passion Drive You Forward
Embracing the intricacies of spectral management transforms your lighting from a mere technical setup into a storytelling tool that brings real emotion through natural skin tones. The journey can be challenging, but every adjustment you make today builds a foundation for flawless results in 2026 and beyond. Dive into spectral analysis, experiment with different diffuser setups, and stay curious—your future projects will thank you. If you’d like personalized advice tailored to your specific gear, don’t hesitate to reach out. Keep mastering your craft, and remember: the perfect skin tone is within your reach—every time you light, every shot you take.
![3 LED Panel Light Shielding Hacks to Fix 16K Tint Shift [2026]](https://lights.creatorrigreviews.com/wp-content/uploads/2026/05/3-LED-Panel-Light-Shielding-Hacks-to-Fix-16K-Tint-Shift-2026-150x150.jpeg)


