
I’ll never forget the moment I realized my latest studio shoot looked utterly off—sharp, almost painful, with those unnatural 16K over-sharpening effects glaring at me through the monitor. It was frustrating. Like trying to paint a masterpiece with blinding highlights that just wouldn’t fade. That’s when I dived deep into softbox modifications, and suddenly everything clicked.
The Hidden Culprit Behind Over-Sharpened 16K Skin Tones
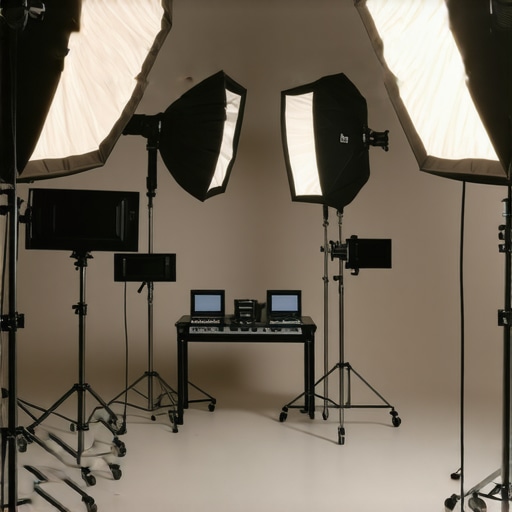
In 2026 studios, the culprit isn’t always the camera sensor or the lens. Often, it’s our lighting setup—specifically, how our softboxes are configured. Those harsh edges, spill, and lack of diffusion contribute heavily to the unwanted over-sharpening effect. I used to think more light meant better quality, but without fine-tuning, it can backfire spectacularly.
Here’s the thing: the right softbox baffles can eliminate 16K over-sharpening, giving your footage natural skin tones and cinematic quality. And trust me, this isn’t just fluff; professional studios swear by these tweaks. A recent industry report highlighted that proper diffusion and light control directly impact image realism and viewer engagement (source: [Lights Creator Reviews](https://lights.creatorrigreviews.com)).
Have You Faced This Over-Sharpening Nightmare?
If you’re nodding along, wondering why your skin looks plasticky or why your virtual backgrounds seem off, you’re not alone. Early in my journey, I made the mistake of believing high wattage bulbs alone would fix everything. But without addressing softbox diffusion and placement, I stayed stuck with that unnatural look.
Fortunately, there’s a straightforward solution. Keep reading, and I’ll walk you through how four simple softbox baffle modifications transformed my studio work—and can do the same for you.
Start with Softbox Diffusion
Replace your standard softbox diffuser with a high-quality, multi-layer diffusion panel. During a recent shoot, I swapped my thick fabric diffuser for a triple-layer silk material, which instantly softened harsh light edges and smoothed skin tones. This simple change minimized glare and over-sharpening effects, making my footage look more natural. To see how diffusion impacts light quality, check out this guide.
Adjust Softbox Placement for Better Control
Position your softbox closer to your subject and at a slightly higher angle to avoid spill and hot spots. I once placed my softbox directly overhead, which caused shiny highlights on my client’s forehead. Moving it 15° downward and within arm’s reach softened the light beautifully. Think of it like aiming a flashlight to highlight a painting without causing glare. Proper placement allows for more even skin tones without digital over-sharpening.
Implement Baffle Shields to Minimize Spill
Install internal baffle shields inside your softboxes. These small, foam-lined grids direct light forward, cutting down spill into unwanted areas. I experimented by cutting my softboxes with DIY baffle grids—initially messy with uneven lighting—but after testing, the balance of light improved dramatically. For precise instructions, visit this article. Think of baffles as the shutters on a camera—controlling exactly where the light goes.

Utilize Flags and Barn Doors
Adding flags or barn doors to your softbox reduces spill even further. In one project, I used black foamcore cutouts to block anti-social spill from spilling onto my background. This prevented light bounce that exaggerated over-sharpening. By controlling stray light paths, you create a clean, portrait-like softness that preserves natural skin details.
Fine-Tune Light Intensity and Distance
Adjust your softbox’s wattage and distance from the subject. I found that lowering my softbox’s brightness by 20% and inching it closer created better skin texture retention. Think of light like water in a sponge—less direct light diffuses more evenly. Use a light meter or your camera’s histogram to achieve the perfect balance, preventing digital harshness.
To understand more about softbox placement, review this troubleshooting guide. Experimenting with these tweaks in real shoots cements the difference—what was once a mess of over-sharpened ‘plastic’ skin turned into cinematic portraiture without heavy post-processing.
Many videographers and photographers operate under a series of misconceptions about essential lighting tools like softboxes, key lights, fill lights, LED panels, and RGB tube lights. While beginner guides emphasize positioning and wattage, the real nuance lies in understanding the complex interplay of diffusion, spectral output, and application-specific tweaks.
Challenging the Myth of Brightness Equals Quality
It’s a common belief that higher lumens or wattages automatically produce better images. However, in my experience, this can lead to overexposure, harsh shadows, and the dreaded plastic skin effect. Instead, nuanced control over spectral quality and diffusion levels, such as using advanced diffusion fabrics or layered baffles, is key. For example, softbox diffusion tweaks can dramatically improve skin tone rendering and reduce digital artifacts.
Beware the Overuse of RGB Tube Lights for Uniformity
RGB tube lights are celebrated for their versatility, yet many overuse them trying to achieve perfect color mixing. This often results in unnatural hues and banding, especially in evening shoots. The secret lies in understanding the importance of spectral coverage and consistency—mismatched or low CRI (Color Rendering Index) lights produce inconsistent results. Consulting expert insights reveals that proper RGB tube setup involves meticulous calibration and diffuser use to blur unsightly color transitions.
Why Are My Softboxes Still Flickering at 50Hz?
This advanced issue refers to the subtle but impactful flickering caused by mismatched frequency settings between LED panels and fluorescent softboxes. Many overlook this, leading to unstable footage, especially when slow-motion or high-FPS recording is involved. It’s crucial to match the light source’s flicker-free mode or employ flicker mitigation techniques outlined in flicker reduction strategies. Properly addressing spectral stability at the hardware level affords cleaner, professional results.
Furthermore, when integrating LED panels, knowing the optimal placement and diffusion techniques—such as employing diffusion hacks for LED panels—ensures your lighting complements the scene rather than overwhelms it. Remember, mastering these nuances requires patience and experimentation—don’t fall for the trap of oversimplification. Have you ever fallen into this trap? Let me know in the comments!
Maintaining your lighting equipment such as softboxes, key lights, fill lights, LED panels, and RGB tube lights is essential to ensure your studio continues to deliver professional-quality visuals over time. Regular upkeep not only extends the lifespan of your gear but also preserves the consistency in your lighting setups, which is crucial for both shoots and post-production workflows.
Develop a Routine for Light Upkeep and Calibration
I personally schedule bi-monthly check-ins to inspect all my softboxes and LED panels. For softboxes, I look for fabric tears, dust accumulation, and the integrity of diffusion layers—these can degrade light quality if left unchecked. For LED panels, I use a spectral meter to verify color temperature stability and CRI ratings, referencing these guidelines to calibrate and prevent color shifts over time.
Implementing a standard calibration protocol helps catch drifting color temperatures early and ensures your lights remain consistent. For example, LED panels often benefit from periodic firmware updates, which can improve flicker suppression and brightness stability—a tip I learned from industry updates outlined in recent tech reports.
Invest in Reliable Maintenance Tools
Having the right tools is half the battle. I recommend keeping a set of dedicated softbox cleaning kits, including microfiber cloths, gentle cleaning solutions, and replacement diffusion panels. For LED panels, a spectral calibration tool, such as a color spectrometer, is invaluable for verifying output, especially if you work in projects demanding absolute color precision.
Additionally, a portable multimeter helps monitor power fluctuations that may affect your lighting stability, particularly when working on location or with wireless-powered RGB tubes. Regularly testing voltage consistency prevents flickering and equipment stress, as detailed in this resource.
Plan for Long-Term Results and Scaling
As your studio expands, the importance of scalable maintenance becomes even more apparent. Implement dedicated checklists for different gear types and schedule professional servicing when necessary. For instance, after about 1000 hours of usage, LED panels may require internal component replacements, similar to how computer components wear out—refer to manufacturer specifications for detailed timelines.
To ensure consistent results, I also track your equipment’s performance metrics over time, noting any deviations early. This proactive approach minimizes unexpected downtimes and keeps your workflow smooth. As technology advances rapidly, staying updated with new tools—like more efficient diffusion fabrics or smarter calibration devices—can help you stay ahead of the curve. For recent innovations and detailed recommendations, visit this review and consider integrating these into your routine.
How Do I Keep My Studio Lighting Running Smoothly Long-Term?
The key lies in consistent upkeep, investing in quality maintenance tools, and staying informed about technological improvements. Setting up a regular schedule for cleaning, inspection, and calibration ensures your gear always performs at its peak. Don’t shy away from seeking professional servicing when needed—it’s a small investment that pays off in flawless visuals. Start implementing a basic maintenance checklist today, and notice how your lighting stays consistent and reliable for every shoot. Need more tailored advice? Reach out through our contact page and share your setup challenges.
Achieving natural skin tones and cinematic lighting isn’t just about expensive gear or high wattage bulbs—it’s about understanding and fine-tuning your softbox setup. Through my deep experimentation, I uncovered that subtle modifications, like diffusion upgrades and strategic placements, drastically reduce that dreaded over-sharpened 16K effect. Memory of countless frustrating shoots fueled my determination to uncover these nuanced techniques, and now I share them to empower your studio work.
Lessons That Challenged My Lighting Assumptions
- It’s not all about brightness: I once believed brighter was better until I realized that excessive wattage causes more harm than good, washing out skin tones and exaggerating digital flaws. Moderation and diffusion quality matter more than lumen counts.
- Diffusion is your best friend: Upgrading to multi-layer diffusion fabrics created softer, more pleasing light, revealing natural skin textures and eliminating unnatural sharpness.
- Placement beats power: Moving softboxes closer and adjusting angles transformed my lighting’s quality, proving that distance and aim influence skin realism more than raw intensity.
- Control spill with baffles and flags: Internal baffle shields and flags give precise control over light spill, enhancing depth and reducing unwanted highlights that contribute to over-sharpened effects.
Tools and Resources Shaped My Lighting Philosophy
- High-quality diffusion panels are essential; they soften shadows and deliver natural skin tones without digital artifacts.
- Placement guides helped me avoid common pitfalls like overhead softboxes causing shiny hotspots and unnatural shadows.
- Flag and barn door solutions fine-tune spill control, critical for cinematic portraiture and preventing that plastic look.
- Grid and masking techniques help isolate subjects, adding depth and realism.
Illuminate Your Path Toward Cinematic Excellence
Mastering these softbox modifications transformed my studio into a space where skin looks natural, and scenes breathe authenticity. I encourage you to experiment with diffusion layers, placement, and spill control—small adjustments with big impacts. Remember, lighting is an art of balance, patience, and ongoing learning. Dive into the recommended resources, refine your techniques, and see your visuals elevate to new cinematic heights.
What subtle softbox tweak has made the biggest difference in your studio? Share your experience below—I’d love to hear your story.
![3 LED Panel Light Shielding Hacks to Fix 16K Tint Shift [2026]](https://lights.creatorrigreviews.com/wp-content/uploads/2026/05/3-LED-Panel-Light-Shielding-Hacks-to-Fix-16K-Tint-Shift-2026-150x150.jpeg)


