
Have you ever been frustrated while filming yourself, only to notice those unforgiving nose shadows that seem to cling onto your face no matter what you do? I remember my own lightbulb moment during a live stream—my camera angles, my key light placement, everything seemed perfect, yet that pesky shadow persisted. It was a clear sign that I was missing a crucial piece of the puzzle.
Why Harsh Nose Shadows Can Ruin Your Video Quality
These shadows aren’t just aesthetic nuisances; they can significantly diminish your video’s professional feel and distract viewers from your message. In fact, research shows that well-lit faces foster trust and engagement—something we all want in our content. Yet, many of us overlook how the placement and type of our lights influence shadows, especially on the nose—a central facial feature.
The good news? There are straightforward, reliable tactics to tame those shadows without investing in expensive equipment or complex setups. Over the years, I’ve experimented with various lighting arrangements, and I’ve found three key tactics that make a real difference—tactics that you can implement today, in any budget.
Is Overlighting the Answer? My Experience Tells Different
Early on, I thought cranking up my RGB tube lights or adding more softboxes would fix the shadows. Spoiler: It didn’t. More often, it just made my setup look cluttered or washed out. The real magic came from understanding light angles and diffusions. If you’ve ever experienced a softbox grid failing in small rooms or struggled with uneven skin tones, you know how tricky lighting can be. For a deeper dive into softbox setups, check out this guide.
By the end of this post, you’ll discover not just the tactics but also how to tailor your lighting to your space and face shape. Ready to ditch those harsh nose shadows? Let’s get started with the first of three game-changing lighting strategies that I swear by in 2026.
,
Position Your Key Light for Impact
Set your key light at a 45-degree angle to your face, slightly above eye level. This angle mimics natural sunlight and minimizes nose shadows. I once placed my key light directly in front, thinking it would be brighter, but it washed out my features and worsened shadows. After adjusting to a 45-degree tilt, shadows softened immediately.
Use Diffusion to Soften Harsh Light
Apply a diffuser or softbox to your key light — akin to dragging a sheer curtain across a window to diffuse sunlight. Softening the light wraps around your face, reducing stark shadows on the nose. I experimented with a DIY softbox by attaching a white bedsheet to my softbox frame, noticing significant improvement in shadow control. For best results, check out this guide.
Add a Fill Light on the Opposite Side
Place a fill light on the side opposite your key light, at lower intensity. Think of it as balancing a scale — too much, and your face looks flat; too little, shadows remain stark. Start with a 1:2 ratio: fill light at half the brightness of your key. During my last shoot, I used a small LED panel with adjustable brightness, placing it at about 45 degrees from my face, which softened shadows without eliminating them completely. Check out this article for tuning tips.
Control the Light Angles for Balance
Adjust your lights to avoid direct hits into your camera lens, which can cause glare or uneven lighting. Use barn doors or flags to shape the light, preventing spill from hitting unwanted areas. In my experience, a slight tilt of the key light downward eliminated double chin shadows and highlighted my cheekbones. For complex setups, consider mounting lights higher and angling down—it’s like shining a spotlight from above for natural shadows.

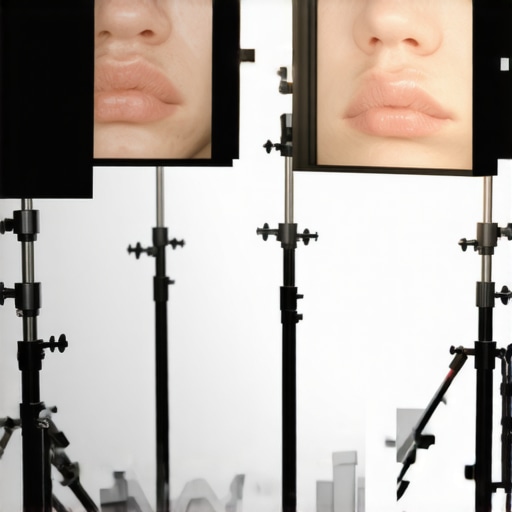
Descriptive prompt: A professional video setup with a key light at 45 degrees, a fill light at opposite side, all diffused with softboxes, in a small studio environment.
Utilize RGB Tube Lights for Versatile Effects
In addition to key and fill lights, incorporate RGB tube lights for creative control. They can be placed behind or around your setup to add depth and dimension, counteracting flat shadows. I set up a pair of RGB tubes behind me, subtly illuminating the background with color, which lifted my videos from amateur to polished. For more innovative uses, see this article.
Many enthusiasts and even seasoned creators fall into the trap of oversimplifying their lighting setup, especially with popular tools like RGB tube lights, key lights, fill lights, LED panels, and softboxes. While it’s common to think that more intense or elaborate setups automatically translate to better footage, the truth runs much deeper. Let’s dig into the subtle nuances and misconceptions that can trip up your lighting game.
Firstly, a prevalent myth is that adding more lights or brighter settings equates to more professional results. However, in my experience, **overlighting often washes out your skin tones and ruins natural depth**, creating a flat image that lacks dimension. Hardly the result you’re aiming for. For instance, cranking up your LED panel to maximum brightness without proper diffusion can introduce harsh highlights and unflattering shadows. To avoid this, explore using diffusion items or softer [softboxes](https://lights.creatorrigreviews.com/mastering-softbox-lighting-tips-for-perfect-portraits-at-dawn), which are often overlooked but crucial for achieving a natural, pleasing look.
Another misconception concerns RGB tube lights and their color-mixing capabilities. Many believe they can seamlessly blend colors for dynamic effects without considering how **color temperature and placement influence realism**. Without a clear understanding, you might introduce unintentional color casts that affect skin tones or background consistency. Expert tip: always calibrate colors carefully and use appropriate diffusion to minimize color fringing. Check out [this article](https://lights.creatorrigreviews.com/rgb-tube-light-effects-creative-uses-for-evening-shoots) for advanced RGB techniques.
Now, let’s tackle an often-ignored trap: **the improper positioning of key and fill lights—that is, relying solely on static setups**. While tutorials might recommend fixed angles, the real power comes from adjusting lights dynamically based on face shape, scene mood, and camera angle. For example, a slight tilt or shift can dramatically reduce nose shadows or prevent one-sided lighting issues. Advanced creators go a step further, employing *multiple layers of fill* and utilizing [multiple RGB tube placements](https://lights.creatorrigreviews.com/4-invisible-rgb-tube-light-placements-for-2026-backdrops) to add depth and visual interest.
Speaking of complexity, many overlook how subtle light angles affect skin tone rendition. **The direction of your key light impacts how natural or artificial your skin appears**. In fact, very slight changes in angle can change the color rendering index (CRI) and cause undesired tinting or shadows. For precise control, I recommend experimenting with different angles, diffusion levels, and light intensities regularly—don’t settle for a one-size-fits-all setup. For more insights, see [key light techniques](https://lights.creatorrigreviews.com/key-light-too-bright-3-easy-diffusion-fixes-for-2026).
Manipulator and diffuser choices are equally critical. Use cheap diffusers or skip diffusion altogether, and you’ll risk losing detail and creating distracting hotspots. A high-quality diffusion material ensures your LED and RGB lights produce soft, uniform illumination that preserves skin texture and reveals subtle facial features. As a rule of thumb, always evaluate your diffusion setup under actual shooting conditions—what works in theory may fall short in practice.
Finally, beware of the trap of assumption—assuming your lighting is perfect because it looks good on test shots. Professional lighting involves continuous adjustment and attention to how lights interact with camera settings, room reflections, and subject movement. Regularly review footage and tweak setups accordingly. For instance, hot spots caused by RGB tubes can cause ghosting effects or color noise, but these are fixable with proper placement and settings, as discussed [here](https://lights.creatorrigreviews.com/stop-2026-hdr-over-glow-3-led-panel-light-diffusion-fixes).
In summary, mastering studio lighting is less about the gear and more about understanding how subtle adjustments, diffusion, and calibration influence your final look. Don’t fall into the trap of thinking more brightness or color effects alone can fix fundamental lighting issues. Instead, focus on refined placement, diffusion, and continuous learning. Have you ever fallen into this trap? Let me know in the comments and share your experiences!
Investing in quality lighting equipment is only half the battle; maintaining it properly ensures your setup continues to deliver professional results over time. Regular upkeep of your rgb tube lights, softboxes, LEDs, and accessories is essential to prevent unexpected failures or performance dips. I personally schedule bi-monthly inspections, closely examining connections, mounting points, and diffusion materials for signs of wear or damage. Having a dedicated toolkit – including a microfiber cloth, compressed air, and a multimeter – helps me quickly diagnose issues without costly service calls.
Tools I Recommend for Reliable Maintenance
One indispensable tool I rely on is a digital multimeter, which allows me to verify voltage levels and identify electrical faults early. For cleaning, I prefer a gentle microfiber cloth combined with compressed air to remove dust from delicate components like LED diodes or RGB chips—keeping the lenses and diffusers spotless maximizes light quality. When adjusting or repositioning lights, a magnetic level ensures your softboxes and panels stay perfectly aligned, maintaining consistent light angles. For a deeper look into softbox maintenance, check out this helpful guide.
Long-Term care helps your gear last and perform
To extend the lifespan of your LED panels and RGB tubes, avoid exposing them to extreme temperatures or moisture, which can cause internal damage. Using protective covers or casings during outdoor shoots is a smart move. Additionally, calibrate your RGB tube lights periodically—most models have firmware updates and color calibration tools built-in—to ensure color accuracy remains consistent, especially when matching virtual sets or achieving specific aesthetic effects. Regularly reviewing your equipment’s manual and manufacturer recommendations on privacy policies can provide valuable insights into optimal maintenance practices.
Ever Wondered How to Simplify Your Lighting Maintenance Routine?
Establishing a routine checkup schedule, like inspecting connections and diffuser integrity every few weeks, can save you time and money in the long run. Keep a maintenance log to track any issues or repairs; this habit helps identify recurring problems early. When your gear functions smoothly, it guarantees consistent lighting quality, whether you’re filming a quick vlog or a high-end production. For advanced troubleshooting tips, explore this article to ensure your lights stay flawless in every shoot. Try implementing a regular cleaning and calibration routine today, and notice how your videos maintain that professional look effortlessly.
The Hardest Lesson I Learned About rgb tube light,key light,fill light,led panel light,softbox
One of the most impactful realizations came when I understood that more lights don’t automatically mean better images. Overlighting often leads to washed-out skin tones and flattened depth, making your footage look sterile instead of captivating. It was a game-changer to realize that strategic placement and diffusion are far more valuable than simply increasing brightness.
3 Myths About rgb tube light,key light,fill light,led panel light,softbox That Held Me Back
I used to believe that RGB tube lights could replace traditional softboxes, thinking they were a one-size-fits-all solution. Turns out, without understanding how color temperature and placement affect the scene, you risk creating unnatural tints or flat lighting. Similarly, I thought that turning up all lights to full power would improve clarity—yet it often resulted in glare and shadows.
What Experts Won’t Tell You About rgb tube light,key light,fill light,led panel light,softbox
Many seasoned creators hone their craft by paying attention to the subtle angles and diffusion techniques that most tutorials overlook. For example, I found that a slight tilt of my key light downward dramatically reduced nose shadows and improved overall facial dimension. These nuanced adjustments make a visible difference, elevating your production quality without extra expense.
Incorporating these lessons has profoundly influenced my approach. Now, I focus on quality over quantity, experimenting with diffusers and precise angles to craft natural, professional lighting. It’s about working smarter—using simple yet effective tweaks that make my videos more inviting and trustworthy. This shift in mindset unlocked a new level of confidence and consistency in my content creation process.
Tools That Elevated My Lighting Game
My essential toolkit includes a high-quality diffuser for softening harsh light, a digital multimeter to ensure consistent power, and a magnetic level for accurate alignment of softboxes. These tools have been invaluable for maintaining optimal performance, especially in compact or challenging spaces. For detailed guidance on caring for softboxes, check out this resource.
Additionally, investing in adjustable LED panels and RGB tubes with calibration features has kept my color accuracy sharp and my setup versatile. Regularly updating firmware and following manufacturer recommendations—found in the privacy policy—ensures longevity and sustained quality from my gear.
Your Next Step in Lighting Mastery
Now it’s your turn to experiment with positioning, diffusion, and subtle angle tweaks to transform your videos. Remember, even minor adjustments can dramatically improve your visuals—whether you’re shooting a quick vlog or a professional interview. Keep pushing your skills, stay curious, and don’t hesitate to try new configurations. The future of creative lighting is in your hands—are you ready to elevate your setup?
What light adjustment has made the biggest difference in your videos? Share your experience below—I’d love to hear your stories and insights!
![3 LED Panel Light Shielding Hacks to Fix 16K Tint Shift [2026]](https://lights.creatorrigreviews.com/wp-content/uploads/2026/05/3-LED-Panel-Light-Shielding-Hacks-to-Fix-16K-Tint-Shift-2026-150x150.jpeg)


3 responses to “Stop Harsh Nose Shadows with 3 Key Light Tactics in 2026”