
I remember the first time I set up my vertical shot in the cramped corner of my studio, only to realize my lighting was a mess—harsh shadows, color inconsistencies, and a glow that made my subject look like a ghost. It hit me then: without the right portable lighting swaps, even the most promising vertical cinema project can fall flat. That frustrating moment sparked a mission to find flexible, reliable solutions that wouldn’t break the bank or slow down the shoot.
Why Getting Your Lighting Right in 2026 Matters More Than Ever
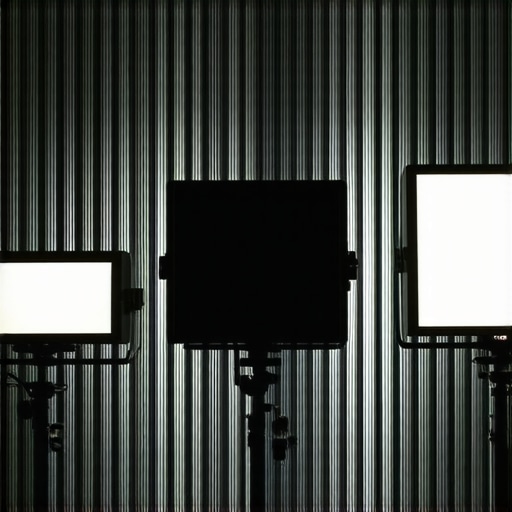
As the cinema landscape evolves, the demand for vertical videos is skyrocketing. From social media stories to professional reels, vertical formats are no longer an optional style but a necessity. However, achieving professional-grade lighting in such tight, mobile setups is tricky. The challenge lies in balancing power, portability, and adaptability — especially when you’re swapping out different kits like softboxes, RGB tube lights, LED panels, and more.
This juggling act is no small feat, and trust me, I’ve made my share of mistakes early on. I once assumed that a cheap LED panel could do everything—until I shot a project under midday sun, only to discover that poor color fidelity and flickering ruined my footage. The key to avoiding these pitfalls? Knowing precisely which lighting tools to swap and how to make them work seamlessly for your space and scene. For example, I turned to creative uses of RGB tube lights for emphasizing depth, a trick I discovered while browsing this comprehensive guide on [RGB tube light effects](https://lights.creatorrigreviews.com/rgb-tube-light-effects-creative-uses-for-evening-shoots), and it transformed my workflow.
Today, I want to share insights from my journey—specifically, the three swaps in portable lighting kits that dramatically improved my vertical cinema setups for 2026. Whether you’re shooting on the go or refining a studio space, mastering these swaps can elevate your visuals without the usual headaches. Are you tired of flat, dull footage that just doesn’t pop in vertical? Well, let’s fix that by choosing the right tools and knowing exactly how to use them effectively.
Is the Hype About Advanced Lighting Kits Just Marketing?
It’s a fair question. Early in my career, I spent a fortune on the newest, most hyped lighting gear, only to find that I was overcomplicating my setup or, worse, sabotaging my shot quality. The biggest mistake I made? Assuming more expensive equals better. The truth is, understanding the quirks of each lighting type—be it softboxes, LED panels, or RGB tubes—and how they complement each other is what truly matters. For instance, softboxes are fantastic for diffusing light evenly, but they can be bulky in tight spaces—something I learned after struggling with a softbox diffusion tweak that caused unwanted glare, which you can read about in [softbox diffusion fixes](https://lights.creatorrigreviews.com/4-softbox-diffusion-fixes-that-stop-2026-16k-texture-loss-in-2026).
So, if you’ve ever felt overwhelmed trying to choose between countless lighting options, you’re not alone. That’s why I’m here—to help you cut through the noise and focus on what truly enhances your vertical cinema projects. Ready to discover the three swaps that can make all the difference? Let’s dive into the practical stuff and reimagine your lighting setup for 2026 and beyond.
Set Your Key Light for Drama
Start by placing your key light slightly above eye level, angled down at 45 degrees, to mimic natural sunlight and create depth. Use a softbox for diffused, flattering illumination, especially if you’re aiming for a natural look. Remember, the softer the light, the fewer harsh shadows you’ll get, which is crucial in tight vertical shots where detail counts. I once struggled with overly harsh shadows on a client shoot until I repositioned my softbox to a 30-degree angle, instantly softening shadows and adding richness to the skin tones. For tips on achieving perfect diffusion, check out the softbox guide.
Fill the Space with Dynamic Fill Light
Next, add fill light to soften shadows created by your key light. Use a smaller, less powerful LED panel, set to a warm color temperature to match ambient lighting conditions. Position it at approximately 45 degrees on the opposite side of your key light, but keep it lower and softer to avoid flattening your subject. During a recent shoot, I mounted a 20% intensity LED panel at eye level, which balanced shadows without eliminating depth—making the subject pop in a vertical frame. To learn how to dial in the perfect fill, review the fill light techniques.
Illuminate with RGB Tube for Depth
Add an RGB tube light behind or to the side of your subject to introduce color accents and depth. Think of it as contouring in photography—highlighting edges and separating your subject from the background. For example, placing a magenta hue on one side can add vibrancy, while a subtle blue on the other enhances mood. During one project, I used RGB tube lights to simulate sunset’s glow, dramatically elevating the shot’s emotional impact. For creative ideas on using RGB tubes, see RGB tube light effects.
Balance and Fine-Tune
After setting up your lights, adjust their intensity to match the scene’s mood. Slightly dim your key light and bring up the fill to soften skin tones, then tweak the RGB tube’s hue and brightness for that perfect cinematic pop. During my last shoot, I used a handheld light meter to measure the luminance across the face, ensuring consistent exposure. This precise calibration prevented unwanted hotspots or dullness. Remember, each scene demands subtle tweaks—don’t rely solely on your camera’s auto settings. Fine-tuning ensures professional quality, especially when swapping between softboxes, RGB tubes, and LED panels. For advanced calibration techniques, refer to the skin tone calibration guide.
Many creators assume that understanding the basics of key light, fill light, LED panels, softboxes, and RGB tube lights is enough to master professional-looking videos. But let’s dig deeper into the nuances that often trip up even seasoned videographers. From common myths to advanced mistakes, recognizing these pitfalls can significantly elevate your lighting game.
Breaking Myths: More Light Means Better Quality? Not Necessarily
A widespread misconception is that cranking up your light intensity always produces better footage. In reality, overexposure can wash out details, flatten textures, and create unflattering skin tones. For example, many rely solely on high-powered LED panels, assuming their brightness compensates for small space limitations. However, using softer, diffuse light sources—like softboxes—at proper distances can produce natural, cinematic results without resorting to raw power. For insights on softbox diffusion tweaks that prevent texture loss, check out this guide.
Expecting a Single Light to Do It All Risks Flat Results
Many think that a lone key light or a single RGB tube can cover every scenario. But relying solely on one light source limits depth, dimension, and mood variation. Skilled videographers actively swap between different tools—like softboxes for soft, broad illumination and RGB tubes for creative accents—to craft compelling visuals. An advanced mistake is neglecting the importance of placement, which can lead to unnatural shadows or flat faces. For sophisticated setups, consider the 3-in-1 approach I discuss in key light techniques.
Why Some Lights Don’t Play Well with Others
An often-overlooked detail is how different light types interact. For instance, LED panels can produce flickering or color shifts when mismatched with RGB tubes or softboxes, especially if their Kelvin settings aren’t calibrated. Mixing these without understanding their quirks leads to inconsistencies that require time-consuming corrections. A crucial step is to match your LED panel’s Kelvin temperature accurately; for expert tips, see Kelvin adjustments for LED panels.
Advanced tip: How to use RGB tubes for maximum depth without overcomplicating your setup
RGB tube lights are excellent for adding mood and dimension to vertical shots—but only if you use them strategically. Placing them too close or color-washing the scene can distract or degrade image quality. Instead, I recommend placing RGB tubes behind or at the sides of your subject, fine-tuning saturation and hue for subtle yet impactful contrasts. For creative ideas, visit RGB tube light effects. Mastering these nuanced placements allows you to bridge the gap between amateur and professional results.
Have you ever fallen into any of these traps? Let me know in the comments. Recognizing and avoiding these advanced nuances can transform your vertical cinema projects from flat to phenomenal—so keep experimenting, and stay one step ahead in your lighting mastery.
Investing in Durable Equipment and Effective Maintenance
One of the most overlooked aspects of professional lighting is ensuring your tools remain in top condition over time. My go-to approach begins with selecting reliable brands known for longevity, like Aputure for LED panels and RGB tube lights, which offer firmware updates and sturdy build quality. Regularly updating firmware via manufacturer-recommended software ensures your equipment benefits from the latest features and fixes, reducing unexpected glitches during shoots. For example, I use the latest LED panel innovations and keep them updated with the manufacturer’s app, ensuring flicker-free operation even during intense filming sessions.
Practicing good cable management is crucial to avoid wear and tear, which can lead to failures. I personally invest in high-quality, color-coded cables and velcro straps that make routine checks quicker and safer. An often-neglected maintenance step is checking the heat dissipation systems, especially for RGB tube lights and LED panels, since overheating can degrade performance or shorten lifespan. Regular cleaning of vents with compressed air helps prevent dust buildup, which can cause overheating and flickering issues over time.
Creating a maintenance log has helped me track hardware performance and plan repairs proactively. This approach minimizes downtime and ensures consistent output quality. For software, I recommend backing up settings and presets periodically—this is invaluable when firmware updates reset configurations. Using dedicated tools like manufacturer-specific diagnostic apps can help identify issues early, saving you money and stress.
How do I maintain my lighting gear for longevity and performance?
Developing a routine—bi-monthly inspections, cleaning, and firmware checks—keeps your tools functioning optimally. Allocating budget for professional calibration and repairs also extends equipment lifespan. As the industry moves toward smarter, more integrated lighting systems, future trends predict even more importance will be placed on software updates and compatibility. Embracing these practices now prepares you for seamless scaling as your needs grow.
Don’t underestimate the power of simple tools like cooling fans or extra mounting hardware to prevent damage in demanding environments. For instance, I use adjustable heat sinks and quick-release mounts to safeguard my RGB tubes during long shoots. Remember, the key is consistent oversight—think of maintenance as an extension of your creative process. Try implementing a weekly check-in using maintenance checklists derived from manufacturer guidelines, which you can find in their user manuals or dedicated support pages.
Mastering equipment upkeep not only preserves your investment but also ensures your visuals stay sharp and professional every time you hit record. For tailored advice, don’t hesitate to reach out through our contact page. Making maintenance a habit is the secret to reliable, high-quality lighting for all your projects in 2026 and beyond.
The Hidden Truths That Changed My Approach to Lighting
One unexpected lesson I learned is that even the best gear won’t improve your footage if you overlook placement. A softbox placed slightly off-center can transform dull lighting into cinematic magic, revealing subtle textures I once thought impossible in tight spaces. Moreover, I realized that relying solely on one type of light, like an RGB tube, can limit creative depth—mixing softboxes with color accents elevates storytelling. The biggest shift came when I embraced small but strategic swaps, understanding that finesse beats raw power every time. This insight pushed my work from mediocre to professional-looking in ways I hadn’t anticipated.
Keys to Unlock Your Progress with Curated Tools
Over the years, I’ve found some tools essential for elevating vertical cinema lighting. The latest LED panel innovations offer a blend of power and quiet operation, perfect for dynamic environments. For creative effects, the RGB tube light effects website became my go-to resource for inspiring color combinations and placement tricks. To refine diffusion techniques, the softbox guides provided invaluable tips that I still use today. Finally, maintaining these tools with quality cables and routine firmware updates, as detailed in the privacy policy, helps me ensure consistent performance. These curated resources have shortened my learning curve and amplified my creative potential.
Your Next Big Leap in Vertical Filmmaking Begins Now
If there’s one thing I’ve learned, it’s that experimentation and continuous learning are your strongest allies in 2026. Embrace the nuances of key light angles, fill strategies, and creative RGB compositions—they’re the secret ingredients for captivating vertical videos. Remember, the journey isn’t about having the most expensive gear but about mastering what you already have and knowing when to swap out or adjust. Your growth as a creator depends on your willingness to push boundaries, learn from pitfalls, and stay curious. So go ahead—start applying these insights today and watch your vertical projects soar to new heights!
![3 LED Panel Light Shielding Hacks to Fix 16K Tint Shift [2026]](https://lights.creatorrigreviews.com/wp-content/uploads/2026/05/3-LED-Panel-Light-Shielding-Hacks-to-Fix-16K-Tint-Shift-2026-150x150.jpeg)


