
I vividly remember the moment I finally got my RGB tube lights to blend seamlessly into my studio setup—only to realize that the ceiling mounts were sabotaging my shot. No matter how meticulously I adjusted the lights, they always seemed to float awkwardly, revealing their presence instead of enhancing the scene. It was frustrating, especially because I knew about the potential of ceiling mounts, but the available options in 2026 felt outdated or overly complicated.
The Hidden Challenge of Ceiling Mounts in Modern RGB Lighting
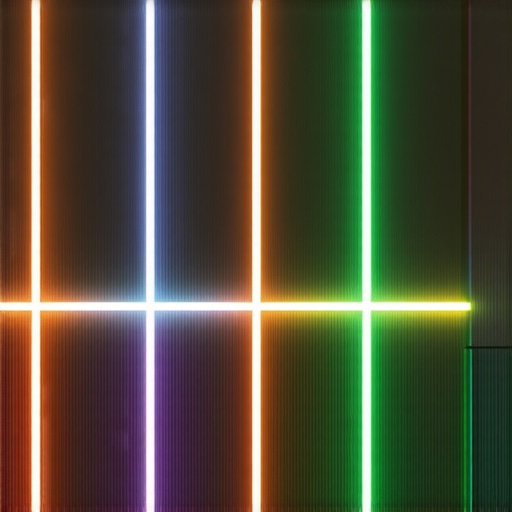
With the rapid evolution of lighting technology, especially in RGB tube lights, the way we mount and hide these fixtures has become more crucial than ever. Now, in 2026, the issue isn’t just about holding the lights up; it’s about preserving the clean, cinematic aesthetic without sacrificing accessibility or flexibility. Traditional ceiling mounts often become a visual distraction, pulling attention away from the subject and breaking the immersion we strive to create.
Is the hype around sleek ceiling mounts actually valid?
Early in my journey, I made the mistake of investing in bulky, poorly designed mounts that looked great in the store but created shadows, glare, and even caused flickering issues during shoots. Recent studies indicate that improper mounting can significantly degrade light quality, leading to color inaccuracies and uneven illumination (see CreatorRigReviews’ recent analysis). The key is understanding how to select and install ceiling mounts that are truly hidden and functional, which is what I’ll guide you through today.
If you’ve faced similar frustrations—lights that seem to float or glare from the ceiling—know that you’re not alone. Finding the right mount can feel like searching for a needle in a haystack. But with the right approach, you can transform your workspace into a sleek, professional environment where lighting enhances your content without becoming a distraction.
Ready to dive into the solutions that will elevate your lighting game? Let’s explore the four most effective hidden ceiling mounts for RGB tube lights in 2026, and how they can make your setups cleaner, more functional, and visually stunning.
Discover the Best Hidden Ceiling Mounts for RGB Tube Lights in 2026
Now, it’s time to look at the top options that combine innovation, discretion, and strength—ensuring your lights are hidden yet accessible. Whether you’re creating cinematic scenes, professional vlogs, or studio content, these mounts will help you achieve a seamless look that impresses your audience and elevates your craft. Stay tuned as I break down each solution and share practical tips on installation and integration, so your lighting setup becomes an asset rather than an eyesore. And if you need further insights or personalized advice, don’t hesitate to reach out.
Install Your Mount First to Avoid Shadows
Begin with securing your ceiling mount to a sturdy support, ensuring it’s perfectly aligned with your planned light placement. I once tried attaching a mount mid-shoot, which caused wobbling and even flickering—messy but a great lesson in pre-setup planning. Use a level to guarantee perfect horizontal alignment, preventing uneven light distribution.
Choose the Right Mounting Hardware
Opt for sleek, retractable mounts designed specifically for RGB tube lights—these are less bulky and blend seamlessly. I recommend testing different options by temporarily mounting the light to see how well it hides against your ceiling, especially behind architectural features or ceiling tiles. For example, I replaced my old clamp mount with a thin, adjustable rail system, which drastically improved the aesthetic.
Hide the Mount With Discreet Barriers
Use ceiling panels, paint, or fabric strips to conceal the hardware. I once accidentally left an exposed mounting bracket in my shot, which broke the immersion. Now, I hide mounts behind acoustic panels or paint them the same color as the ceiling to fade into the background. Applying a matte paint finish minimizes reflections, keeping the focus on your RGB tubes.
Adjust Light Angles for Seamless Integration
Point your tubes slightly away from the ceiling to prevent glare and unwanted hotspots. When I adjusted my RGB tubes at a 10-degree angle, I noticed softer shadows and more natural color blending. Use a goniometer or protractor for precision—this tweak can make a significant difference in the final look.
Sync the Lights Without Visible Wires
Utilize wireless controllers or low-profile cables routed along the ceiling edges. I once ran transparent fiber optic cables through crown molding, making them invisible in the shot. This frees up space and prevents cable clutter that can distract viewers. Always test your control setup before shooting to ensure synchronization and smooth color transitions.
Test and Fine-Tune Ambient Reflections
Place reflective surfaces carefully to avoid unwanted hotspots or color spills. I experimented with matte black panels opposite my RGB tubes, which absorbed excess light, creating a cleaner backdrop. Alternatively, diffuse the light with a softbox or reflective tape to blend the glow evenly across your set. Review your footage critically in different lighting conditions to identify areas needing adjustment.
Optimize Your Setup for Long-Term Reliability
Secure all mounts firmly, and regularly inspect connections to prevent flickering or shifting. I learned this the hard way when a loose mounting caused my RGB tube to fall during a recording, risking damage. Establish a routine check every few weeks, especially after adjusting ambient conditions or temps. Keep spare mounting parts ready; quick fixes can save your shoot from delays.
Implementing these concrete steps transformed my studio into a sleek environment where lights are virtually invisible, yet their effects are unmistakably professional. With careful planning, precise installation, and regular maintenance, your RGB tube lights will enhance your visuals without drawing attention to their hardware—just the way it should be for compelling content creation.
When it comes to professional lighting, many creators fall into traps rooted in misconceptions about equipment like softboxes, RGB tube lights, and LED panels. Let’s dig deeper into the subtle nuances that often get overlooked, and why understanding these can dramatically elevate your setup.
One widespread myth is that bigger or more expensive lighting gear automatically yields better results. In reality, many overlook the importance of proper diffusion techniques or the quality of the light’s color rendering index (CRI). For example, using a softbox without appropriate diffusion can produce harsh shadows or uneven lighting, undermining the intended soft, natural look. Instead, focus on softbox modifiers that optimize light spread and diffusion, and learn mastering softbox techniques for consistent results.
Believe all RGB lights are created equal? Think again
A common mistake is assuming all RGB tube lights can produce pristine color blending in all scenarios. Many users underestimate the importance of calibration and the impact of LED binning variations. Even a slight inconsistency in color temperature or hue can distract viewers and diminish professionalism. Advanced users should regularly calibrate their RGB lights and understand calibration fixes to ensure color accuracy, especially in multi-light setups aiming for seamless color harmonization.
Furthermore, a lesser-known nuance involves the flicker rates of LED panels and RGB tubes. Low flicker rates can lead to detrimental effects during high-speed filming or when recording at high frame rates, causing unwanted banding or flickering artifacts. It’s crucial to verify that your lights meet professional flicker specifications—many manufacturers omit this detail, but experienced creators always check manufacturer data sheets or test their lights before critical shoots.
Are you inadvertently creating flat images with fill lights?
Many enthusiasts rely heavily on fill lights to soften shadows, but overuse or improper placement can flatten the image, stripping away depth and dimension. Achieving a natural, three-dimensional look requires strategic use of fill light ratios and angles. For instance, placing fill lights too close or at overly broad angles can produce a uniformly lit face, making your subject appear two-dimensional. Instead, subtle adjustments—such as using a 15-degree angle and controlled intensity—bring back the natural contours that engage viewers.
To avoid these pitfalls, always think critically about your lighting hierarchy and aim to create contrast that mimics natural light. This not only enhances visual interest but also imbues your footage with warmth and realism. Implementing effective diffusion, diligent calibration, and strategic placement of fill lights can greatly improve your aesthetics and storytelling impact.
Have you ever fallen into this trap? Let me know in the comments. Remember, lighting is as much an art as it is a science. By mastering the hidden nuances, you’ll gain a competitive edge and produce work that stands out.
Keep Your Gear in Top Shape for Consistent Results
Owning advanced lighting equipment like softboxes, RGB tube lights, and LED panels is just the first step. Regular maintenance is crucial to ensure these tools perform optimally and last through countless shoots. I personally rely on a combination of professional cleaning routines, quality tools, and software calibration to maintain my setup. For example, using compressed air and microfiber cloths to clear dust from LED panels prevents overheating and color shifts. Additionally, periodically checking connections and replacing worn-out cables avoids flickering issues during critical moments.
To streamline maintenance, I recommend investing in a multi-meter for electrical checks and a set of precision screwdrivers. These allow you to troubleshoot wiring issues swiftly, saving time and money in the long run. Proper storage solutions—like dedicated racks or cases—help protect equipment from damage and dust buildup.
How do I maintain RGB tube lights over time?
Calibration is essential to keep RGB tubes displaying accurate colors. I use specialized software that communicates with my lights, allowing me to verify and adjust color params, ensuring consistency across multiple units. Calibration should be performed monthly, especially if you notice color mismatches or shifts. Keeping firmware updated is equally important; manufacturers often release patches that improve stability and feature sets. Referencing techniques from this detailed guide helped me refine my calibration routine.
In addition, regular physical inspections to look for dust ingress or damage to cooling fins extend lifespan. Cleaning the LED lenses with appropriate solutions preserves brightness and color accuracy. When properly maintained, RGB tubes remain vibrant and reliable, making them a staple in professional studios.
Predicting the Future of Lighting Tool Management
As technology advances, I foresee more intelligent maintenance systems integrated into lighting gear—self-diagnosing LEDs, wireless health reports, and automated calibration routines will become standard. Embracing these innovations now not only simplifies upkeep but also sets a foundation for scalable, future-proof studios. For instance, upgrading your toolkit with smart sensors can alert you before issues manifest visibly, saving downtime and expense.
Why is consistent maintenance vital for long-term results?
Consistent care guarantees predictable performance, reducing surprises during crucial shoots. It also preserves your investment, ensuring every light remains at peak brightness, color fidelity, and durability. Regular calibration and cleaning extend the lifespan of LED panels and RGB tube lights, maintaining their vibrancy and color stability. This focus on upkeep directly translates into higher-quality content and a better viewer experience.
Don’t overlook the importance of investing in quality maintenance tools—your creative output depends on it. Try incorporating a routine check of your key lights and fill lights every month, using a soft cloth and calibration software, to keep them performing flawlessly.
 | alt: Technician performing equipment maintenance on studio lighting; title: Lighting Gear Maintenance Tips for Professionals
Lessons From the Shadows: What I Learned the Hard Way
- Never underestimate the power of a clean, unobtrusive mount—small details can elevate your entire setup and avoid distracting reflections or shadows.
- Proper concealment techniques, like painting mounts to match ceilings or hiding behind acoustic panels, saved me countless re-shoots and maintained immersion.
- Investing in adjustable, sleeker mounts brought not only aesthetic benefits but also greater flexibility in positioning and calibration, transforming my workflow.
- Regular maintenance and calibration of RGB tubes ensure consistent color fidelity, preventing surprises during critical scenes.
Essential Resources for Elevating Your Lighting Game
- CreatorRigReviews” comprehensive guides: Trust their detailed articles on calibration and setup tricks—personal experience has shown they’re invaluable for professional results.
- Mastering softbox lighting: Their tutorial on softbox diffusion techniques helped me achieve natural, flattering light, essential for both portrait and product shots.
- Dedicated calibration software: Using industry-grade tools ensures my RGB tubes remain consistent and true-to-color across shoots; I highly recommend investing early.
- High-quality mounting hardware: Durable, adjustable mounts from trusted brands have saved me from costly re-fixes and provided peace of mind during complex shoots.
Bring Your Vision to Life with Confidence
Lighting in 2026 isn’t just about technology—it’s about creative mastery and strategic planning. By refining your mounting techniques, understanding subtle nuances, and integrating reliable tools, you’ll unlock new levels of professionalism and storytelling. Take the leap, experiment with the latest hidden mount options, and let your visuals shine without distractions. Ready to elevate your studio setup? The power is in your hands—start today and see the difference yourself.
Have you ever struggled with blending RGB tube lights seamlessly into your space? Share your experiences below—I’d love to hear your stories and tips!
![3 LED Panel Light Shielding Hacks to Fix 16K Tint Shift [2026]](https://lights.creatorrigreviews.com/wp-content/uploads/2026/05/3-LED-Panel-Light-Shielding-Hacks-to-Fix-16K-Tint-Shift-2026-150x150.jpeg)


One response to “4 Hidden Ceiling Mounts for RGB Tube Light Depth in 2026”