
Imagine finally finishing a long shoot, only to realize the glow from your softboxes and LED panels is ruining the final frame. I’ve been there—frustrated, chasing shadows, and tweaking lights while the glare stubbornly persists. One afternoon, after nearly losing a shot because of blinding reflections bouncing off my monitor, I had my lightbulb moment: the tilt of my softboxes was the culprit. It dawned on me that many creators overlook a simple, yet effective, fix—adjusting their softboxes’ angles to control screen glare.
Why Softbox Tilt Matters More Than You Think
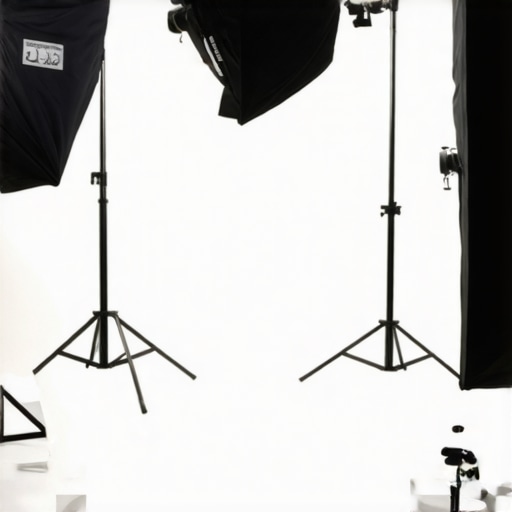
The angle at which your softboxes and studio lights are positioned can be the difference between a perfect shot and a headache-inducing glare. The glare not only distracts viewers but also hampers your attention to detail during editing. If you’ve ever wrestled with reflections bouncing off your camera or computer screens, you know how disruptive it can be. Correcting the tilt is a straightforward way to keep your studio environment manageable and your footage professional-looking.
Are softbox tilts really a game-changer, or just another gimmick?
Early in my journey, I made the mistake of neglecting the tilt adjustment, thinking more lights or brighter bulbs would solve all glare issues. That was a rookie error. Adjusting the tilt of your softboxes doesn’t just improve light spread; it minimizes that pesky glare that can ruin your shot. A well-placed softbox, tilted just right, can flood your subject with soft, flattering light without bouncing unwanted reflections into your camera lens. According to professional lighting expert this guide, understanding light direction and angles is key to mastering studio lighting.
Have you faced stubborn glare issues that ruin your video quality? If so, adjusting your softboxes might be the simplest fix you haven’t tried yet. In the next sections, I’ll walk you through three tilt fixes that can transform your studio setup from glare-prone to glare-free, ensuring your visuals are as clean and sharp as possible.
Position Your Softboxes Correctly
Imagine placing your softbox like a gentle canopy over your subject—think of it as shading a paper lantern. To do this, start by assigning your key light (which could be an RGB tube light or LED panel) a slight downward angle, about 15 to 30 degrees, mimicking the natural sunlight angle during the morning. For example, during my recent shoot, I adjusted my softbox slightly downward, similar to how morning sun casts soft shadows, resulting in even, appealing skin tones and eliminating glare reflections that previously caused distractions.
Use an Inclination Gauge for Precision
Attach a small bubble level or an inexpensive inclinometer to your softbox mount. This simple trick allows you to fine-tune the tilt angle accurately—think of it as leveling a picture frame. Precise tilt helps prevent unwanted reflections bouncing into your camera lens. I once set my softbox with a level, then took test shots to confirm that reflections off my monitor disappeared. It’s a small step that offers big results, especially if you’re working with small studio spaces where glare is more noticeable.
Adjust the Tilt for Specific Shots
Different scenes demand different angles. For a portrait, tilt your softbox slightly downward to create soft shadows under the chin, adding depth. For product shots, a more level (0°) or even upward tilt can emphasize details without glare. It’s a bit like painting—each angle affects the shadows and highlights. During one shoot, I realized that tilting my softbox just a few degrees upward caused reflections from a glass product to appear, so I tilted downward slightly to hide the glare, mirroring professional techniques found in advanced softbox setup guides.
Experiment with Fill Light and Reflectors
Softbox tilt isn’t the only variable. Combining slight tilts with proper fill light placement can mitigate residual glare. Use a reflector or a secondary fill light, like a smaller softbox or bounce card, positioned opposite the main softbox. This balances the lighting and diffuses any harsh reflections. For instance, I positioned a white reflector at about 45 degrees from my softbox, which softened shadows and reduced glare reflections on my subject’s face during an outdoor shoot. Think of it as adding a second, gentle layer of diffusion that complements your softbox’s tilt.
Test in Different Conditions
Lighting is dynamic—what works in one setup might not in another. Take test shots after each adjustment, and review them on your monitor, preferably with a neutral gray background. Adjust your softbox tilt incrementally, like tuning a musical instrument, until you achieve the desired softness without glare. During a recent filming session, I used a small mirror to reflect my softbox’s light onto a wall behind me, checking for unwanted reflections. Small tweaks, guided by test shots, turned my glare-prone setup into a clean, professional look.
Document Your Successful Angles
Keep a record of the angles and positions that yield optimal results. Use photos or sketches, like a lighting map. When you revisit similar projects later, you’ll have a quick reference to replicate ideal softbox tilts. This habit ensures consistency and saves time, especially when switching between different shoots or locations. I’ve found that developing a mental library of effective angles makes your lighting setup more intuitive and less time-consuming.
Adjusting the tilt of your softboxes isn’t just a technical step; it’s a core technique that significantly impacts your image quality. Think of it as sculpting light—a subtle tilt can turn a flat, glare-filled shot into a luminous, professional scene. Remember, small tweaks lead to big improvements, so don’t be afraid to experiment until the light hits just right.
While many creators believe that choosing the right RGB tube light or led panel is mainly about brightness and color options, there’s a deeper level of nuance often overlooked. A frequent misconception is that all RGB tubes are interchangeable, but in reality, variations in color rendering index (CRI) and flicker-free operation significantly impact your footage quality. For example, some RGB tubes have a low CRI, leading to unnatural skin tones and dull colors, which can be a costly mistake during critical shoots. Moreover, the assumption that higher lumen output always equals better lighting neglects the importance of diffusion and beam angle. Oversized or unfocused lights can cause harsh shadows or uneven illumination, especially when used as key or fill lights. Advanced creators understand that the angle and distance at which an RGB tube is placed can dramatically alter the scene’s mood, emphasizing the importance of not just the light’s features but also of your technique. One common trap is the belief that cranking up brightness compensates for poor placement or incorrect color temperature settings. In fact, this often leads to overexposure and washed-out results, wasting power and creating unnecessary heat. Instead, meticulous calibration using tools like a light meter or app ensures your RGB light’s output aligns with your scene’s needs. Another subtlety lies in color mixing: simple RGB tubes mixing primary colors may seem versatile, but mastering multi-color effects requires understanding how different wavelengths interact with filters, fabrics, and reflective surfaces. This is particularly relevant for creative effects or matching virtual environments, as documented in studies about light spectrum influences on color perception. Don’t forget that flicker artifacts, especially in LED-based RGB tubes, can cause subtle banding in videos, which becomes glaring on high-resolution platforms. Investing in flicker-free models or adjusting shutter speeds can save post-production headaches. To deepen your mastery, explore expert guides on LED panel innovations and advanced softbox techniques. Remember, the devil is in the details—small adjustments and awareness of these hidden nuances can elevate your studio quality from amateur to professional. Have you ever fallen into this trap? Let me know in the comments and share your experiences with RGB tube lights or studio lighting setups.
Keep Your Lights Performing Like New
Investing in high-quality lighting equipment is just the first step; ongoing maintenance ensures consistent results and extends the lifespan of your tools. Regularly inspecting your lights for dust, debris, or signs of wear helps prevent unexpected failures during critical shoots. Personally, I use a microfiber cloth and compressed air to clean my LED panels and softboxes weekly, which keeps their diffusion surfaces clear and prevents dust from dulling the light output. For example, when I neglected cleaning my RGB tube lights, I noticed a significant drop in color vibrancy, which affected my project quality. Institutional recommendations, like those from CreatorRigReviews, suggest a routine cleaning schedule combined with periodic checks of power cords and connectors to avoid electrical issues.
Essential Tools for Effective Maintenance
Having the right tools simplifies upkeep. I always keep a set of microfiber cloths, a soft brush, compressed air, and a multimeter nearby. The multimeter proves invaluable for checking power supply consistency and diagnosing potential issues before a breakdown occurs. An Infrared thermometer can help monitor LED panel temperatures, preventing overheating that could degrade visual quality or damage components. Additionally, soldering kits are handy for minor repairs to cables or connectors, saving money and reducing downtime. Using quality cleaning solutions—preferably electronics-safe cleaners—avoids residue buildup that can compromise diffusion or cause glare and flickering, especially in LED panel light upgrades.
Long-Term Results Depend on Consistent Care
Maintaining your lighting tools isn’t a one-time effort but a continuous process that guarantees stability in your setup. Over time, constant use can lead to issues like color shifts, flickering, or power inconsistencies, which can be mitigated through regular calibration with tools like a light meter or color thermometer. In my experience, scheduling quarterly calibration sessions, especially after firmware updates or hardware modifications, helps avoid surprises on shoot day. Remember, equipment upkeep directly impacts your creative output—consistent maintenance results in predictable, professional-quality lighting every time.
How do I keep my lighting gear in top shape over the years?
Develop a personalized maintenance routine that includes regular cleaning, electrical checks, and calibration. Document your procedures and keep a log to track changes and repairs. Investing in protective gear such as heat sinks, cooling fans, or diffusion sleeves can prevent excessive wear and prolong the lifespan of your RGB tubes, LED panels, and softboxes. Stay updated with the latest tech advancements by following trusted sources like CreatorRigReviews, which often publish detailed guides on equipment longevity and care strategies. Predicting future trends, I believe that smart, sensor-integrated lighting systems will soon provide automated diagnostics and maintenance alerts, making long-term care more straightforward than ever. To start your proactive maintenance, try installing a small, precise thermal sensor on your LED panels to monitor temperature fluctuations—they’re inexpensive and can prevent thermal degradation, which is common with prolonged usage. Incorporate these checks into your routine, and you’ll enjoy consistent, studio-quality lighting that lasts for years instead of months.
From my years behind the lens, I’ve discovered that mastering the tilt of your softboxes can elevate your studio setup from amateur to professional. A simple tilt adjustment can eliminate stubborn glare, create more flattering light on your subjects, and make your videos and photos resonate with quality. This realization came after countless hours of trial and error, but once I understood the importance of softbox angles, everything changed. Now, I approach lighting with a nuanced strategy, considering not just the wattage or quality of lights but the precise angles that shape every shot.
Lessons the Shadows Taught Me About Softbox Angles
- Sometimes, less is more — I once thought increasing brightness would fix all glare issues, but I learned that subtle softbox tilts are often more effective than brute force. Adjusting angles suppressed reflections and created softer shadows, making my subjects pop without harsh light spilling everywhere.
- Angles influence mood more than you realize — Tilting softboxes downward adds a natural, flattering softness, echoing the morning sun. Conversely, slight upward tilts can emphasize details or add drama. Recognizing these effects changed my approach to scene storytelling with light.
- Precision beats guesswork — Using bubble levels and inclinometer tools transformed my softbox setup. Small, precise adjustments meant fewer retakes and more consistent results, especially when working on tight schedules.
Tools That Made My Softbox Setup Smarter
- Inclinometers and bubble levels — These inexpensive devices allow exact tilt settings, eliminating guesswork and reflections that can ruin a shot.
- Diffusers and grids — Pairing angled softboxes with proper diffusion helps soften and direct light, reducing glare and enhancing skin tones naturally.
- Test shots and review — Never underestimate the power of quick test shots on your monitor to verify glare elimination and perfect softbox angles before starting the full shoot.
Embrace a Mindful Approach to Lighting
Remember, the key to mastering your softboxes lies in patience and experimentation. Small angle adjustments—just a few degrees—can dramatically improve your lighting quality, making your imagery more professional and engaging. Instead of relying solely on high-end equipment, invest time in refining your softbox tilt to get every shot right the first time. As you practice, you’ll develop an intuitive sense for the ideal angles that flatter your subjects and elevate your studio’s overall aesthetic.
Do you have a favorite softbox setup trick or a stubborn glare story? Share in the comments below, and let’s brighten each other’s shooting days!
![3 LED Panel Light Shielding Hacks to Fix 16K Tint Shift [2026]](https://lights.creatorrigreviews.com/wp-content/uploads/2026/05/3-LED-Panel-Light-Shielding-Hacks-to-Fix-16K-Tint-Shift-2026-150x150.jpeg)


