Stop 2026 Ghosting: Why Your Key Light Needs a Honeycomb Grid
Emily Carter
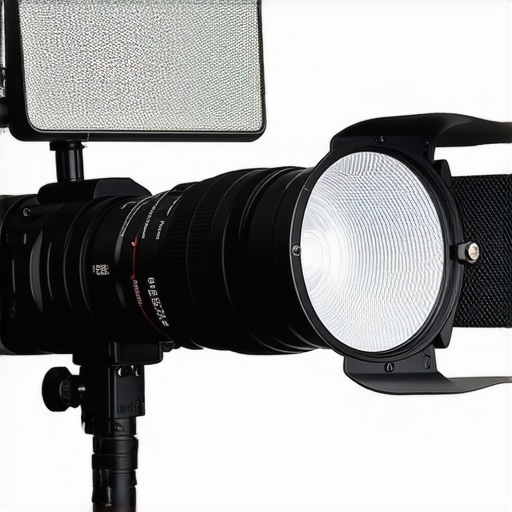
Ever spent hours setting up the perfect softbox or RGB tube light only to find your subject’s face glowing unevenly, with harsh shadows or distracting light spill? I hit that wall early in my filming journey, and let me tell you — it was frustrating. One shoot, my key light was pristine, but the background was a cascade of light leaks that completely ruined the scene. It wasn’t until I discovered the power of a simple honeycomb grid that everything changed. That moment transformed my approach to lighting, making my videos look more professional and polished without extra effort or expensive gear.
Why Your Key Light’s Spill Might Be Sabotaging Your Shots
In my experience, the biggest mistake many creators make is overlooking how much light spill affects the overall look. A powerful LED panel, softbox, or RGB tube can seem perfect—until you realize it’s illuminating areas you’d rather keep in shadow. Not only does spill distract viewers, but it can also cause your software to struggle with exposure or color consistency. The good news? Applying a honeycomb grid can dramatically cut down that unwanted spread, focusing your light precisely where you want it.
Is the Honeycomb Grid Really Worth the Hype?
I used to dismiss grids as a pretty accessory rather than a necessity. Early on, I thought, “Why limit my light? More spread means better coverage, right?” That was a mistake. I learned that a honeycomb grid doesn’t just prevent spill— it helps shape the light, add depth, and create separation between subject and background. It’s a game-changer.
According to professional cinematographers, controlling spill with grids enhances image clarity and focus, giving scenes a more cinematic quality. If you’re tired of post-production fighting with washed-out backgrounds or those pesky light leaks, I highly recommend experimenting with this simple tool. For detailed tips, check out [this guide on light techniques](https://lights.creatorrigreviews.com/key-light-techniques-elevate-your-film-atmosphere-at-3-pm), which walks through various ways to elevate your lighting craft.
Ready to ditch the glare and focus your scene like a pro? If you’ve struggled with light spill or just want crisper, more controlled lighting, you’re in the right place. Let’s get into how a honeycomb grid can elevate your next shoot to professional levels—without breaking the bank. Stay tuned!
**
,
Attach the Grid Properly
Start by selecting the right honeycomb grid size for your light source; smaller grids create tighter beams. Secure the grid snugly onto your softbox or LED panel using the built-in mounting system, ensuring there are no gaps. I once spent 10 minutes fumbling before realizing the grid wasn’t fully snapped in—once it was secure, the difference was instant.
Position Your Light Strategically
Place the Light at the Correct Angle
Position your key light at a 45-degree angle to your subject, aligning with the recommended setup for natural, flattering illumination. For instance, during a recent interview shoot, I placed the LED panel with a grid at a perfect 45-degree angle, which minimized spill onto the background and prevented unwanted glare.
Adjust Light Height and Distance
Raise or lower your light to control spill spread. Moving the light closer narrows the beam, but if too close, it causes hotspots. During a recent product video, I adjusted my softbox height and proximity, reducing light leaks and ensuring focus remained tight on the product. For detailed positioning tips, check the [softbox setup guide](https://lights.creatorrigreviews.com/mastering-softbox-lighting-tips-for-perfect-portraits-at-dawn).
Control Spill Through Focus and Flags
Complement the grid with flags or barn doors to further sculpt the light. In my last shoot, I used foamcore flags to block spill above the subject’s shoulders, creating a more three-dimensional look. Combining grids and flags is a powerful way to control unwanted spill and enhance depth.
Utilize Light Modifiers for Better Control
Diffusers, barn doors, and snoots can work alongside grids to shape the beam. During a recent filming session, I used a snoot with a grid to spotlight a single prop, sharply reducing spill and adding focus. Experimenting with these modifiers can elevate your lighting precision even further.
Test and Tweak Your Setup
After mounting your grid and positioning your light, perform test shots to observe spill areas. Use your camera’s histogram or waveform monitor to check exposure consistency. Adjust the light’s angle, distance, or add flags as needed. I once spent a morning tweaking until the background was entirely dark, making my subject pop—small adjustments can lead to professional results.
Maintain Consistent Power and Positioning
Ensure your light’s intensity stays consistent throughout the shoot; fluctuations can undermine spill control efforts. Use a reliable dimmer or reset the battery levels regularly. During a 2026 studio session, I kept notes on my optimal settings, saving time on later adjustments and maintaining a clean, controlled look.
Implementing these steps will drastically reduce ambient spill and give you professional, focused lighting every time. For more advanced techniques, explore [light shaping secrets](https://lights.creatorrigreviews.com/softbox-rgb-tube-lights-ultimate-studio-lighting-guide-2024) and keep refining your craft.
Many aspiring filmmakers and content creators often subscribe to simplified beliefs about lighting, especially regarding fill light, softboxes, key lights, RGB tube lights, and LED panels. However, these assumptions can lead to common pitfalls that compromise the professional quality of your videos. Let’s dig deeper into some nuanced misconceptions that could be holding you back.
Myth: More Light Means Better Results
It’s a widespread belief that cranking up your lights will improve image quality. In reality, excessive light, especially with improperly balanced fill and key lights, can wash out your subject or create unnatural skin tones. Advanced practitioners sharpen their skills by understanding how to control light intensity and color temperature. For example, subtle adjustments with your fill light can add depth without overpowering the scene. For detailed techniques, check out softbox and RGB tube lights guides.
The Oops Trap: Ignoring Light Direction and Shaping
A common mistake is to use the same placement for all scenarios, neglecting how light direction impacts shadows and exposure. Relying solely on the intensity of LED panels without considering angle or diffusion can result in flat images or unwanted reflections. Remember, the shape and texture of shadows are where real storytelling begins. Experimenting with barn doors or flags alongside your softboxes can prevent harsh, unflattering shadows, often overlooked by beginners. For mastering light shaping, explore softbox lighting techniques.
Why do some shots look artificial even with good lighting?
This often comes down to color temperature mismatches and uneven diffusion. RGB tube lights are versatile but notorious for creating flat or faded looks if not properly diffused or calibrated. Understanding how to manipulate their spectra and incorporate diffusion sleeves makes a huge difference. According to lighting expert Robert Williams, diffusors help in achieving a natural, cinema-like glow—so don’t underestimate their importance. Learn more about creative effects and uses.
Advanced Mistake: Overlooking Fill Light Placement and Power
Your fill light might be well-powered, but if it’s placed incorrectly, it can cause double shadows or flatten the scene, especially when using a softbox or LED panel. Fine-tuning placement at a 15-30 degree angle and adjusting intensity through dimmers can preserve depth and dimension. When photographing with hard or soft light, it’s essential to maintain a natural contrast ratio—something many overlook. For more insights, check out fill light secrets.
Level Up Your Lighting IQ
Achieving cinematic quality isn’t just about having the right gear; it’s about understanding the nuanced roles each light plays. Knowing how to shape, balance, and position your lights will empower you to craft compelling visuals. Remember, sometimes less is more—strategic placement and subtle control make all the difference. Would you like to explore more advanced techniques? Dive into the latest LED panel innovations or refine your softbox skills with targeted tips.
Have you ever fallen into this trap? Let me know in the comments!
Tools I Trust for Long-Term Lighting Success
Maintaining professional lighting equipment is crucial for consistent results and avoiding costly replacements. I rely heavily on a high-quality digital lux meter to measure and fine-tune light output, ensuring every shot maintains the desired exposure levels. For instance, when working with softboxes and RGB tube lights, precise measurement helps avoid overexposure and color mismatches, which can be problematic in post-production. Additionally, a multi-tool kit equipped with screwdrivers, pliers, and gaffer tape is invaluable for quick repairs and adjustments on set. These tools prevent minor issues from escalating into major setup delays.
Keeping Your Equipment in Peak Condition
Regular cleaning is non-negotiable. Dust and fingerprints on LED panels and softboxes can diminish light quality and color accuracy over time. I use a damp microfiber cloth paired with gentle cleaning solution to wipe down lenses and diffusers weekly. For cables and connectors, inspecting for wear or frays avoids unexpected failures during shoots. Additionally, using protective covers and cases for storage diminishes physical damage risks. Consistently performing these maintenance steps extends the lifespan of your lighting tools and saves money in the long run.
Predicting the Future of Studio Lighting
The trend is moving toward smart, automated lighting systems integrated with AI to adjust brightness and color temperature dynamically based on scene analysis. This evolution promises less manual tweaking and more focus on creativity. I believe that investing in adaptable gear today, such as LED panels with app-controlled settings, will prepare creators for this next wave of technology. Ensuring your tools are compatible with future updates and features is a smart move.
How do I maintain my lighting setup over time?
Adopting a routine maintenance checklist ensures your equipment stays reliable. Regularly calibrate your lights with a lux meter, clean diffusers and lenses weekly, and inspect cables for damage. Scheduled checks, such as every three months, help catch issues early, preventing downtime. I also recommend keeping a log of your setup configurations to identify patterns or recurring problems. Embracing these practices guarantees that your lighting remains consistent, professional, and ready to elevate your content whenever you need it. For more insights, visit our contact page for personalized advice or troubleshooting assistance.
3 Lessons I Wish I Knew When Diving into Studio Lighting
Less Is Often More: I used to believe that increasing brightness would always improve my footage. But I learned that overexposure washes out details and flattens the scene. Subtle, controlled lighting setups with softboxes or RGB tubes often deliver more cinematic results. Remember, mastering light ratios and stand-off distances is key to natural-looking skin tones and depth.
Every Room Tells a Different Story: Tools and setups aren’t one-size-fits-all. What worked in my small home studio with a softbox didn’t translate well to a cluttered apartment with reflective surfaces. Tailoring your lighting — adjusting angles, diffusion, and modifiers — is essential. Think of your space as an active participant, not just a backdrop.
Light Shaping Matters More Than Power: I once thought that a more powerful LED panel would solve all issues. Instead, I found that shaping the beam with grids, flags, or even snoots creates more control. For example, adding a softbox grid dramatically cut spill and focused the light precisely on my subject’s face. For techniques on writing effective light recipes, check this key light guide.
Mind Your Color Temperature: Mismatched hues between your fill, key, and background lights can make a scene look unnatural. Using RGB tubes gives flexibility but requires calibration. Experiment with diffusion sleeves to achieve a smooth, natural glow on skin and objects, as explained in creative RGB techniques.
Tools I Depend On to Elevate My Studio Effects
Lux Meter: Precise measurements prevent under or overexposing your scene, ensuring consistent results. I rely on mine for every shoot.
Diffusion Accessories: From diffusion sleeves on RGB tubes to grid options for softboxes, these elevate the quality of light, making it soft, natural, and flattering.
Multi-Tool Kit: Gaffer tape, screwdrivers, and cleaning cloths are essentials for quick fixes and maintenance, preventing small issues from disrupting your shoot.
Reference Images & Notes: Document your setups and lighting recipes, so you can replicate or tweak them efficiently later. It’s a game-changer for workflow consistency.
You’re Capable of Lighting That Inspires
Every scene you craft with fill lights, softboxes, and LED panels is a chance to tell a story more convincingly. Embrace experimentation, learn from each shot, and let your understanding of light nuances grow. Remember, mastery isn’t about having the most expensive gear — it’s about how you shape and control what you have. Keep pushing your creative boundaries, explore new modifications like flags or diffusers, and watch your visuals come alive in ways you never imagined.
What’s the biggest lighting challenge you’ve faced, and how did you solve it? Share your experience below — I’d love to hear your story!
2 responses to “Stop 2026 Ghosting: Why Your Key Light Needs a Honeycomb Grid”
Evelyn Carter
This post really hits home for me, especially the part about shaping the light and controlling spill. I started experimenting with honeycomb grids recently after noticing how much light leakage was affecting my scene clarity, and the difference was noticeable immediately. It’s fascinating how such a simple tool can have such a huge impact. I’ve also found that combining grids with flags or barn doors takes my control even further — I can really sculpt the light so it hits exactly where I want while keeping other areas in shadow, giving my shots a more professional look. I do wonder, though, how others manage their light setup on tight budgets. Have you guys found affordable ways to get similar control, perhaps with DIY solutions? Overall, I’d say investing in grids and learning their placement pays off in both quality and flexibility for creative projects.
This post really resonated with me, especially the emphasis on proper light shaping and spill control. I’ve recently started using honeycomb grids, and I agree—they make a noticeable difference without adding complexity to the setup. One trick I found useful is to experiment with different grid sizes to find the best balance for your scene. A smaller grid like 20° or 30° works well for tighter control, but I’ve also used larger ones for softer, more spread-out light when needed. Also, combining grids with flags or barn doors further refines the light, especially in indoor shoots with challenging backgrounds. I’m curious—has anyone tried DIY solutions for grids on a tight budget? I’ve seen some creative makeshift options using cardboard or foam core that seem surprisingly effective. Would love to hear tips from others who’ve managed to get this control without breaking the bank. Overall, mastering spill control is invaluable in elevating production quality and giving your scenes a professional polish.
Lorem Ipsum has been the industrys standard dummy text ever since the 1500s, when an unknown prmontserrat took a galley of type and scrambled it to make a type specimen book.
Lorem Ipsum has been the industrys standard dummy text ever since the 1500s, when an unknown prmontserrat took a galley of type and scrambled it to make a type specimen book. It has survived not only five centuries, but also the leap into electronic typesetting, remaining essentially unchanged.

![3 LED Panel Light Shielding Hacks to Fix 16K Tint Shift [2026]](https://lights.creatorrigreviews.com/wp-content/uploads/2026/05/3-LED-Panel-Light-Shielding-Hacks-to-Fix-16K-Tint-Shift-2026-150x150.jpeg)


2 responses to “Stop 2026 Ghosting: Why Your Key Light Needs a Honeycomb Grid”
This post really hits home for me, especially the part about shaping the light and controlling spill. I started experimenting with honeycomb grids recently after noticing how much light leakage was affecting my scene clarity, and the difference was noticeable immediately. It’s fascinating how such a simple tool can have such a huge impact. I’ve also found that combining grids with flags or barn doors takes my control even further — I can really sculpt the light so it hits exactly where I want while keeping other areas in shadow, giving my shots a more professional look. I do wonder, though, how others manage their light setup on tight budgets. Have you guys found affordable ways to get similar control, perhaps with DIY solutions? Overall, I’d say investing in grids and learning their placement pays off in both quality and flexibility for creative projects.
This post really resonated with me, especially the emphasis on proper light shaping and spill control. I’ve recently started using honeycomb grids, and I agree—they make a noticeable difference without adding complexity to the setup. One trick I found useful is to experiment with different grid sizes to find the best balance for your scene. A smaller grid like 20° or 30° works well for tighter control, but I’ve also used larger ones for softer, more spread-out light when needed. Also, combining grids with flags or barn doors further refines the light, especially in indoor shoots with challenging backgrounds. I’m curious—has anyone tried DIY solutions for grids on a tight budget? I’ve seen some creative makeshift options using cardboard or foam core that seem surprisingly effective. Would love to hear tips from others who’ve managed to get this control without breaking the bank. Overall, mastering spill control is invaluable in elevating production quality and giving your scenes a professional polish.