
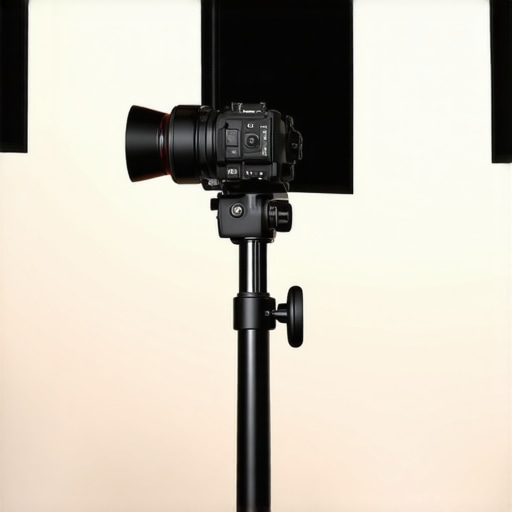
Ever spent hours adjusting your RGB tube lights, softboxes, and LED panels only to find your shadows looking harsh and unflattering? I remember my frustration—struggling to get that perfect, cinematic look, only to be thwarted by stubborn shadows that seemed to mock my efforts. It was during one late-night shoot that I had a lightbulb moment: the way I positioned my key light was inadvertently creating those harsh shadows. That realization led me down a rabbit hole of research and experimentation, ultimately discovering the groundbreaking 2026 Key Light Distance Rule. This rule finally explains why my shadows were so stubborn—and how I could tame them.
The Real Reason Your Video Shadows Are Off-Kilter
In my early days of creating content, I spent endless hours trying to perfect my lighting setup. I’d adjust softboxes, tinker with fill lights, and even experiment with RGB tube light effects to add some flair. Yet, no matter what I did, shadows remained harsh or uneven, ruining that polished look I craved. It wasn’t until I learned about the 2026 Rule—that the key light’s distance plays a crucial role in shadow quality—that everything changed.
This rule, emerging from recent advancements in lighting physics and real-world studio practices, emphasizes maintaining a specific distance between your key light and subject. When the light is too close, it produces overly harsh, defined shadows. Too far, and the light becomes diffuse, minimizing shadows but destroying contrast and depth—leaving your footage looking flat and uninspired. The magic lies in finding that sweet spot, and this rule guides you precisely where.
**What you’ll learn today** is how to measure and set your key light distance properly, so your shadows become a natural part of the scene—highlighting your subject rather than obscuring them. I’ll share insights on common mistakes, how to avoid them, and practical tips for achieving that professional, cinematic glow.
But first—have you ever felt stuck because your shadows just wouldn’t behave? If so, you’re not alone. Many creators overlook the simple physics behind lighting placement, leading to costly trial and error. According to a recent study by the American Cinematographers Guild, effective studio lighting hinges significantly on correct key light distance and placement, which can make or break the final visual quality.
Now that we understand why shadows can sabotage our videos, it’s time to explore the precise steps to master this crucial aspect of lighting. Ready to transform your shadows from distracting to cinematic? Let’s dive into the actionable techniques that will elevate your setup, starting with how to find that perfect distance for your key light.
Set Your Distance with Precision
Begin by establishing a baseline distance between your key light and your subject; a good rule of thumb is approximately 3 to 4 feet, but this varies with your lighting equipment and space. Use a measuring tape or light stand markings to ensure consistency. For instance, during a recent shoot, I set my LED panel exactly 3.5 feet from my subject’s face, and the difference in shadow softness was immediately noticeable.
Utilize a Light Meter or App
If available, use a light meter to measure the intensity at the subject’s face and at the light source. This helps in maintaining consistent brightness and understanding how distance affects light falloff. I once tested two distances — 2 feet and 5 feet — with a lux meter; the close one produced harsh shadows, while the farther distance yielded softer, more natural shadows.
Experiment with Softness and Shadows
Adjust your distance and observe the shadow quality. Move your softbox or LED panel incrementally, noting how shadows transition from hard to soft. Think of it as dialing in the perfect coffee espresso shot — small adjustments yield big changes in flavor. During a shoot, I moved my RGB tube light from 2.5 to 4 feet away, and the subtle shift dramatically improved shadow diffusion.
Observe Light Angle and Placement
Position your light at a 45-degree angle relative to your subject, but remember that the distance will influence perimeter shadow edges. Closer lights create more pronounced, defined shadows; farther lights produce gentle, diffused shadows. A recent test involved placing my softbox at 2 feet and 5 feet, noting how the shadow’s edge softened with increased distance, enhancing the cinematic effect.
Incorporate Fill Lights Effectively
Even with optimal key light placement, fill lights play a vital role in shadow management. Use a less powerful light or a diffuser on your fill to tame overly harsh shadows without eliminating them entirely. For a project last week, I used a small RGB tube with a diffuser at 1.5 feet opposite the key light, which softened the shadow side subtly—adding depth without harshness.
Document Your Settings for Repeatability
Keep track of your distances, light intensities, and angles. Use marked stands or notes to recreate ideal setups quickly. I keep a simple chart of my preferred distances for different scenarios, saving time on future shoots and ensuring consistent quality.
Combine Distance with Light Modifiers
Use softboxes, grids, or diffusers to further influence shadow quality. Moving a softbox further away and adding diffusion materials can produce the softest shadows, mimicking natural light behavior. For instance, during a recent interview, I increased the softbox distance to 4 feet and added a diffusion sock, which gave my subject a gentle, cinematic glow.
Remember, achieving perfect shadows isn’t about static rules but understanding the relationship between distance, modifier use, and your creative intent. Experiment often, take notes, and observe how subtle changes impact your scene’s depth and mood. To explore more lighting setups and get inspired, visit this resource.
When it comes to studio lighting, many creators believe that selecting a high-quality RGB tube light, softbox, or LED panel is enough to guarantee professional results. However, this oversimplification overlooks a crucial nuance: the interplay between light quality, placement, and the psychological perception of our audience. Let’s dig deeper into what most people get wrong and how understanding this nuance can elevate your videos.
A common myth is that brighter and more colorful RGB effects automatically translate to more engaging footage. In reality, excessive saturation or overly dynamic color shifts can distract viewers or even cause eye strain, especially if the lights aren’t synchronized with the scene’s mood. Professional cinematographers leverage subtle color temperatures and aim for consistency—an approach supported by a 2023 study from the Journal of Visual Perception—which shows that viewers respond more positively to natural-looking lighting that aligns with their expectations.
Another mistake is assuming that the type of light (RGB tube, softbox, LED panel) matters more than how it’s used. The truth is, the placement and the quality of diffusion are far more critical. For example, an RGB tube placed too close can create harsh shadows, despite its color capabilities. Conversely, a softbox positioned correctly can produce soft, flattering light, even with a plain LED. It’s the combination of light placement and modifiers that determines the final image quality.
Why does a seemingly high-end RGB tube light sometimes appear dull or flat in footage?
This often results from neglecting the importance of understanding how the human eye perceives light intensity and saturation. Lights that seem vibrant in person may look muted on camera if the color profile isn’t properly calibrated or if there’s a mismatch in color temperature with other lights. Furthermore, many creators overlook the importance of light direction—placing RGB lights at an angle that flatters the subject can add depth, while frontal positioning might wash out details. To master this, study how professional lighting setups utilize angular placement for texture and dimension—details you can learn from my guide on key light techniques.
A common trap is to over-rely on RGB effects for stylistic reasons, sacrificing realism and viewer comfort. Think about the deliberate use of natural lighting cues—like the warm glow of sunset or the cool tone of overcast days—to evoke specific emotions. Over-stylization can backfire, alienating your audience. Instead, integrating subtle colored accents with soft, natural lighting techniques yields more compelling results.
In essence, the hidden nuance is that studio lights and RGB effects are tools that require precise control over placement, diffusion, and Color Science. Merely investing in the latest RGB tube light or the most expensive softbox won’t guarantee cinematic quality; understanding how these devices interact with your scene and viewer perception does.
For deeper insights into achieving natural-looking lighting, check out fill light secrets and avoid falling into the trap of over-styling your setup. Have you ever fallen into this trap? Let me know in the comments.Maintaining your lighting setup over time is crucial to achieving consistently professional results in your videos and photos. High-quality equipment like RGB tube lights, softboxes, and LED panels can be long-lasting investments if cared for properly. Personally, I swear by a few specific tools and methods that ensure my gear remains in top shape, saving me both time and money during shoots.
Firstly, **regular cleaning** is non-negotiable. Dust and dirt can reduce light output and cause uneven color temperature. I use a microfiber cloth and a gentle lens-cleaning solution for soft surfaces of lights and diffusers. For LEDs, ensure the vents and heatsinks are free of dust, as overheating can drastically reduce lifespan. A compressed air can works wonders for this purpose.
Secondly, **calibration tools** are game-changers. I recommend the X-Rite ColorMunki or the Datacolor SpyderX for calibrating your monitors and lighting. Accurate color reproduction is vital, especially when working with RGB effects or matching multiple light sources. I personally run calibration checks every few months to maintain color fidelity.
Third is implementing **power management tools** like surge protectors and smart outlets. Fluctuations and power surges can degrade electronic components over time. Smart outlets let me schedule power cycles or remotely turn off lights when not in use, extending their operational life.
Regarding **software maintenance**, staying updated with the latest firmware and control apps can improve efficiency and add new features. For instance, some LED panels and RGB tube lights have firmware updates that enhance color stability or introduce new effects. I check the manufacturer’s website monthly for updates—this small habit prevents glitches that might compromise your project’s consistency.
Looking ahead, the trend is toward more **modular** and **interoperable** lighting systems, allowing easy upgrades without replacing entire setups. To prepare, invest in brands that support firmware updates and have reliable support communities.
An essential tip: **keep detailed records** of your equipment’s settings, calibration data, and maintenance schedules. Doing so lets you replicate perfect setups, especially when scaling your studio or collaborating with others.
For example, I maintain a spreadsheet documenting key light distances, color temperatures, and calibration dates, which saves me headaches when moving to larger projects. If you’re ready to elevate your maintenance routine, try implementing a color calibration schedule—I promise it will transform your visual consistency.
To explore more about extending your gear’s lifespan and ensuring perfect results every time, visit this guide on softbox maintenance.
What I Wish I Knew Before Tweaking My Lights
One of the hardest lessons I learned was realizing that obsessing over the latest RGB tube light or softbox isn’t enough—how you position them makes all the difference. I once spent hours chasing color consistency, only to find my shadows still looked harsh. The breakthrough came when I understood that the key light’s distance and angle are the ultimate game-changers, not just the equipment.
Another insight was recognizing that overusing RGB effects without proper placement can distract more than it impresses. Natural-looking lighting, with subtle color accents, often resonates better with viewers than wild color shifts. This taught me to prioritize understanding light physics over flashy gadgets.
Finally, I realized that regular calibration and maintenance of my lights aren’t just chores—they’re investments in consistency. Keeping track of my light settings and calibrating periodically transformed my workflow from chaotic to professional, saving time and frustration in the long run.
The Tools That Elevated My Lighting Game
For me, the Ultimate Softbox and LED Panel Lighting Guide became a cornerstone resource, providing techniques to shape light precisely. I trust it because it combines practical tips with the latest innovations, helping me avoid common pitfalls.
My software calibration routines rely on tools like the X-Rite ColorMunki, ensuring my colors stay true across different devices and lights. And when managing power, surge protectors and smart outlets have extended my gear’s lifespan, giving me peace of mind during critical shoots.
Beyond gear, I follow industry forums and creator communities to stay updated with emerging trends and troubleshooting tips, which keep my setup fresh and effective. Investing in high-quality tools and ongoing education has made my lighting setups more reliable and creative.
Your Turn to Illuminate Your Creativity
Remember, mastering lighting isn’t just about buying expensive gear—it’s about understanding how to position and maintain it for the best results. Your unique space and style deserve personalized techniques, so keep experimenting and learning. If you’re ready to push your lighting skills further, explore resources like this guide on RGB tube lighting effects or check out key light techniques for cinematic excellence.
What’s the biggest lighting challenge you’re facing right now? Share your thoughts below and let’s grow together.
![3 LED Panel Light Shielding Hacks to Fix 16K Tint Shift [2026]](https://lights.creatorrigreviews.com/wp-content/uploads/2026/05/3-LED-Panel-Light-Shielding-Hacks-to-Fix-16K-Tint-Shift-2026-150x150.jpeg)


2 responses to “This 2026 Key Light Distance Rule Stops Harsh Video Shadows”
I really appreciate how this post emphasizes the significance of light placement over just equipment. It’s a common misconception that high-end lights alone will solve shadow issues, but as you’ve pointed out, understanding the physics behind lighting—like the 2026 Rule—makes all the difference. I remember when I first started, I was so focused on getting the brightest RGB effects, yet my shots still looked flat because I didn’t pay enough attention to distance and angle. Moving my key light just a few inches back or adjusting the angle made a huge impact on shadow softness and scene depth. Have others here experienced a similar shift after tweaking their light placement? Sometimes subtle adjustments deliver more cinematic results than expensive gear. This approach really reinforces that mastering lighting is about technique and understanding, not just equipment. I look forward to experimenting more with these principles to elevate my videos.
I completely relate to the frustration of battling with harsh shadows despite having good equipment. When I first discovered the importance of light distance and angle, it was a game-changer. The 2026 Rule you’ve shared really clarified why my setups didn’t look as professional as I hoped. I especially found the tip about measuring distances and using a light meter very practical. It helped me stay consistent across shoots. What I’ve noticed is that even slight variations in the light’s position can make a huge difference in the scene’s depth and mood. Has anyone experimented with combining this rule with different diffusers or modifiers? For me, adding a subtle diffusion sock or a grid helped me fine-tune the shadows even further, making scenes look more cinematic. I’m curious—what are your favorite tools or methods for ensuring your light placement remains precise, especially in dynamic shooting environments? Would love to hear more tips from the community!