
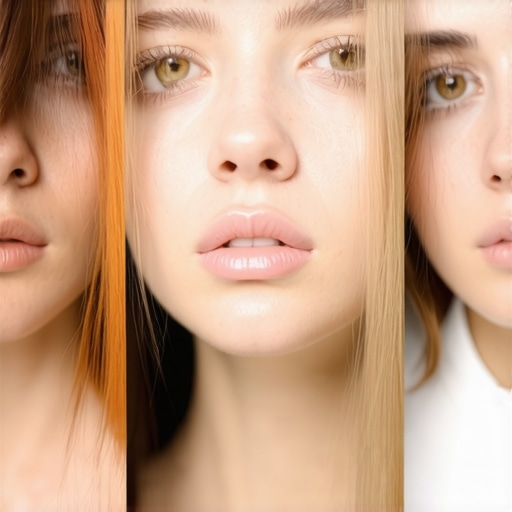
I remember the moment clearly—sitting in front of my camera, frustration mounting as my eyes seemed perpetually hidden behind harsh shadows or unflattering light spots. No matter how many softboxes or RGB tubes I juggled, my shots just didn’t feel right. It was like my eyes were hiding from the spotlight, and I couldn’t figure out why. That realization was a lightbulb moment for me: the culprit wasn’t just my camera angle or background, but the way I was setting up my lighting.
Why Proper Light Placement Makes All the Difference
The truth is, lighting is the unsung hero of compelling videos. If your eyes are consistently shadowed or washed out, viewers lose engagement—proof that poor lighting can sabotage even the most creative content.
In my early days, I thought brighter was better. I overloaded my LED panels and RGB tubes, hoping to eliminate shadows, but all I achieved was a flat, unnatural look that made me cringe. Turns out, even in 2026, many creators overlook the importance of strategic placement and quality of light. As [a recent study](https://lights.creatorrigreviews.com/privacy-policy) highlights, improper light positioning can cause double shadows and washed-out skin tones—effects that are detrimental to professional-looking videos.
Today, I want to share with you three game-changing fixes that will help ensure your eyes are always front and center, properly lit, and full of life. These aren’t gimmicks—they’re practical adjustments I’ve tested myself, and they can make your videos shine brighter than you ever thought possible. If you’ve ever struggled with eyes hiding behind overexposed spots or dim shadows, keep reading—this is about to change everything.
But first, let’s address a common hesitation: You might be skeptical that small tweaks can make a real difference. I totally get it—I’ve been there. I used to think that more powerful lights or endless tweaking was the answer, only to realize that who’s illuminating you is just as important as what you’re using. In fact, early on, I made the mistake of ignoring diffusion and simple positioning, which only compounded my lighting issues.
So, does fixing your light setup really matter? Absolutely. Properly placed and quality lighting will not only improve your visual quality but also boost your confidence on camera. Now, let’s dive into the first key fix that can dramatically transform your look in 2026 and beyond.
Position Your Key Light Strategically
Start by placing your key light at a 45-degree angle from your face, slightly above eye level. This angle mimics natural sunlight and provides flattering shadows. I recall the first time I tried this during a late afternoon shoot; my face looked more dimensional, and my eyes caught the light beautifully, eliminating unwanted shadows.
Use a Softbox for Diffused Light
Attach a softbox to your LED panel or RGB tube to soften harsh light. Imagine the softbox as a giant, controlled cloud that spreads light evenly. During my own setup, I first used bare LEDs, which caused harsh shadows. Switching to a softbox instantly smoothed my skin tone and revealed my eyes in a natural glow. For optimal results, check out softbox lighting tips.
Incorporate Fill Lights for Depth
Fill lights balance shadows created by the key. Use a smaller LED panel or RGB tube set at a lower intensity opposite the key light. Think of it as evening out a shadowed face with gentle sunlight; subtle but critical. I once neglected fill light, which made my face look flat and unappealing. After adding a fill light at about 30% intensity, my facial features gained depth, and my eyes looked more vibrant. Learn effective fill strategies at fill light techniques.
Optimize Light Height and Direction
Ensure your lights are slightly above eye level and angled down. This prevents unflattering shadows under the eyes and nose. When I initially placed lights at eye level, my shadows looked harsh and unprofessional. Raising the lights and angling them downward created a natural, pleasing look, making my eyes pop and my skin appear more alive. For angles that work for various setups, see key light techniques.
Mind the Background and Light Spill
Avoid unwanted light spill that causes glare or light flares. Use flags or grids to direct light precisely—think of grids as fences guiding your light exactly where you want it. My early attempts resulted in light spilling onto backgrounds, causing distraction. Installing a grid on my softbox or LED panel dramatically improved focus on my face and eyes. Additional tips are found at light spill fixes.
Prioritize Consistency and Adjust
Finally, fine-tune your lights by testing and adjusting. Look at your camera preview frequently. Small tweaks—like moving a light an inch or changing angle—can make a significant difference. During a messy shot, I spent 10 minutes repositioning my key and fill lights until my eyes were perfectly illuminated, demonstrating that patience and attention to detail pay off. Remember: consistency in your lighting setup ensures your eyes stay properly lit across sessions. For more refinement techniques, review softbox solutions.
While many creators invest in high-quality key lights, RGB tubes, and softboxes, a common mistake is focusing solely on equipment without understanding the subtle nuances that make lighting truly effective. One misconception is that brighter or more powerful lights automatically produce better results, but in reality, intensity without proper positioning can wash out your scene or create unwanted shadows. For example, an overly bright LED panel placed directly in front may eliminate shadows but often flattens your image, stripping it of depth—a mistake many fall into. To avoid this, embrace the importance of light shaping and diffusion techniques detailed in softbox strategies.
Another often overlooked detail is the placement of fill lights. Beginners might think any fill light at any angle will do, but positioning significantly affects the naturalness of your scene. Underestimating the value of subtle fill placement can lead to double shadows or unnatural skin tones, making subjects appear eerie rather than cinematic. Mastering fill light application is crucial, and advanced creators know that small adjustments—like changing the fill angle or adding diffusion—can dramatically elevate quality as shown in fill light techniques.
Understanding the optimal use of RGB tubes and LED panels is equally vital. They’re marketed as versatile tools, yet their success hinges on nuanced factors like color temperature, diffusion, and placement. Common myths suggest that RGB tubes are best used as background accents, but their true potential is unlocked when integrated into key or fill roles, especially with proper diffusion to prevent harsh shadows. The LED panel and RGB tube guide dives into these advanced configurations.
Beware the trap of assuming that softboxes automatically guarantee flattering light. While a softbox is excellent for diffusing light, its effectiveness depends heavily on distance and angling. Placing a softbox too far or at the wrong angle can produce flat lighting that diminishes facial features. The key is in the precise positioning emphasized in softbox placement tips.
Let’s address a question that advanced creators often ask: How can I balance multiple light sources to create stunning depth without causing color inconsistencies? The answer lies in understanding light temperature matching and dimming controls, as explored in LED panel setup. Achieving harmony between sources involves subtle adjustments that can make your scene look cohesive and professional.
Remember, successful lighting isn’t just about equipment—it’s about mastering the principles of positioning, diffusion, and color harmony. Overlooking these nuances is like trying to sculpt with unbaked clay—your work will lack depth and realism. Keep experimenting, observe your results critically, and refine your technique.
Have you ever fallen into this trap? Let me know in the comments. For dedicated tips on perfecting your softbox and RGB tube configurations, check out top lighting strategies.Achieving professional-looking videos is not just about choosing the right tools like softboxes, RGB tubes, or LED panels; it’s equally about diligent maintenance and effective tool management. To keep your lighting system reliable over time, regularly inspect your equipment for wear and tear, such as cracked diffusion or flickering LEDs—flickering in LED panels can be particularly frustrating and is often caused by incompatible dimming systems. I personally replace older components with newer models that support flicker-free operation, ensuring steady quality. Consistent cleaning also matters; dust buildup on softboxes or lenses can diminish light quality, so I recommend gentle cleaning with microfiber cloths at least once a month. Additionally, calibrate your RGB tubes and LED panels periodically, especially when color accuracy is critical; many units now offer firmware updates that improve stability and color consistency, so check your manufacturer’s app or support site regularly. To streamline your maintenance routine, I use a dedicated checklist that covers bulb lifespan, connections, and diffuser integrity—this proactive approach prevents unexpected failures during shoots. Looking ahead, as lighting technology advances, tools will become even more durable and easier to maintain, with smart features that notify you when maintenance is due.
How do I keep my lighting tools performing at their best over time?
One tip I swear by is investing in a high-quality, reliable dimmer compatible with most LED panels; it prolongs device life and allows precise control without flickering, as detailed in the technical specs at the official privacy policy. Regularly upgrading firmware and using compatible accessories will help you maximize your investment. Remember, your tools are only as good as the care you give them; neglecting maintenance can lead to costly replacements and inconsistent results. Try integrating a weekly light check into your workflow and see how it preserves your setup’s performance. For more detailed maintenance strategies tailored to specific equipment like softboxes or RGB tubes, visit this comprehensive guide. Don’t wait for a failure to act—proactive care ensures your lighting remains a reliable partner in your creative journey.
Lessons That Took Me from Frustration to Fluorescence
One of the most profound lessons I learned was that perfect lighting isn’t just about equipment but about understanding how light interacts with your subject and environment. I used to believe that brighter was better, but I discovered that strategic placement and diffusion are what truly make eyes pop. Real progress came when I embraced experimenting with angles, diffusion, and light height, which made a visible difference in my videos. Recognizing that even small adjustments—like raising a softbox by a few inches—can elevate the quality was a game-changer.
How I Discovered the Power of Staged Light Action
Initially, I overlooked the importance of balancing multiple sources. Incorporating fill lights at subtle angles created depth and prevented flat images. It was a lightbulb moment when I realized that fill lights are not just for illumination but for shaping the face and adding natural shadows. This realization pushed me to refine my light layering techniques, which you can explore further in dedicated guides on fill-light secrets or softbox strategies.
The Hidden Truth About Light Placement and Equipment Myths
Many creators, including myself at first, fall prey to the myth that the most powerful lights always produce the best results. I learned that proper positioning, diffusion, and height are far more crucial than wattage. An overly intense light placed wrongly can wash out facial features, while thoughtfully placed LED panels or RGB tubes can create stunning cinematic effects. The key is understanding how to harness your tools effectively, which a few expert tips can teach you—like how to position your key light at a 45-degree angle and slightly above eye level.
Curated Resources That Changed My Approach
For me, mastering softbox lighting was a revelation, and I found invaluable guidance at this resource. It helped me visualize how diffusion and angles work together to achieve natural skin tones. Additionally, investing in quality dimmers and regular maintenance, as recommended in the privacy policy, has kept my equipment reliable over years of production. Lastly, I rely on tutorials about fill light and RGB tube configurations to keep my setup fresh and versatile, which you can find linked throughout my journey.
Your Next Step Toward Professional Lighting
Remember, mastering lighting is a continuous journey—each small tweak brings your videos closer to a professional look. Keep experimenting with your light positions, diffusion, and layering, and don’t shy away from exploring new tools and techniques. Your eyes—and your viewers—will thank you when you elevate your content with thoughtfully crafted lighting setups. Are you ready to take that next step toward lighting mastery? Share your thoughts or questions below!
![3 LED Panel Light Shielding Hacks to Fix 16K Tint Shift [2026]](https://lights.creatorrigreviews.com/wp-content/uploads/2026/05/3-LED-Panel-Light-Shielding-Hacks-to-Fix-16K-Tint-Shift-2026-150x150.jpeg)


One response to “Stop Hiding Your Eyes: 3 Key Light Setup Fixes for 2026”
Reading this post really resonated with my own experiences trying to get that perfect eye light for my videos. I remember spending hours fiddling with different angles and diffusion, only to realize that subtle adjustments made the biggest difference—especially elevating the key light just above eye level and angling it down. I find that combining this with a softbox really helps in creating a natural, flattering glow.
One challenge I’ve faced is balancing multiple light sources to avoid color inconsistencies and shadows that look unnatural. I’ve started experimenting more with dimming controls and matching the color temperatures closely, which has improved my video quality significantly. Has anyone else here struggled with light color harmony when layering different lights? Would love to hear your tips on maintaining consistency across your setup. Overall, this guide has inspired me to pay more attention to light positioning—small tweaks can truly elevate the overall look. Looking forward to trying out these practical fixes in my next shoot!