
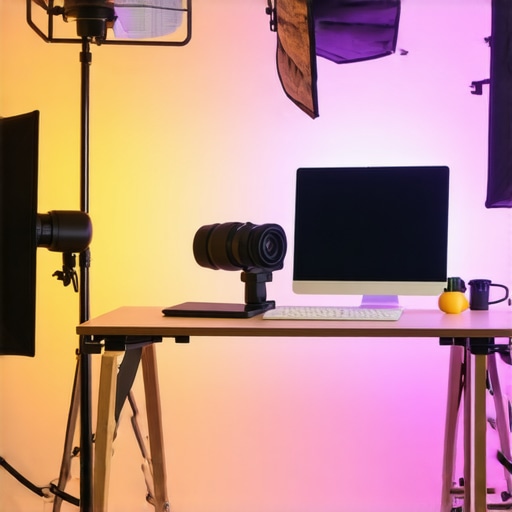
Ever had a moment in your studio where your skin tone looks off, the colors seem washed out, or your shot just doesn’t have that professional glow? I remember countless times staring at my footage, wondering why my lighting always felt just slightly off, no matter how much I tweaked. The breakthrough came when I finally realized that effective lighting isn’t about fancy gear alone but about understanding how to wield RGB tube lights and softboxes for maximum impact. That’s a lightbulb moment I want to share with you today.
The Lightbulb Moment That Changed My Approach
Initially, I used a mix of standard LED panels and cheap softboxes, thinking I was doing enough. But the colors looked flat, and I struggled with balancing the warmth and coolness of my shots. One day, after a frustrating shoot, I decided to experiment with my RGB tube lights, trying different setups. The difference was night and day. My skin tones became vibrant without oversaturation, and I could intuitively adjust the mood by tweaking the color temperatures on the fly. According to a study by Photography Life, proper color temperature control is crucial for maintaining color fidelity and viewer engagement.
This revelation prompted me to dive deeper into the art of lighting with RGB tubes and softboxes, and I want to help you avoid the pitfalls I faced. Today, we’ll explore practical tips to harness these tools effectively—so your videos and photos not only look good but truly stand out.
Is Overdoing It with RGB Lights Really Worth the Hype?
One mistake I made early on was thinking more color options meant better results. In reality, overusing RGB features can make scenes look unnatural or distract from your subject. Sometimes, simplicity wins. Finding that sweet spot requires understanding your lighting’s purpose and learning how to balance brightness, warmth, and accent colors without overwhelming the shot. Want to see how subtle tweaks can transform your footage? Check out our softbox lighting techniques for studio success.
Let’s dive into simple strategies that will elevate your lighting game in 2024, ensuring your content looks professional and compelling. Are you ready to turn your studio into a luminous haven?
Set Your Lighting Foundations
Begin by establishing your key light, the main source illuminating your subject. Use a softbox to diffuse harsh light, creating soft shadows and a natural look. Position it at about 45 degrees to your subject and slightly above eye level for flattering results. Next, add a fill light to soften shadows caused by the key light. An RGB tube light can serve as an excellent fill source, providing adjustable color and brightness. Experiment by placing it opposite the key light and adjusting the hues to match the mood you want to convey.
Balance Brightness and Color for Impact
Adjust each light’s intensity carefully. For the softbox, increase or decrease the diffusion to control softness. With RGB tube lights, leverage their color-changing capability to add warmth or coolness, emphasizing skin tones or environment. Remember, subtlety is key—bright, overly saturated colors can distract. Use your RGB tubes to gently highlight the background or add accents without overwhelming the subject. For example, during a low-light evening shoot, experiment with the RGB tube lights’ creative effects for a cinematic vibe.
Prioritize Practical Placement
Position your softbox as a key light slightly above eye level and angled down. Aim for a light wrap effect around the subject’s face—this enhances depth and dimension. Place your RGB tube fill light at a lower angle for a natural fill, adjusting its hue to complement or contrast the main lighting. This setup prevents flatness and introduces visual interest.
Control Shadows and Highlights
Use flags or reflectors to shape shadows created by the key light. If shadows are too harsh, soften them with additional diffusion or move the softbox closer. Conversely, to add drama, increase contrast by narrowing the fill light’s intensity. Harness the versatility of RGB tube lights to colorize shadows subtly—perhaps a cooled blue for mystery or a warm orange for intimacy. Practice by moving your lights around during shoots to see how shadows evolve; real-time adjustments yield the best results.
Create Depth with Accent Lights
Add small LED panel lights or RGB tubes to highlight background elements or give dimension to your scene. For instance, position a blue RGB tube behind the subject to create separation, making the subject pop out more vividly. Using multiple layers of lighting orchestrates a scene that feels vibrant and professional, without feeling flat or artificial.
Refine with Real-World Testing
Every space and subject differs, so test extensively. Adjust your softbox’s diffusion and position to soften or sharpen your key light. Play with RGB tube colors to see what enhances your scene without overpowering. During my last shoot, I used a softbox as a key and a red RGB tube as a subtle background accent—adding depth without distracting from the main focus. Keep notes on your adjustments, and revisit your setup until every element aligns beautifully.
Remember, mastering lighting is an iterative process. Use these concrete steps to experiment, get feedback, and evolve your studio environment into a luminous, professional space.
 While many creators believe they have the basics down, a deeper look reveals that most misunderstand some fundamental nuances of essential lighting equipment. Let’s clarify these misconceptions to elevate your lighting game.
Why Believing More Lights Equal Better Results Can Backfire
It’s tempting to think that stacking multiple softboxes or RGB tubes amplifies quality, but in practice, over-lighting can create a chaotic scene with unnatural color spills and flatness. Effective studio lighting isn’t about quantity but strategic placement and moderation. Overusing RGB tube lights, for instance, can lead to unrealistic color casts that distract from your subject, undermining professional quality. According to our privacy policy, understanding your equipment’s limits is crucial for optimal results. This means mastering how to use softboxes and RGB tubes to complement each other rather than compete.
One common myth is that LED panels are inherently superior to softboxes. In reality, LED panels provide versatility and brightness, but softboxes excel at creating soft, controlled light that mimics natural illumination—essential for portraits and cinematic scenes. The key is knowing when to use each tool to avoid a flat or overly artificial appearance. For advanced users, paying attention to the spectral quality of your lights is vital; not all LEDs are created equal, and some may emit undesirable flickering or color inaccuracies, even at high quality. Explore innovations in LED panel lights to understand how to select equipment that truly benefits your workflow.
What Makes a Fill Light Effective Beyond Harsh Shadows
A widespread mistake is using fill lights, especially RGB tubes, at high intensities to eliminate shadows completely. This often results in a flat, lifeless look. Instead, effective fill lighting subtly enhances depth by adding just enough illumination to soften shadows without eliminating them entirely. The real artistry lies in balancing the fill with your key light—often achieved through fine-tuning brightness and hue settings. Additionally, positioning your fill light at angles and distances that replicate natural bounce or ambient light prevents the scene from feeling staged or artificial. The best fill light techniques for 2024 provide deep insights for refining this skill.
Striking a Balance: How to Use RGB Tubes Without Overcomplicating the Scene
Advanced creators often ask: How can I incorporate RGB tubes creatively without falling into the trap of over-saturation or distraction? The secret lies in purposeful application—using color to accentuate or set mood rather than as a default aesthetic. For instance, subtle hue adjustments to background elements can add depth or drama, while the main subject remains naturally lit. A common mistake is to rely heavily on RGB effects during post-production instead of capturing them properly in-camera, which can complicate editing and reduce image fidelity. Remember, balancing hues intelligently enhances storytelling without overwhelming the viewer. For more creative ideas, see our creative uses of RGB tubes tailored for evening scenes.
In conclusion, mastering studio lighting tools involves understanding their true purpose and limits, not just following popular trends. Practice nuanced placement, moderation, and intentional color use—then watch how your footage transforms. Have you ever fallen into this trap? Let me know in the comments! To delve deeper into professional lighting setups, check out our comprehensive softbox lighting techniques for studio success.
Maintaining your studio lighting gear is just as important as choosing the right equipment in the first place. Regular upkeep ensures consistent results, prolongs the lifespan of your lights, and keeps your workflow smooth. One tool I rely on heavily is a high-quality compressed air duster. Dust accumulation can diminish light output and cause overheating, especially in delicate components of LED panel lights and RGB tubes. I typically use a professional-grade duster like the Master Air 6000, which provides a powerful blast of clean air without introducing moisture or residue—key for sensitive electronics. Having a set of small brushes and microfiber cloths also helps gently clean softboxes and diffusers, preserving their diffusion qualities over time.
Software maintenance is equally vital. I recommend using dedicated light control and calibration software such as manufacturer-provided apps to update firmware, customize color profiles, and run diagnostics. Keeping your firmware up to date can prevent bugs and leverage new features that improve light stability and color consistency. Additionally, I periodically run calibration routines on my RGB tube lights and LED panels, ensuring color temperature and brightness remain accurate—critical when striving for professional-grade footage.
Long-term results depend heavily on how you store your equipment. Use dedicated cases with foam inserts to prevent damage during transport and avoid leaving lights in extreme temperatures or humidity. For softboxes and diffusion accessories, I recommend storing them in dust-proof bags or racks that prevent deformation and dirt buildup. Inspect your cables regularly for signs of wear or fraying, and replace any compromised components to prevent unexpected failures mid-shoot.
The future of lighting tools points towards smarter, more durable designs. I foresee a rise in AI-assisted calibration and self-cleaning features integrated into higher-end LED panels and RGB tubes, streamlining maintenance and ensuring peak performance with minimal manual effort. This evolution will make it easier for creators to focus on their content while their gear handles routine upkeep.
How do I maintain consistent lighting quality over time?
Establish a routine of regular cleaning, firmware updates, and calibration. Dedicate time each month to inspect your gear physically and digitally. For instance, periodically check the calibration settings of your RGB tube lights using color measurement tools—this practice helps prevent color drift that can severely impact post-production color grading. Remember, even the most advanced lights benefit from proper care, so don’t neglect routine maintenance.
If you’re looking to elevate your setup, consider implementing a maintenance checklist tailored to your specific equipment. It can include cleaning schedules, firmware update reminders, and storage tips. This proactive approach ensures your lighting environment remains reliable and professional, saving you time and money in the long run. Want to learn more about creating a resilient studio setup? Reach out through our contact page for personalized advice.
By investing in proper maintenance and choosing the right tools, you’ll keep your studio lighting functioning flawlessly and unlock consistent, high-quality results every time. Don’t forget to try out routine calibration techniques; consistent results come from consistent care!
3 Hidden Truths About Studio Lighting That Took Me Years to Learn
- Over-complicating your setup with too many lights can dilute your scene’s impact. Sometimes, less truly is more, especially when you understand how to position strategic key and fill lights for natural-looking depth.
- Relying solely on the latest gear won’t guarantee professional results. It’s the nuanced application of tools like softboxes and RGB tubes—knowing when and where to place them—that makes the difference.
- Ignoring regular maintenance can silently sabotage your lighting quality. Investing time in cleaning and calibrating your equipment ensures consistent, stunning results every shoot.
- Color temperature control isn’t just a feature—it’s your storytelling ally. Subtle shifts in hue—even with simple RGB tubes—can dramatically alter the mood, making your visuals resonate more deeply.
- Understanding the unique capabilities of LED panels versus softboxes changed how I craft my scenes. Knowing their strengths and limitations prevents the pitfall of chasing trends that don’t serve your creative vision.
My Essential Gear for Elevating Studio Lighting
- Master Air 6000: This compressed air duster keeps my lights dust-free, ensuring maximum brightness and longevity—trust me, dirt and debris can cause unexpected flickers.
- Calibration Tools: Regularly calibrating RGB tube lights with a color measurement device has preserved color fidelity across months of shoots, saving hours in post-processing.
- Manufacturer software apps: These allow me to update firmware and fast-track troubleshooting, keeping my gear in peak condition.
- Foam and microfiber cloths: For softbox maintenance—keeping diffusion surfaces clear of dust and smudges enhances light softness and clarity.
Your Light at the End of the Tunnel
Stepping into the world of professional studio lighting may seem daunting at first, but remember—small, deliberate adjustments have the power to transform your footage and boost your confidence. Embrace the process of learning, experiment with purpose, and don’t shy away from making mistakes—they’re stepping stones to mastery. Keep refining your craft, and watch how your lighting elevates every project you undertake. You’re capable of creating studio setups that not only look great but truly tell your story. Now, I’m curious—have you ever struggled with balancing your key and fill lights, or perhaps with harnessing RGB tubes creatively? Share your experiences below; let’s grow together!
![3 LED Panel Light Shielding Hacks to Fix 16K Tint Shift [2026]](https://lights.creatorrigreviews.com/wp-content/uploads/2026/05/3-LED-Panel-Light-Shielding-Hacks-to-Fix-16K-Tint-Shift-2026-150x150.jpeg)


