
Ever set up your studio lights, only to find your shots look flat, unflattering, or just plain off? I’ve been there. I remember spending hours fiddling with softboxes and RGB tubes, only to realize I was doing it all wrong. That frustrating moment when I finally understood that lighting isn’t just about brightness; it’s about telling a story with shadows, highlights, and color—making your subject pop instead of blending into the background.
Why Mastering LED and RGB Lighting Matters More Than Ever
In 2024, the landscape of studio lighting has exploded with options. LED panels and RGB tubes are no longer just tools—they’re game-changers. But here’s the thing: with so many choices, it’s easy to get overwhelmed or fall into common traps. I’ve learned the hard way that without a clear strategy, your lighting setup can turn into a confusing maze of mismatched colors and uneven exposure.
Understanding how to wield these tools effectively is crucial. Properly configured, they can transform your video or photos from mediocre to stunning. But if you’re like I was early on, you might have made a mistake like over-relying on a single light source or ignoring the importance of color temperature. Trust me—those errors cost me countless hours of post-production work and precious creative energy.
Fortunately, I discovered that the key lies in strategic placement, color harmony, and knowing when to use each type of light. Whether it’s setting the perfect softbox for portraits or leveraging RGB tubes for mood and atmosphere, the right technique makes all the difference. If you’re tired of inconsistent results, then keep reading. I’ll walk you through the most effective strategies for 2024, backed by my own experience and industry insights.
Is RGB Tube Lighting Actually Worth the Hype?
Early on, I thought RGB tubes were just a fancy gimmick. Boy, was I wrong. The mistake I made was thinking they were only good for color effects. Turns out, they’re versatile enough to serve as key, fill, or background lights, helping me craft dynamic scenes with ease. If you’ve ever hesitated to invest in RGB lighting, I’ll show you how to harness their full potential in this guide.
By the end of this post, you’ll have a solid understanding of how to combine LED panels and RGB tubes for studio lighting that’s not just functional but creatively expressive. Ready to get your lighting setup to the next level? Let’s dive in!
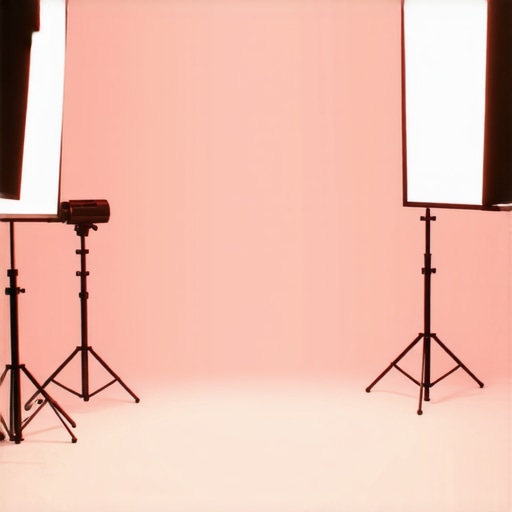
Set Up Your Lights Strategically
Start by positioning your key light, typically a softbox, at a 45-degree angle to your subject. I once placed my softbox directly in front of my subject, which flattened the face and washed out shadows. Moving it to a side created depth and dimension, instantly improving my shot. Use a softbox setup guide to refine your placement.
Use RGB Tubes for Mood and Highlights
Integrate RGB tubes behind or to the side of your subject to add vibrant accents or background color. I experimented with a blue RGB tube behind my setup, which contrasted beautifully with warmer skin tones, giving my scene a cinematic feel. Remember, the key to effective use is balancing brightness and hue. Check out creative RGB tube techniques for inspiration.
Balance Light Intensity and Color Temperature
Adjust your LED panels to match or complement your RGB lighting. I often set my LED panels to daylight (around 5600K) and tweak RGB tubes for warmer or cooler tones. This harmony prevents color clashes and creates a cohesive look. Use a lighting innovation guide for precise control.
Experiment with Placement and Angles
Don’t be afraid to move your lights around. I once tried placing an RGB tube at a lower angle to cast shadows upward on my subject’s face, which added drama. Use practical test shots to see how shadows fall and adjust accordingly. For detailed techniques, see key light positioning tips.
Combine Key, Fill, and Background Lights Effectively
Use a softbox as your main (key) light, add an RGB tube or LED panel as a fill to soften shadows, and employ RGB tubes or panels as background accents. I once overused my fill light, which made my scene look flat. When I reduced its intensity and added a subtle RGB glow behind my subject, the scene gained depth and vibrancy. Check fill light strategies for more insights.
Fine-Tune Using Dimmer and Color Controls
Always use dimmers and color controls to match your lighting to the scene’s mood. I once set my RGB tubes to a harsh red, which was too intense until I dimmed them and softened the hue. Small adjustments make a big difference. Refer to RGB and LED control tips for detailed settings.
Record Test Shots and Adjust Accordingly
Before your main shoot, take several test shots. I learned this the hard way when my first shot was too dark because I didn’t account for reflective surfaces in my scene. Fine-tune your lights based on these results for perfect exposure and color balance. For best practices, see testing and adjustment techniques.
Many photographers and videographers assume that choosing the right lighting equipment is enough to get perfect shots. However, even seasoned creators often get tripped up by misconceptions about softboxes, LED panels, and RGB tubes. Let’s dig deeper into what most people overlook and how to avoid costly mistakes.
Why Bigger Isn’t Always Better with Softboxes
It’s a common belief that larger softboxes automatically produce softer, more flattering light. While size does influence softness, the real trick is in the distance and diffusion quality. A massive softbox placed too close can create harsh shadows, especially if the diffusion material isn’t high quality. Conversely, a well-designed smaller softbox positioned correctly can deliver more controlled, natural light. Don’t fall into the trap of thinking bigger equals better; instead, focus on diffusion materials and placement. For expert tips on softbox techniques, visit mastering softbox lighting.
The Hidden Danger of Overusing LED Panels
Many creators rely heavily on LED panels, assuming their adjustable brightness and color temperature make them foolproof. But over-reliance can lead to flat, unnatural images. One advanced mistake is neglecting the importance of directional control—failing to shape and direct the light properly. LED panels tend to be broad and diffuse, which can create a washed-out look if not carefully controlled. Using flags, barn doors, or grids can help shape the light and add depth. Remember, a well-placed LED panel with proper modifiers outperforms simply increasing brightness. For more nuanced control techniques, see LED panel innovations.
RGB Tubes: The Color Trick That Can Backfire
RGB tubes are often hailed for their versatility, but many overlook the subtlety of color harmony. The mistake is thinking you can just set random hues for dramatic effect; in reality, mismatched colors can clash and produce unappealing results. Achieving harmony requires understanding color temperature and complementary hues. Also, remember that RGB tubes emit a narrow spectrum of light, which may not reproduce skin tones accurately unless balanced with other lights. Use them as accents rather than primary sources unless you’re confident with color grading. To master creative RGB use, explore RGB tube effects.
Are Key and Fill Lights Always Equal? The Surprising Truth
Many assume that key and fill lights should be of similar intensity, but this is a misconception. The real benefit lies in deliberate contrast—using a stronger key light to sculpt features and a subtly dimmed fill to soften shadows. Overfilling with light can flatten textures and reduce depth, especially in portraiture. For advanced control, learn how to balance key and fill for dramatic or natural looks by visiting key and fill techniques.
Have you ever fallen into this trap? Let me know in the comments, and remember: mastering the nuances of lighting equipment can elevate your work from good to extraordinary. Keep experimenting, and always analyze your results critically.
Investing in quality lighting equipment like softboxes, LED panels, RGB tubes, key lights, and fill lights is just the first step toward professional results. To keep your setup performing at its best, regular maintenance is essential. This not only extends the lifespan of your gear but also ensures consistent, high-quality lighting for every shoot.
How do I maintain my lighting tools over time?
First, always keep your softboxes and diffusion materials clean. Dust and dirt can diminish light quality and cause uneven diffusion. Use a soft brush or a gentle vacuum to remove particles without damaging the fabric. For LED panels and RGB tubes, regularly check for dust buildup on vents and fans, which can cause overheating and reduce lifespan. A soft, dry cloth or compressed air works well here.
Second, inspect your cables and connectors for signs of wear or damage. Loose or frayed cables pose safety risks and can cause flickering or unstable lighting. Replace any damaged components immediately, and consider using cable organizers to prevent tangling and strain. For precise control and longevity, keep your dimmers and controllers clean and free of dust.
Third, update your firmware and software if your equipment supports it. Many modern LED panels and RGB tubes come with firmware updates that enhance stability, introduce new features, or fix bugs. Regularly visiting the manufacturer’s website or subscribing to their newsletter can keep you informed about updates. This proactive approach ensures your gear remains compatible with evolving creative workflows.
Additionally, store your lights in a cool, dry place when not in use. Avoid exposing them to extreme temperatures or humidity, which can degrade electronic components. Using protective cases or padded bags adds an extra layer of protection during transport or storage.
Tools I recommend for long-term care
For cleaning, I personally rely on a microfiber cloth combined with compressed air — it’s gentle yet effective for dust removal. To troubleshoot issues, a basic multimeter helps test power supplies and cables, ensuring your equipment operates safely and reliably. When updating firmware or software, always use the manufacturer-approved tools and follow their instructions carefully.
Looking ahead, the trend in lighting technology points toward smarter, more integrated systems with self-diagnostic features. Investing in equipment that offers remote management and automatic calibration can save time and reduce errors during setup. As these innovations become more accessible, maintaining your gear will become even easier, allowing creators to focus on their art rather than technical hassles.
Don’t overlook the importance of routine maintenance — it guarantees your investment continues to perform beautifully. Try scheduling a quarterly check-up of all your lights, cables, and diffusion materials. This simple habit can prevent costly repairs and keep your creative workflow smooth and productive.
For more detailed tips, check out key light techniques or visit our contact page for personalized advice. Keeping your lighting tools in top shape is a worthwhile effort that pays off in stunning visuals every time.
The Hardest Lesson I Learned About softbox, led panel light, rgb tube light, key light, fill light
One of my biggest realizations is that bigger softboxes aren’t always better. It’s tempting to assume that larger means softer and more flattering, but the key is in the diffusion quality and placement. I once used a massive softbox too close to my subject, which created harsh shadows instead of smoothing them out. Now, I focus on diffusion materials and proper distance for natural results.
3 Myths About LED Panels That Held Me Back
I used to think LED panels were foolproof tools for perfect lighting. Turns out, over-relying on their adjustable brightness can flatten your images. Directional control is vital — using flags, barn doors, or grids shapes the light and adds depth. LED panels are powerful, but only when you shape and control the light properly.
What Experts Won’t Tell You About RGB Tube, Softbox, and Lighting
Many overlook the importance of color harmony with RGB tubes. Random hues can clash and make your scene unappealing. Achieving harmony requires understanding color temperature and complementary hues. RGB tubes shine as accents, but they shouldn’t be your primary light source unless you’re confident in color grading.
My Essential Toolkit for Studio Lighting Mastery
For me, a microfiber cloth and compressed air are essentials for maintaining diffusion and electronic components. A multimeter is invaluable for troubleshooting electrical issues, and firmware updates keep my LED panels reliable. Investing in protective cases and regular cleaning ensures my gear performs at its best for every shoot.
Your Turn to Try Making Light Work for You
Lighting is an art that rewards patience and experimentation. With the right knowledge and tools, you can craft scenes that are compelling and professional. Don’t be afraid to test new setups and analyze your results critically. Your creative journey in studio lighting starts now — are you ready to elevate your visuals?
![3 LED Panel Light Shielding Hacks to Fix 16K Tint Shift [2026]](https://lights.creatorrigreviews.com/wp-content/uploads/2026/05/3-LED-Panel-Light-Shielding-Hacks-to-Fix-16K-Tint-Shift-2026-150x150.jpeg)


One response to “Ultimate LED Panel & RGB Tube Light Strategies for Studio Lighting in 2024”
This post really resonated with my own experience in setting up studio lighting. I used to think larger softboxes automatically meant softer, more flattering light, but I’ve learned that placement and diffusion material are just as important—sometimes more so. Experimenting with smaller, well-placed softboxes has often yielded better, more natural results for me. Also, I never realized how critical controlling the beam with flags or barn doors can be to add depth and dimension, especially when using LED panels. Have others found that investing in quality diffusion and modifiers makes a bigger difference than size alone? It seems like understanding these subtleties can truly elevate the quality of the shots, which aligns with your point about strategic placement and balance. What’s been your biggest unexpected breakthrough in lighting techniques that improved your work dramatically? I’d love to hear, as I’m constantly looking for ways to refine my setup and avoid common pitfalls like flat, washed-out images or mismatched color temperatures.